Plastic is Forever
Making Tomu's Injection-Molded Case
Sean Cross - https://xobs.io/ - @xobs
About Me
![]()
Tomu
![I'm Tomu!]()
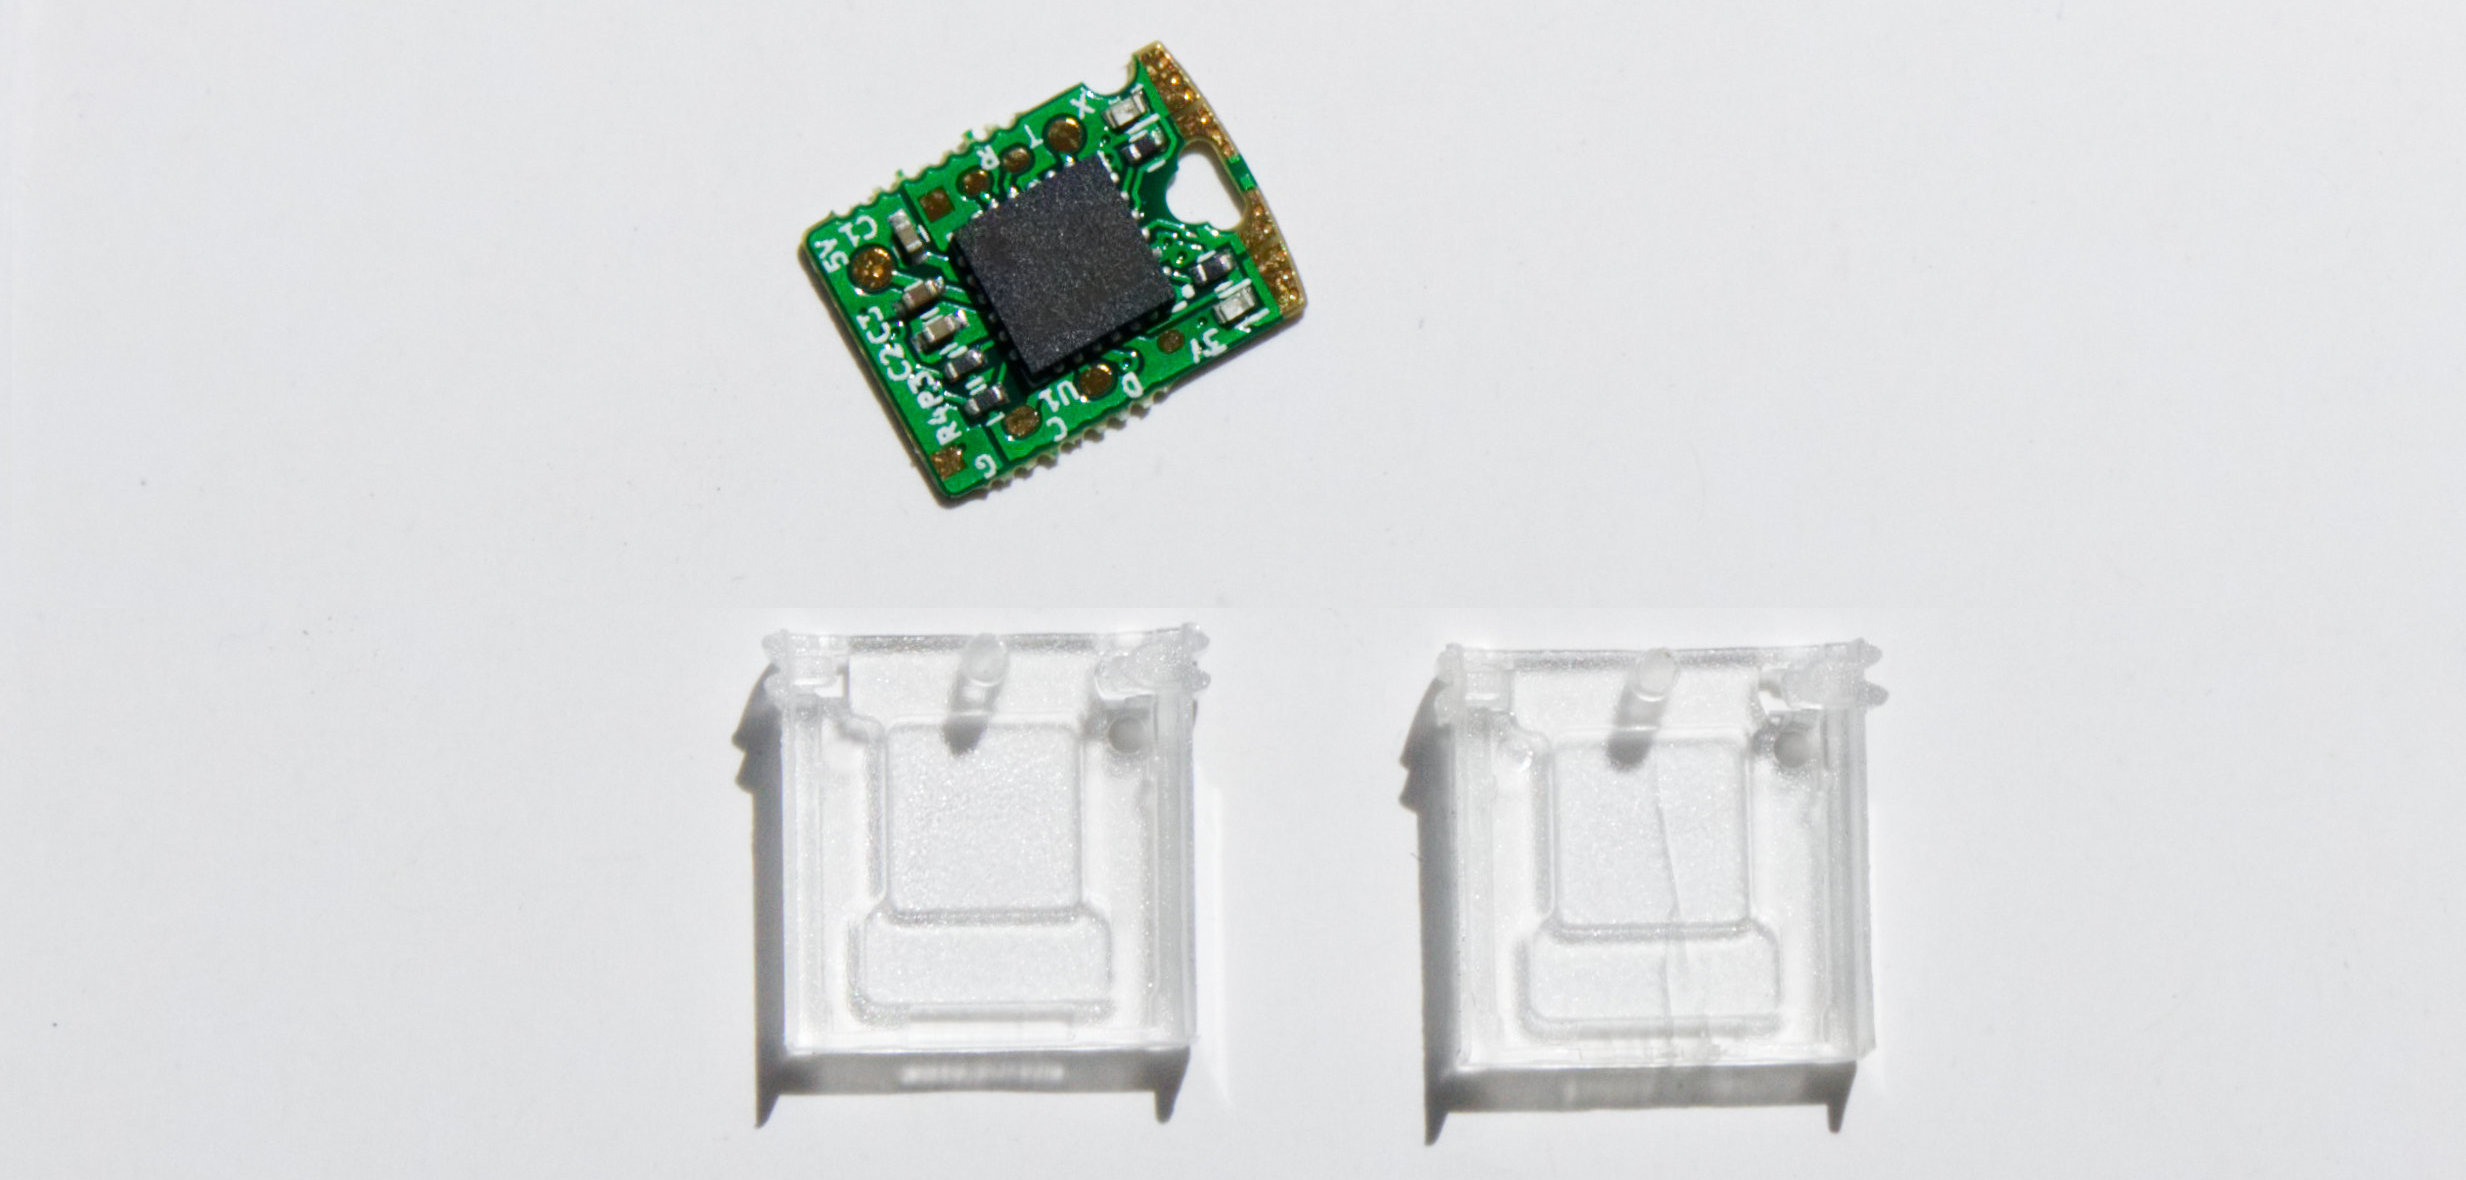
Case
![I'm Tomu Case!]()
Tomu + Case
![I'm in my case!]()
Outline
- Manufacturing the Case
- Designing the Case
- Understanding Plastics
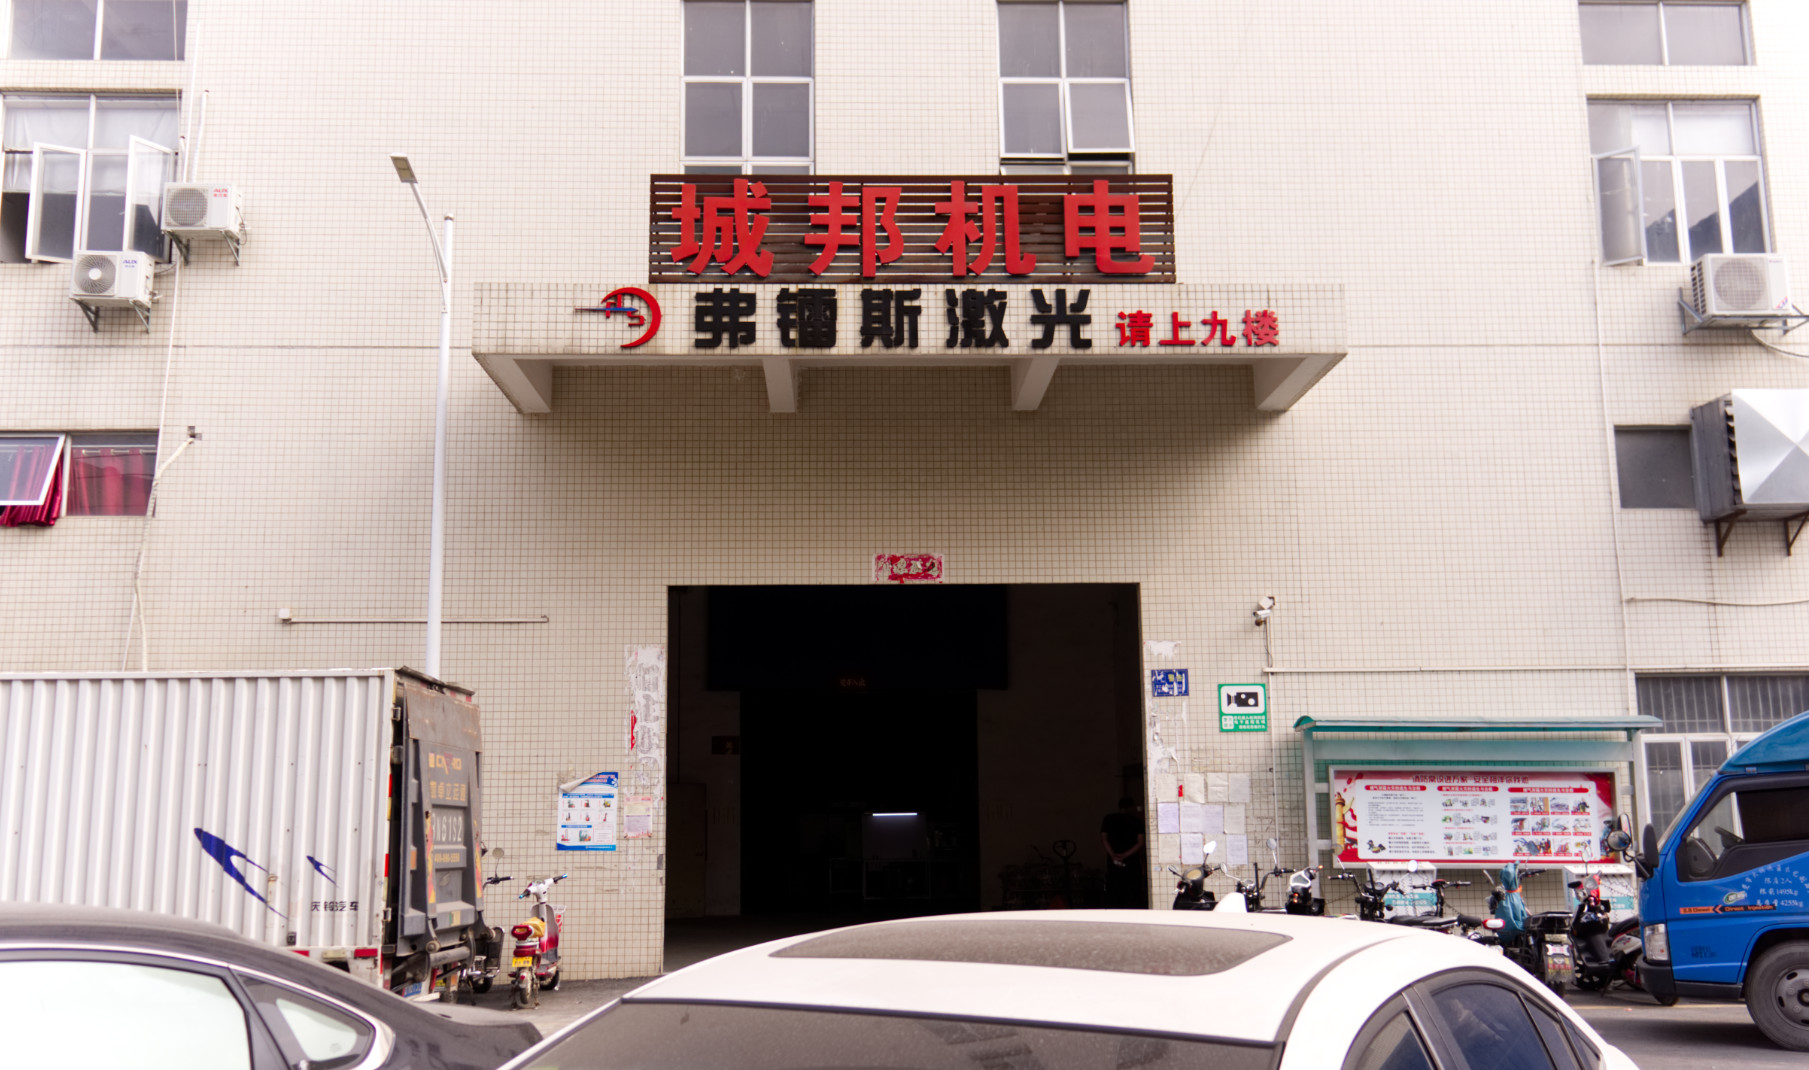
Factory Tour!
Front Door
![]()
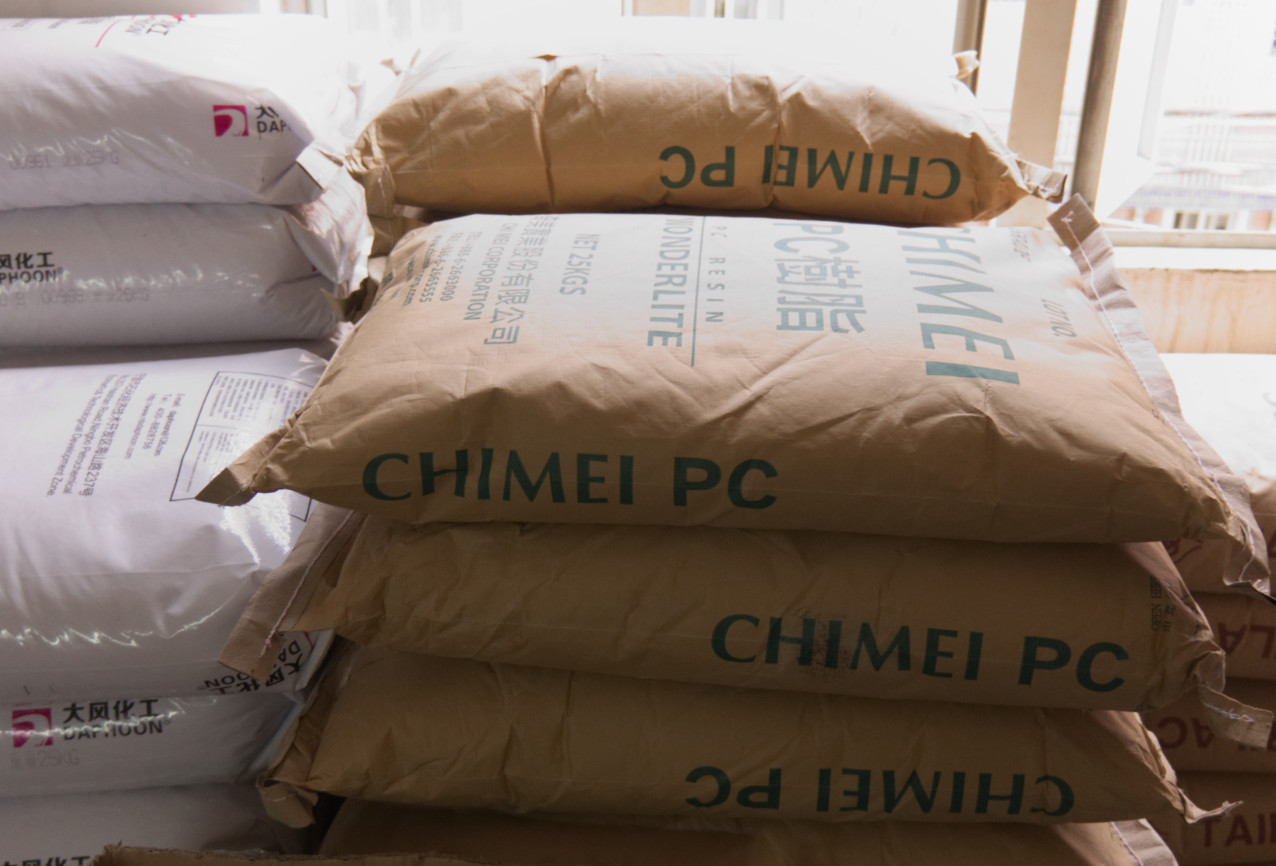
Bags of Plastic Pellets
![]()
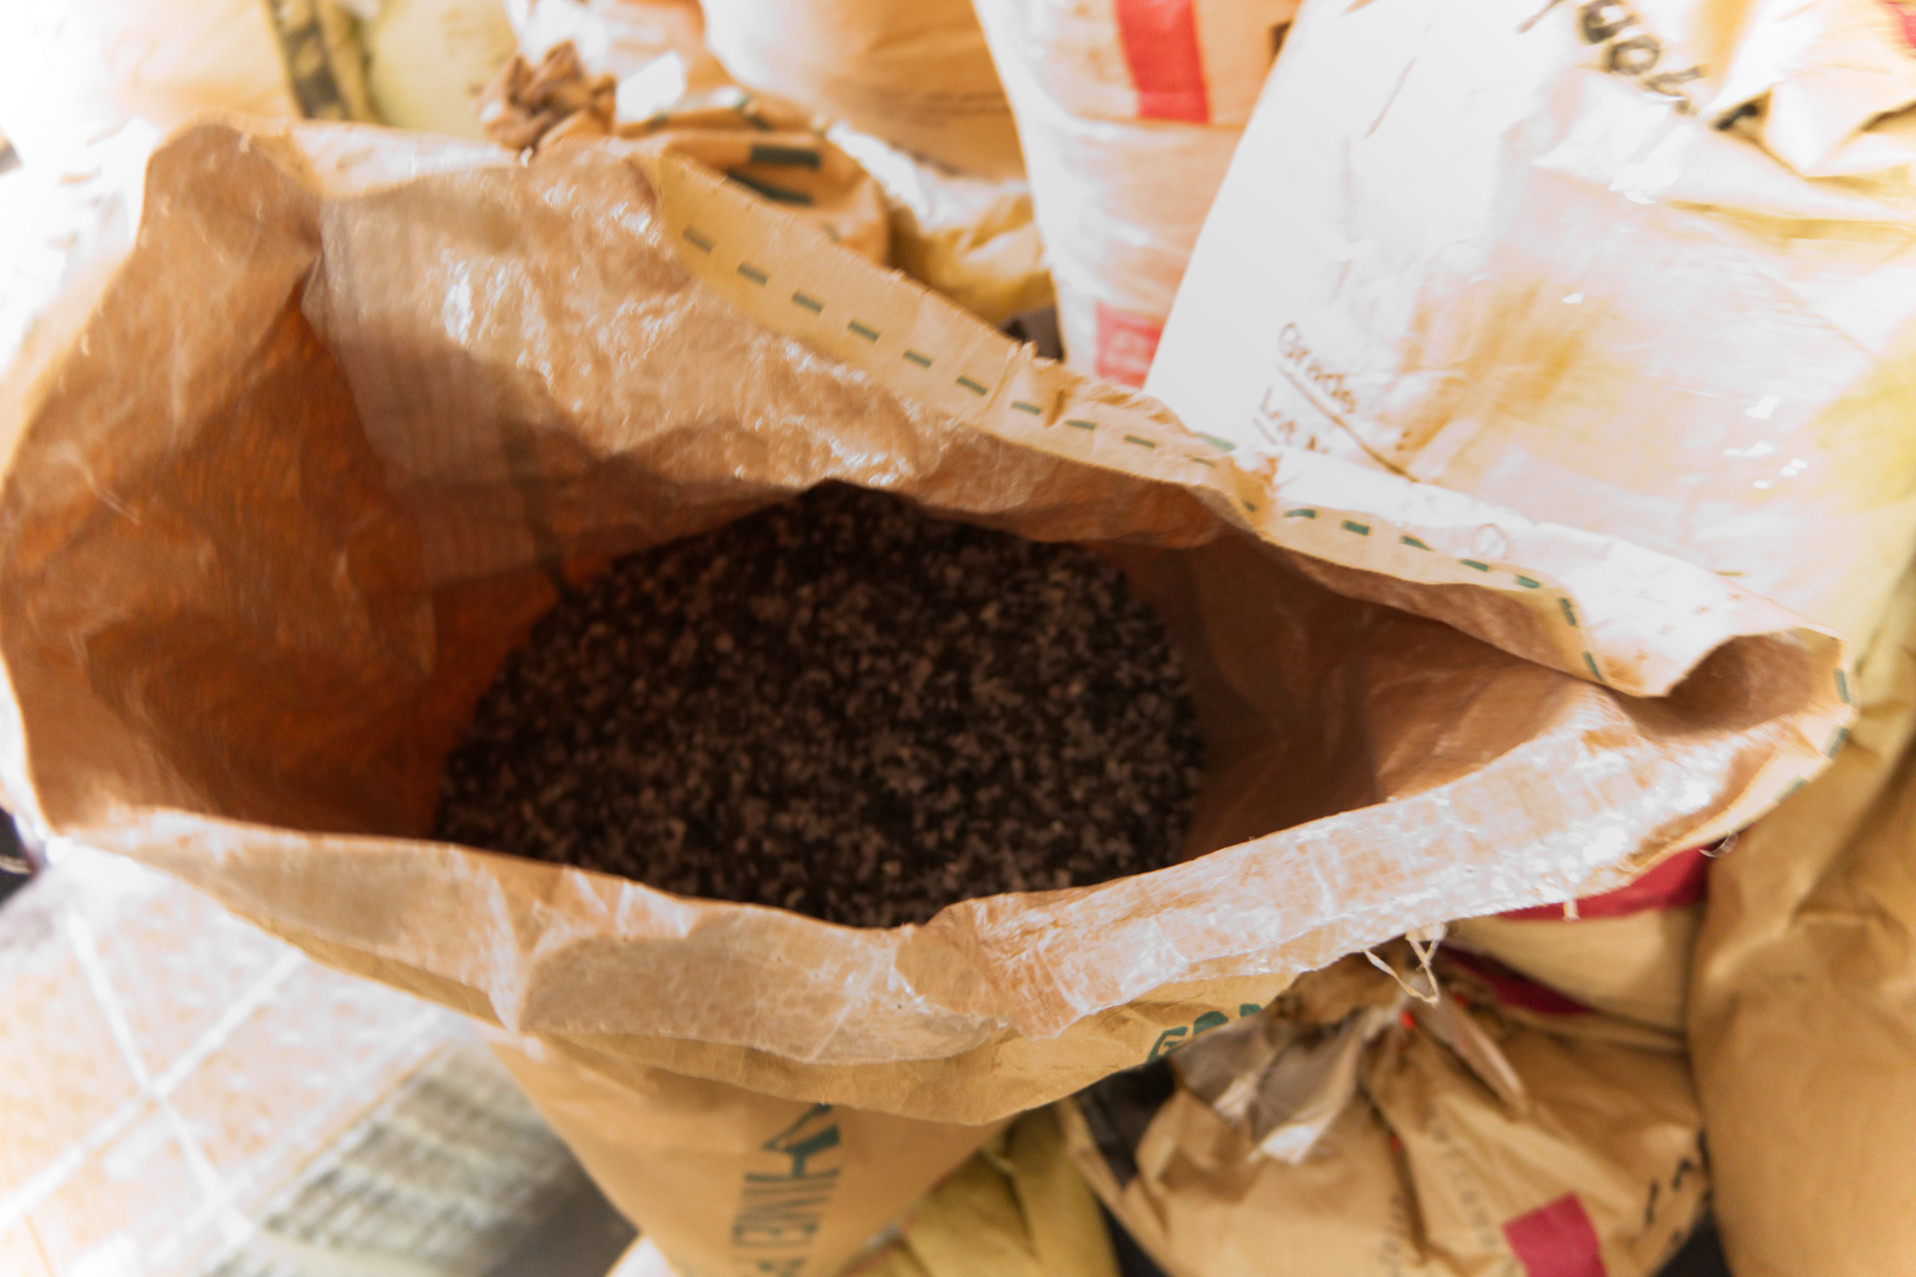
Inside the Bags
![]()
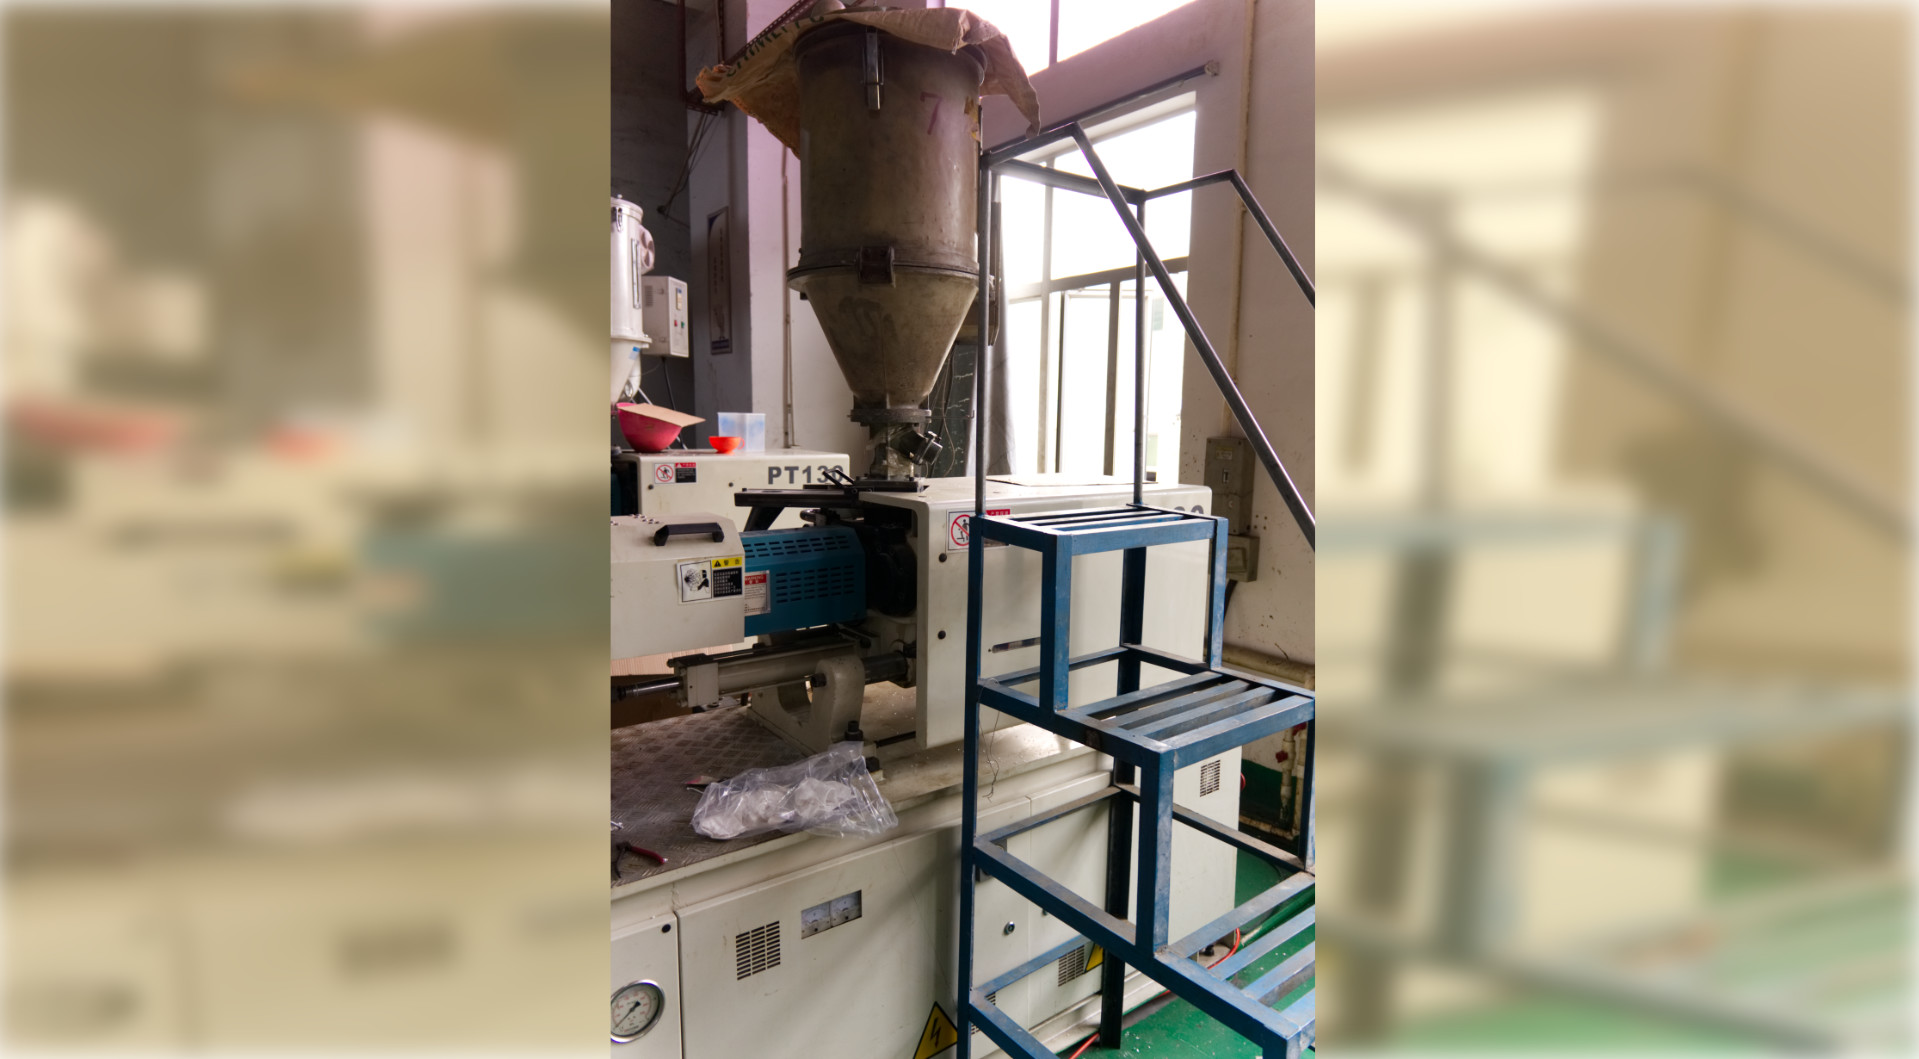
Into the Machine
![]()
Pulling a Shot
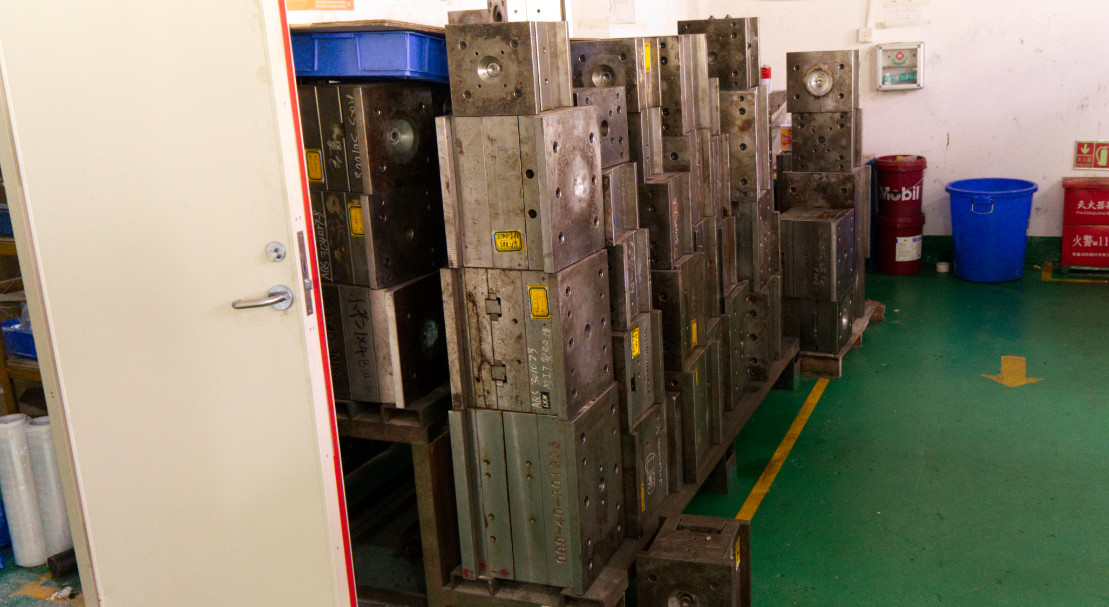
Factory Mold Bases
![]()
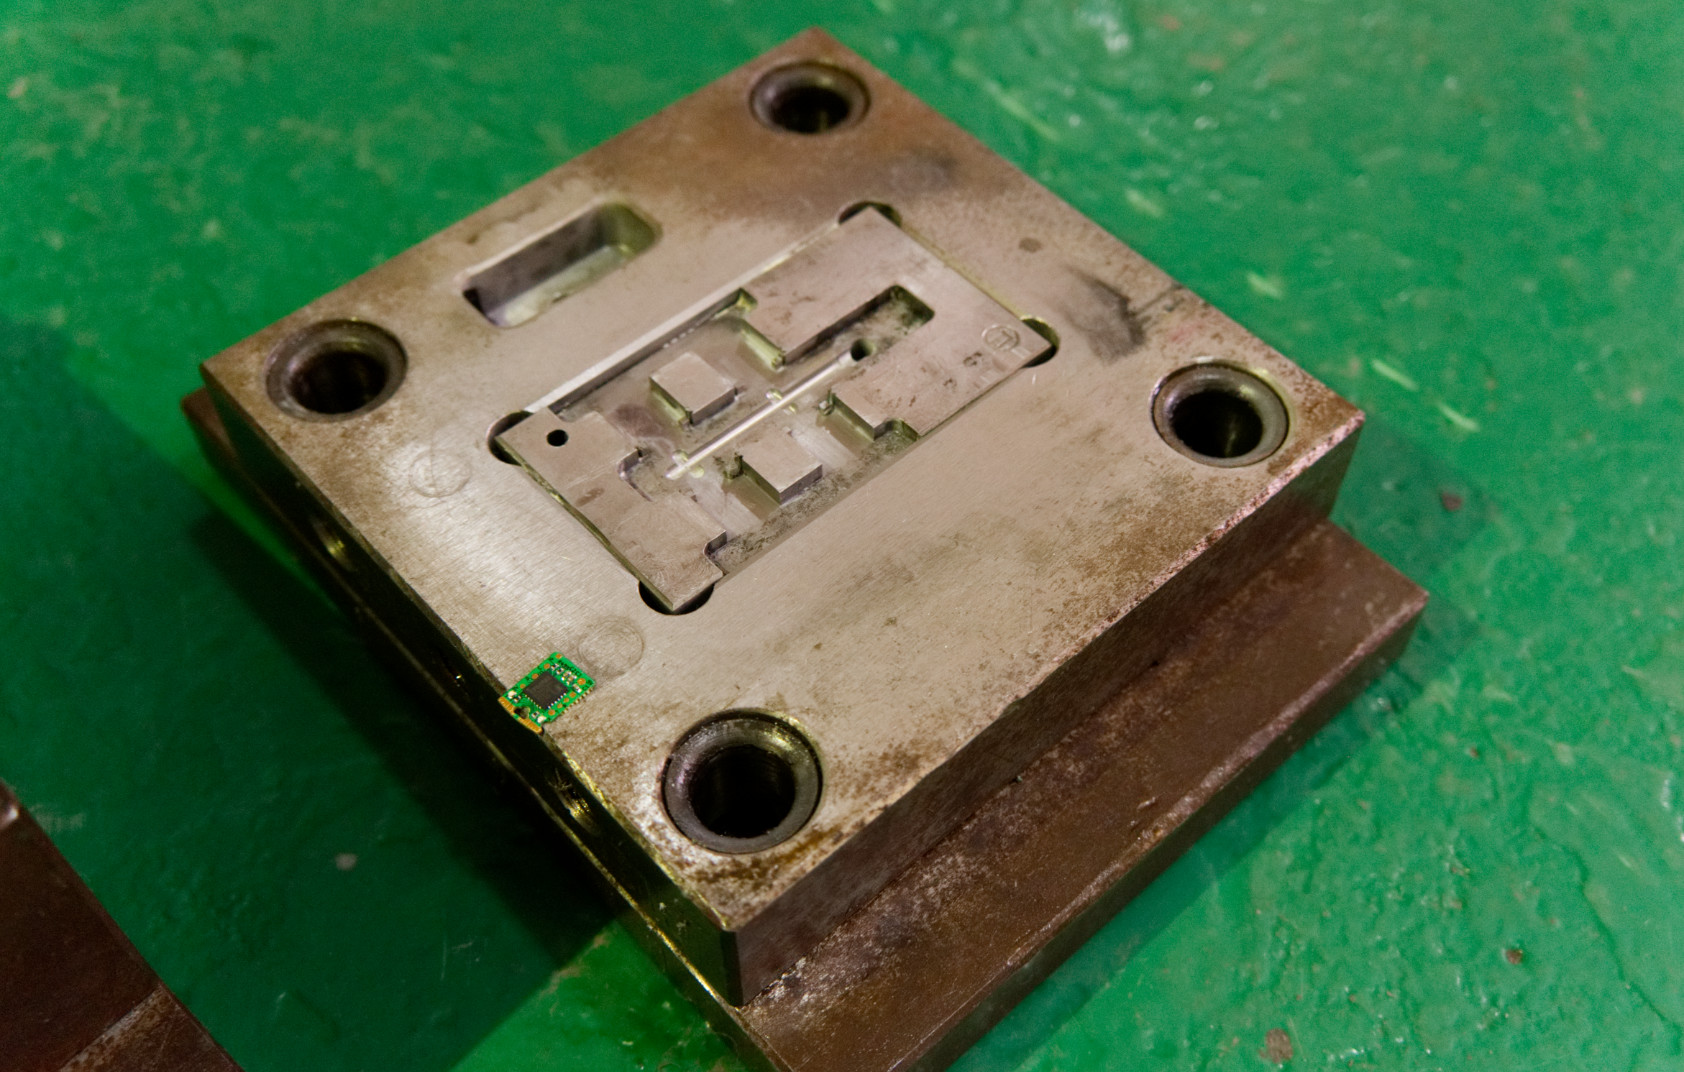
Tomu on its Mold
![]()
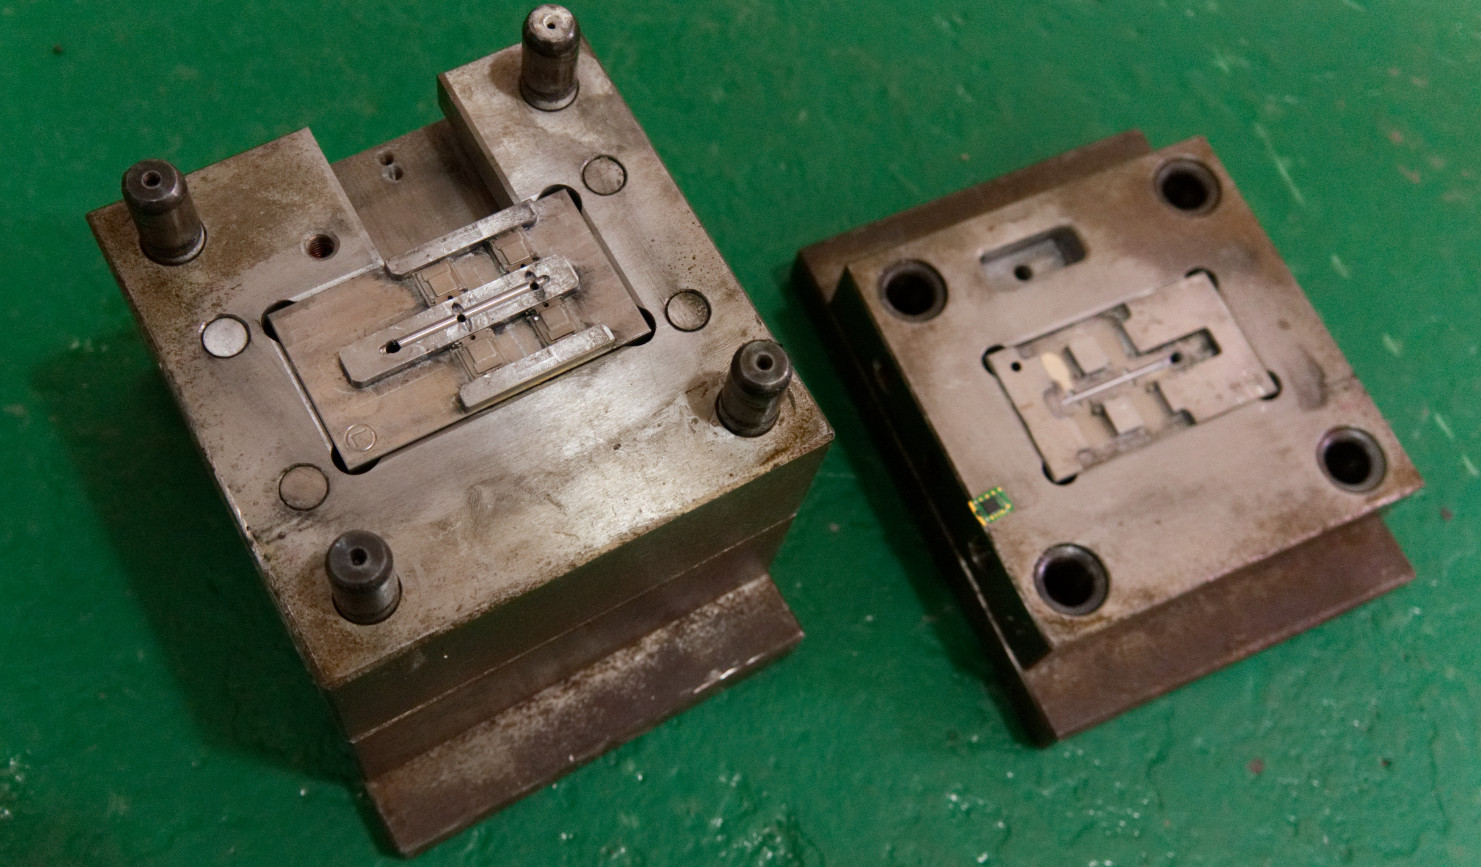
Both Mold Halves
![]()
Bottom Half
![]()
Ejectors
![]()
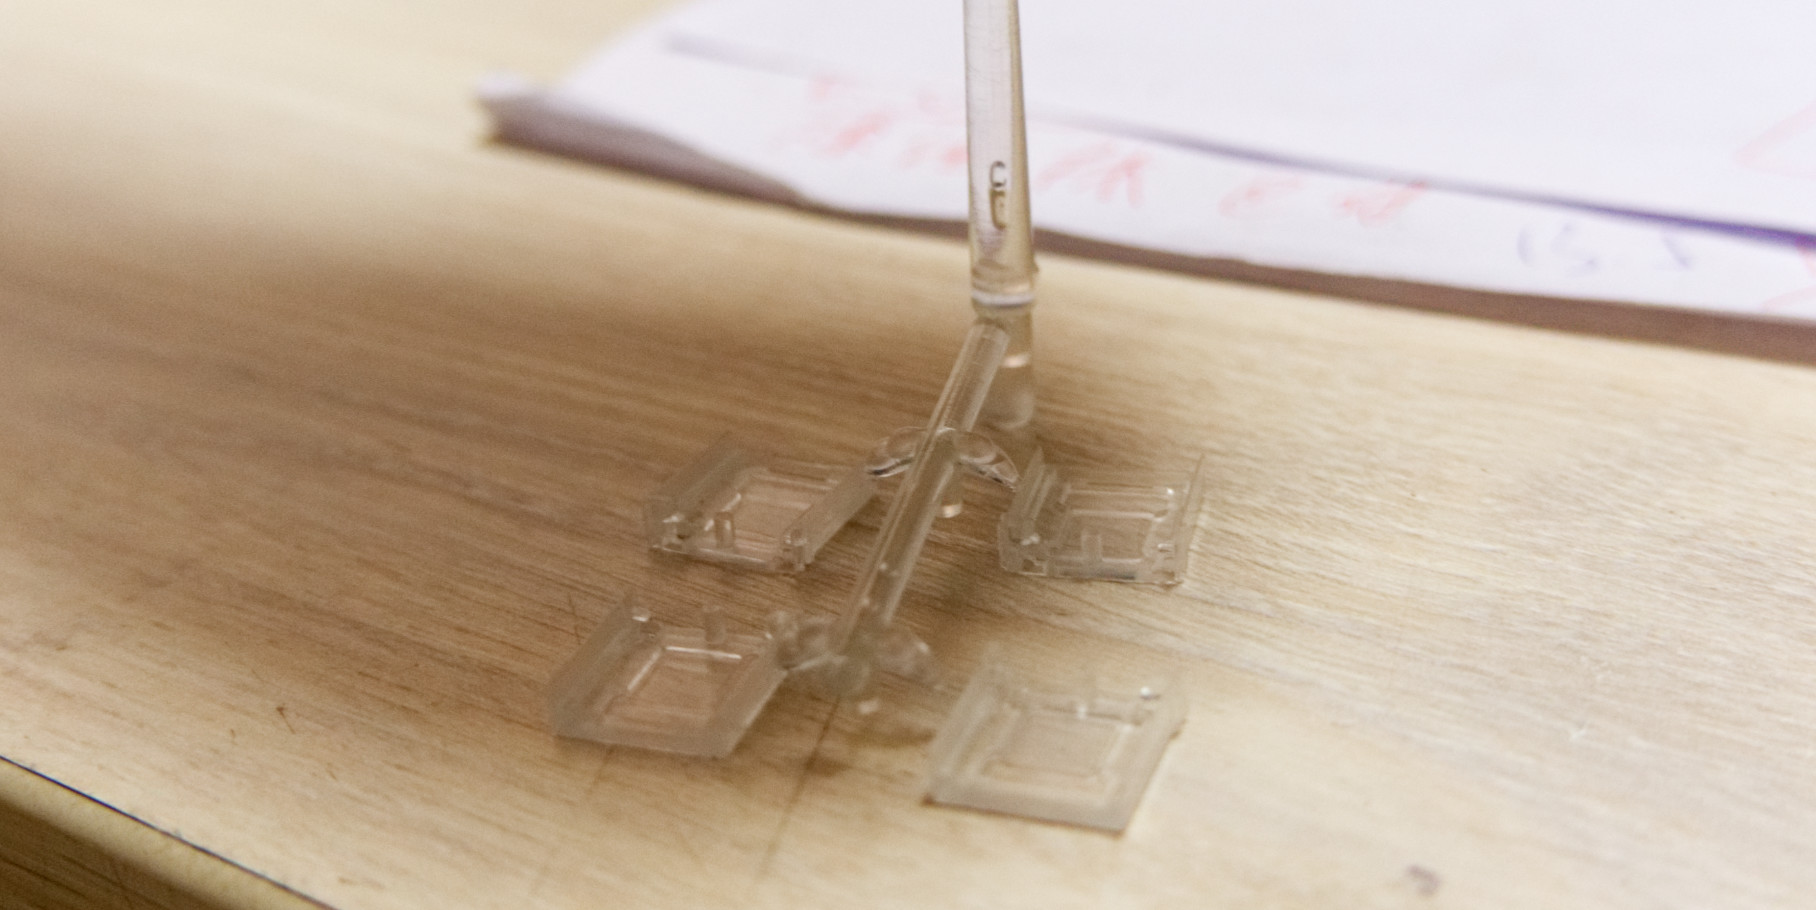
Cases on Runners
![]()
Factory Edits
![]()
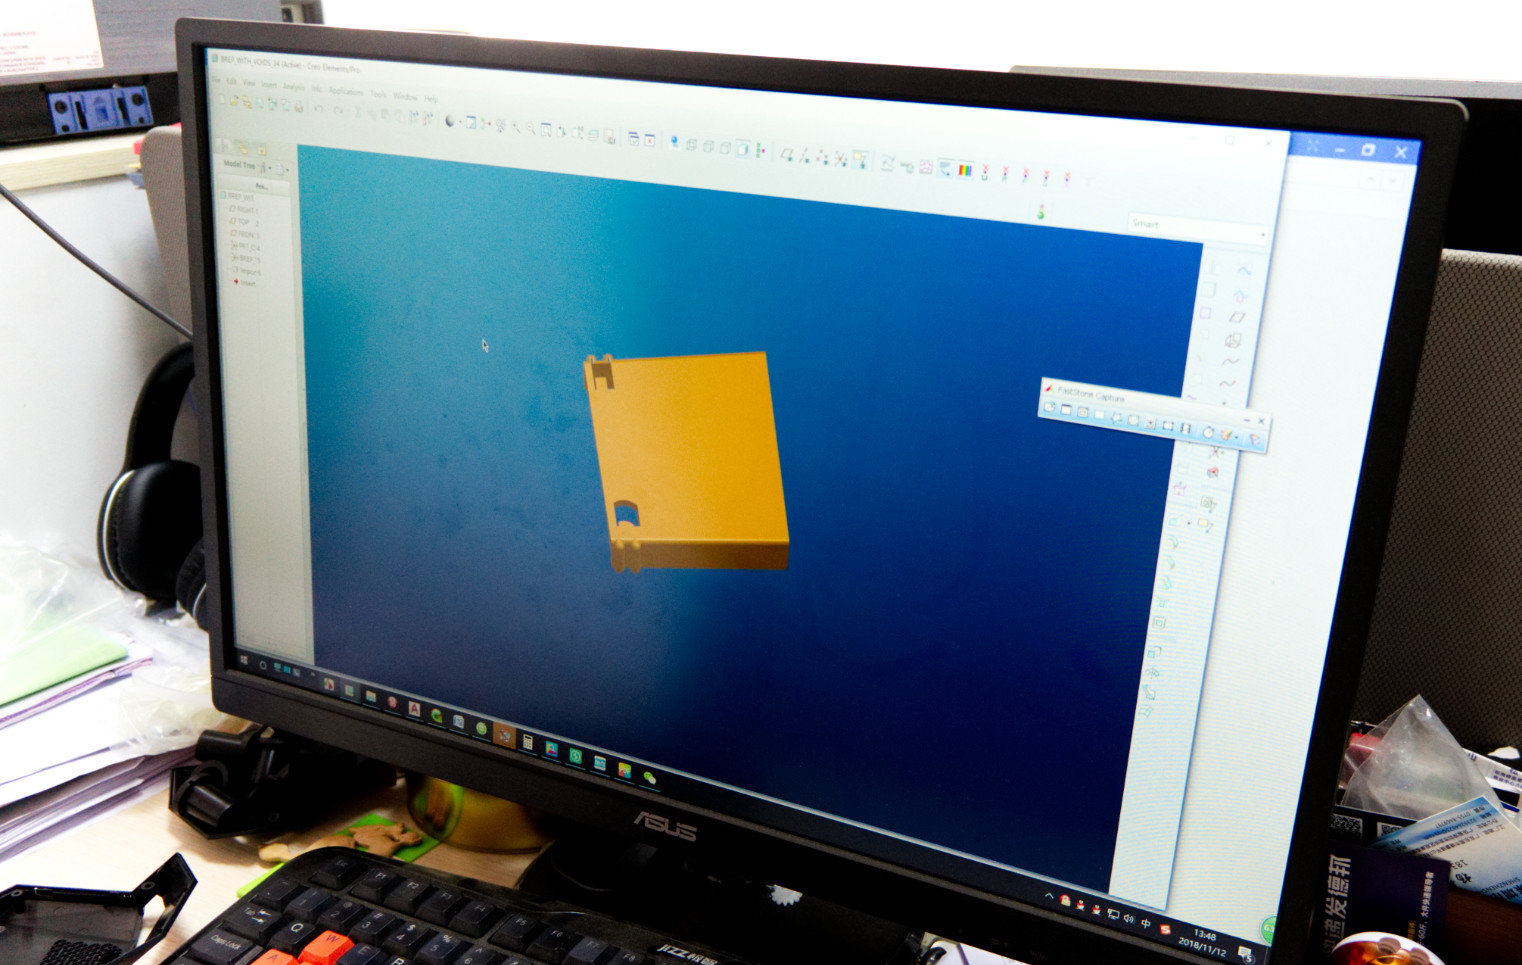
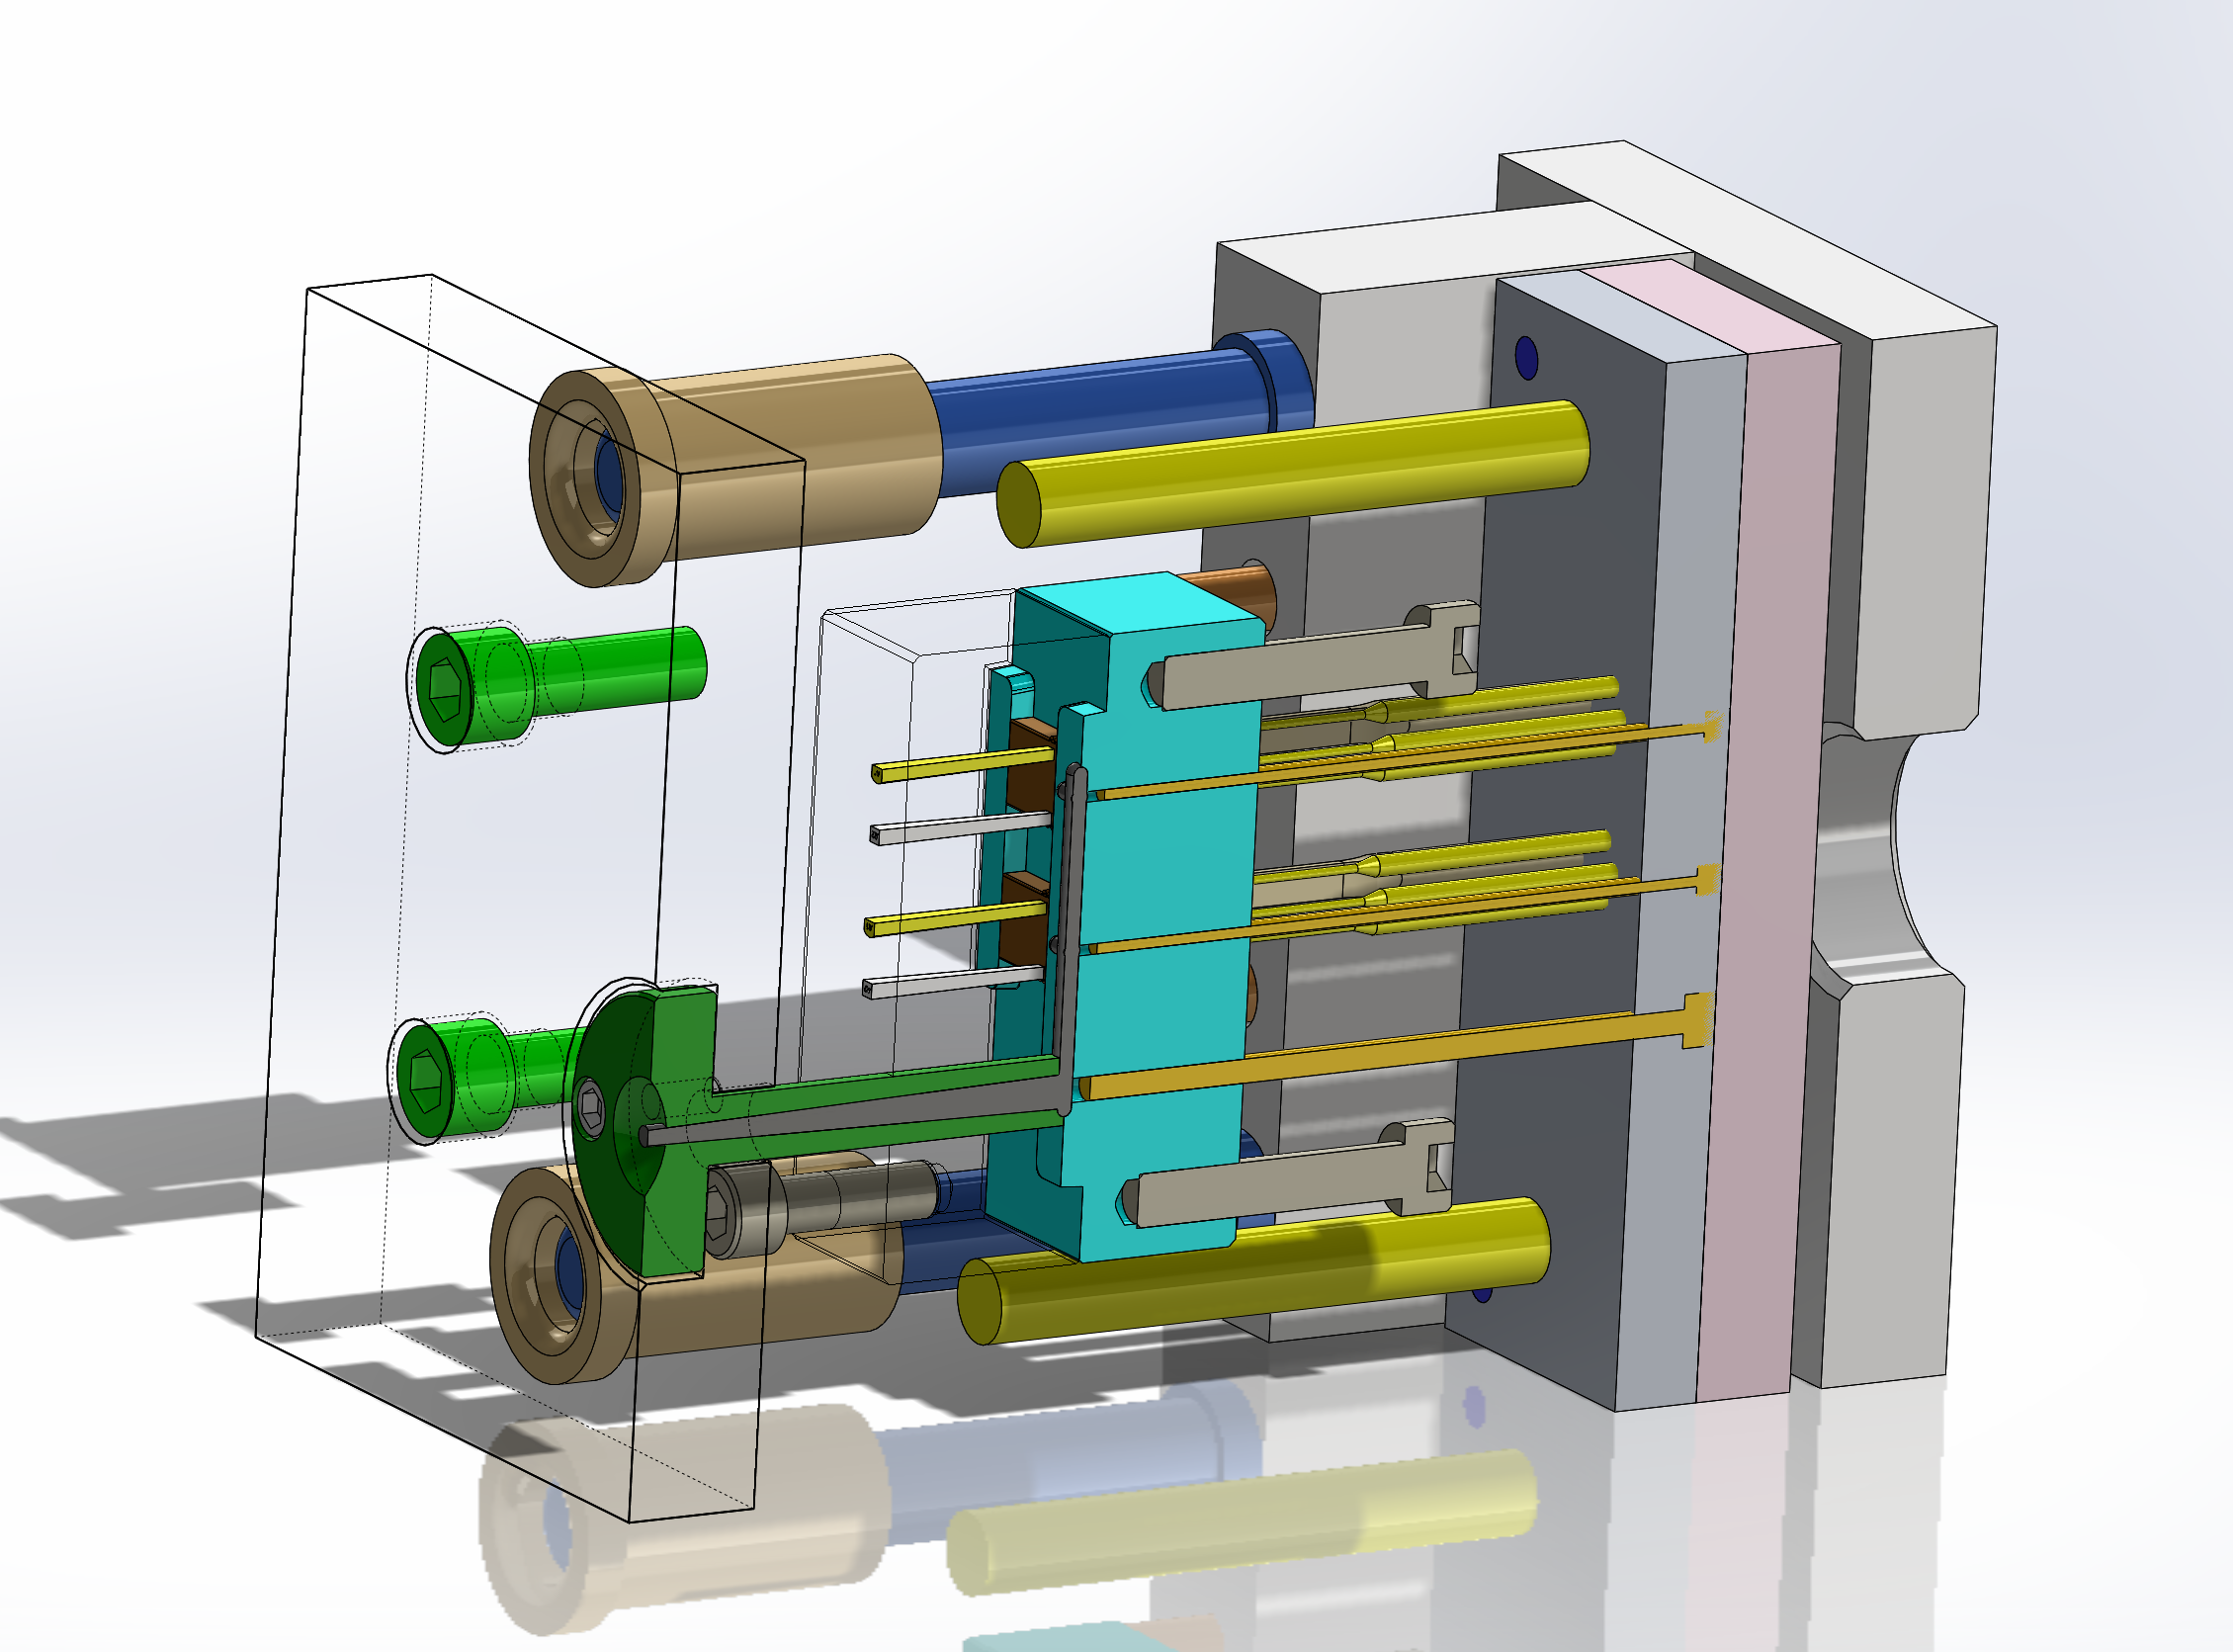
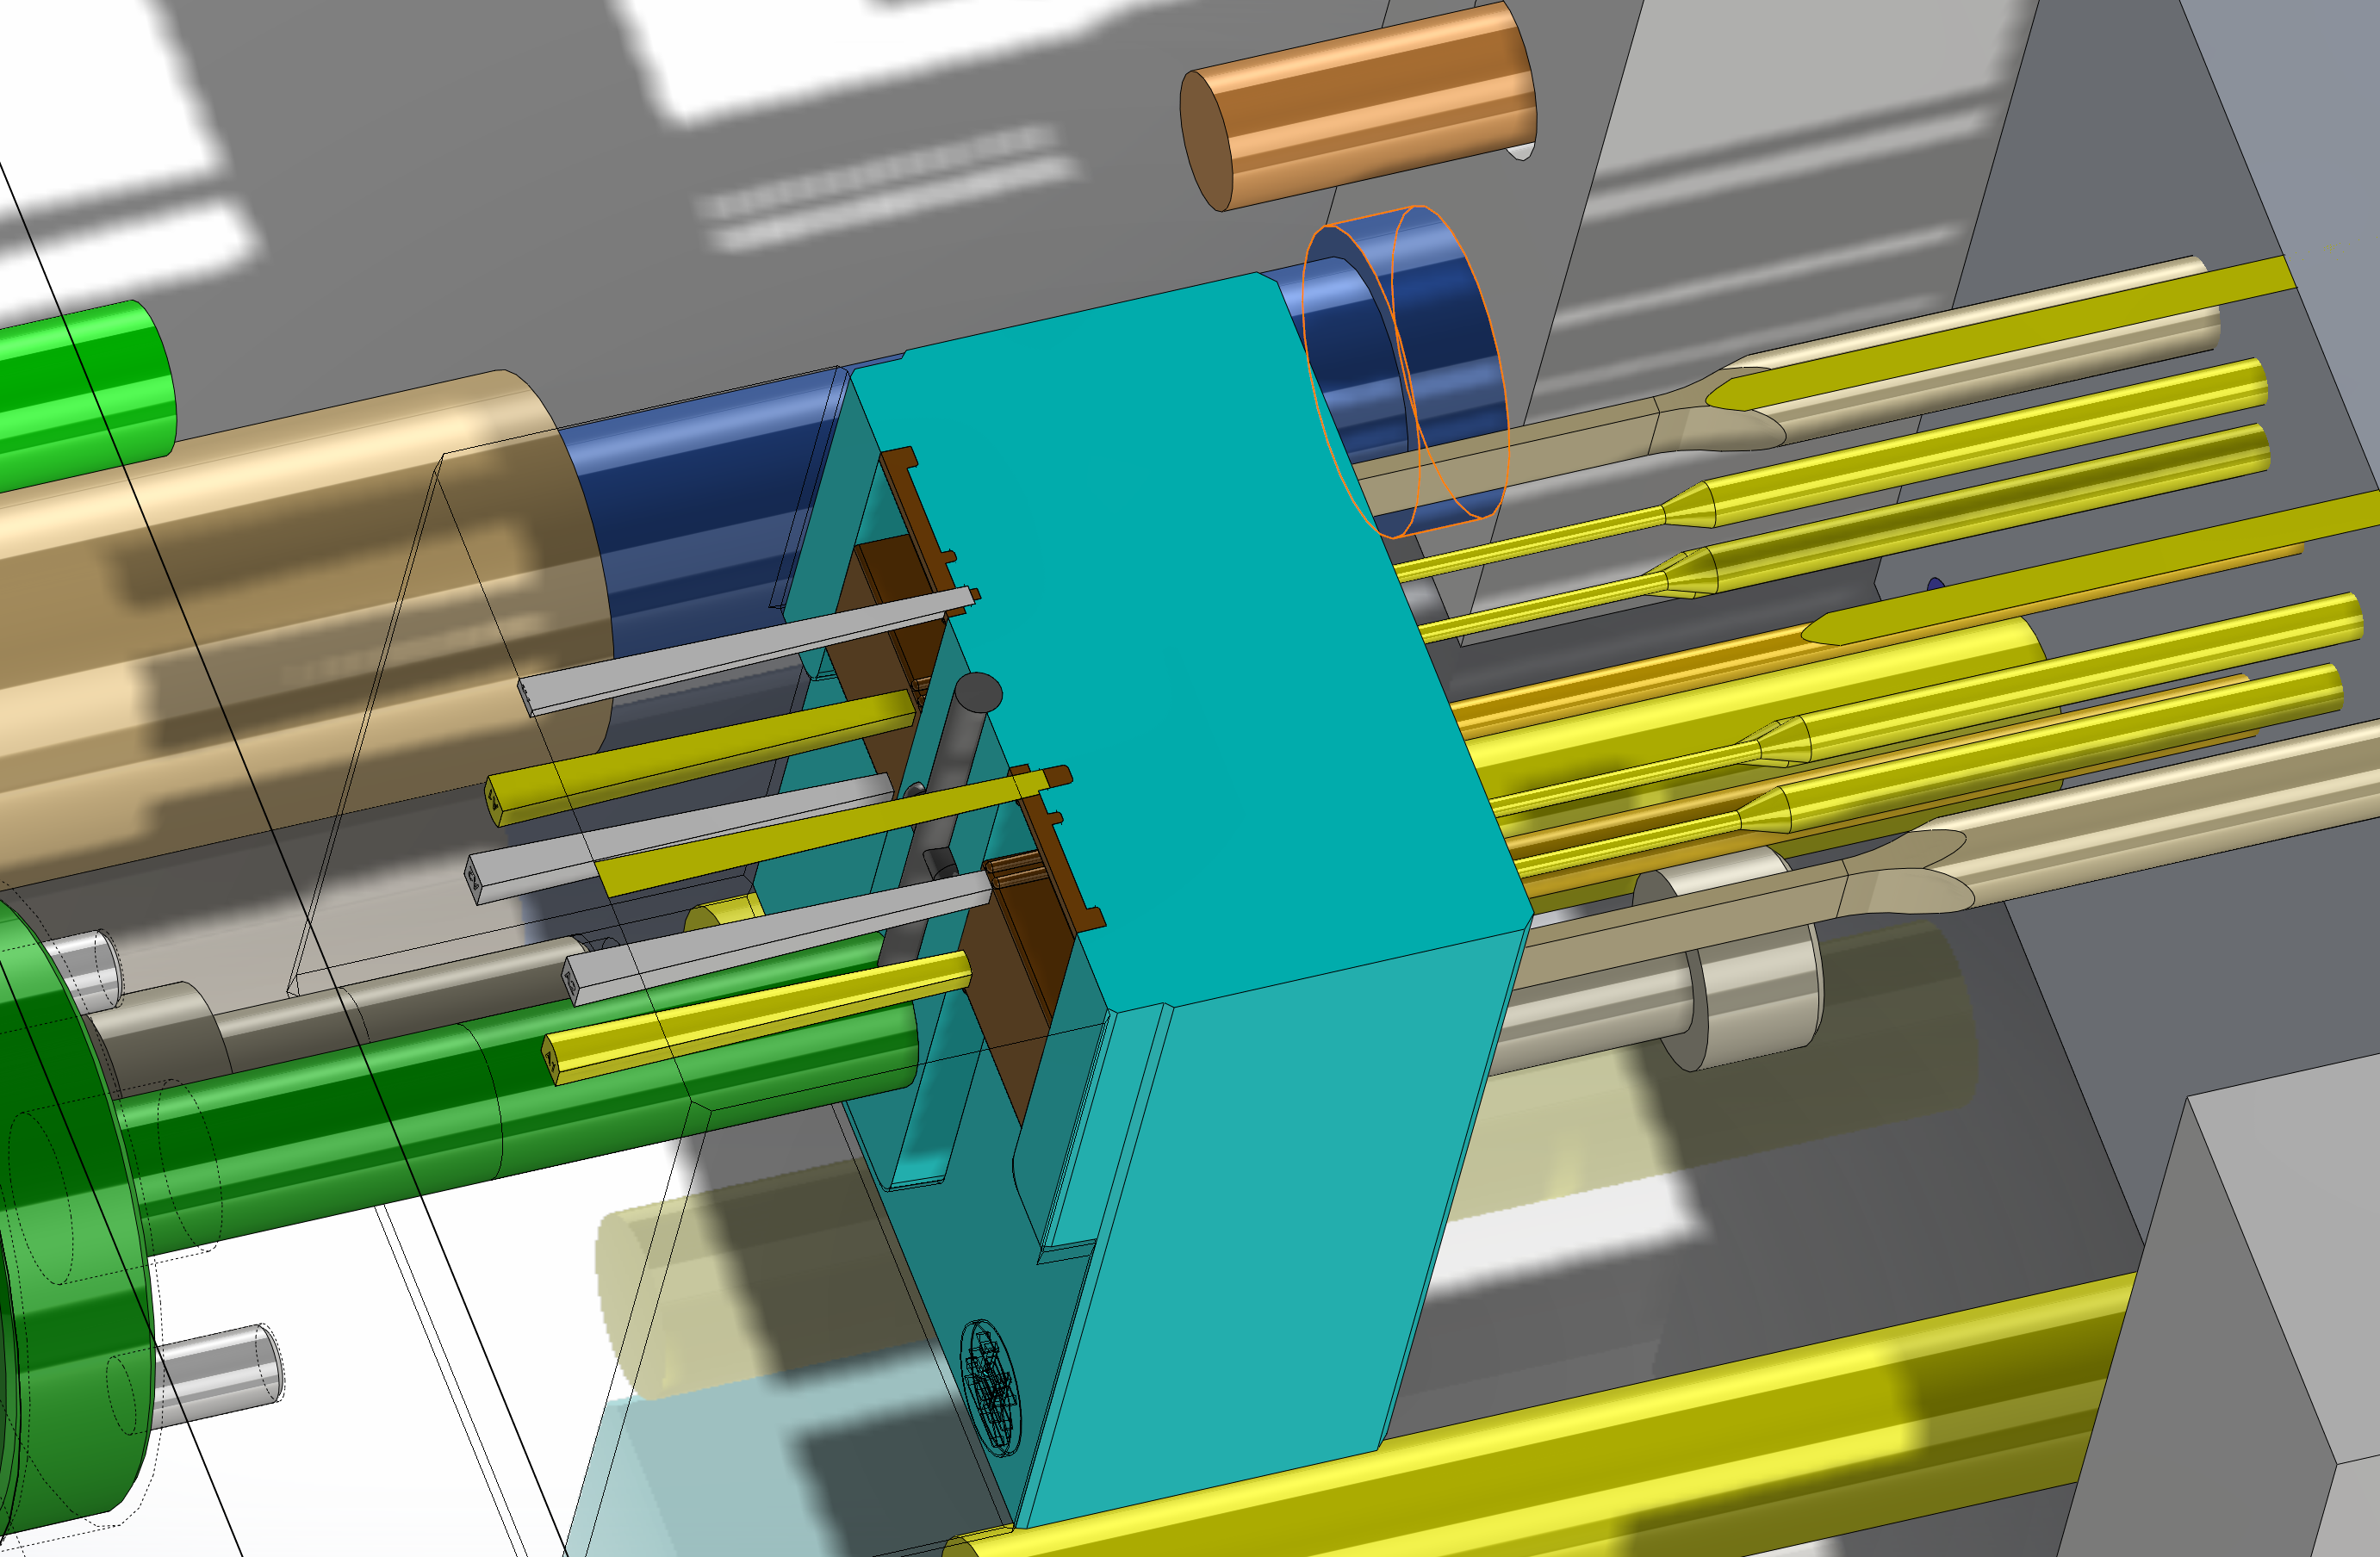
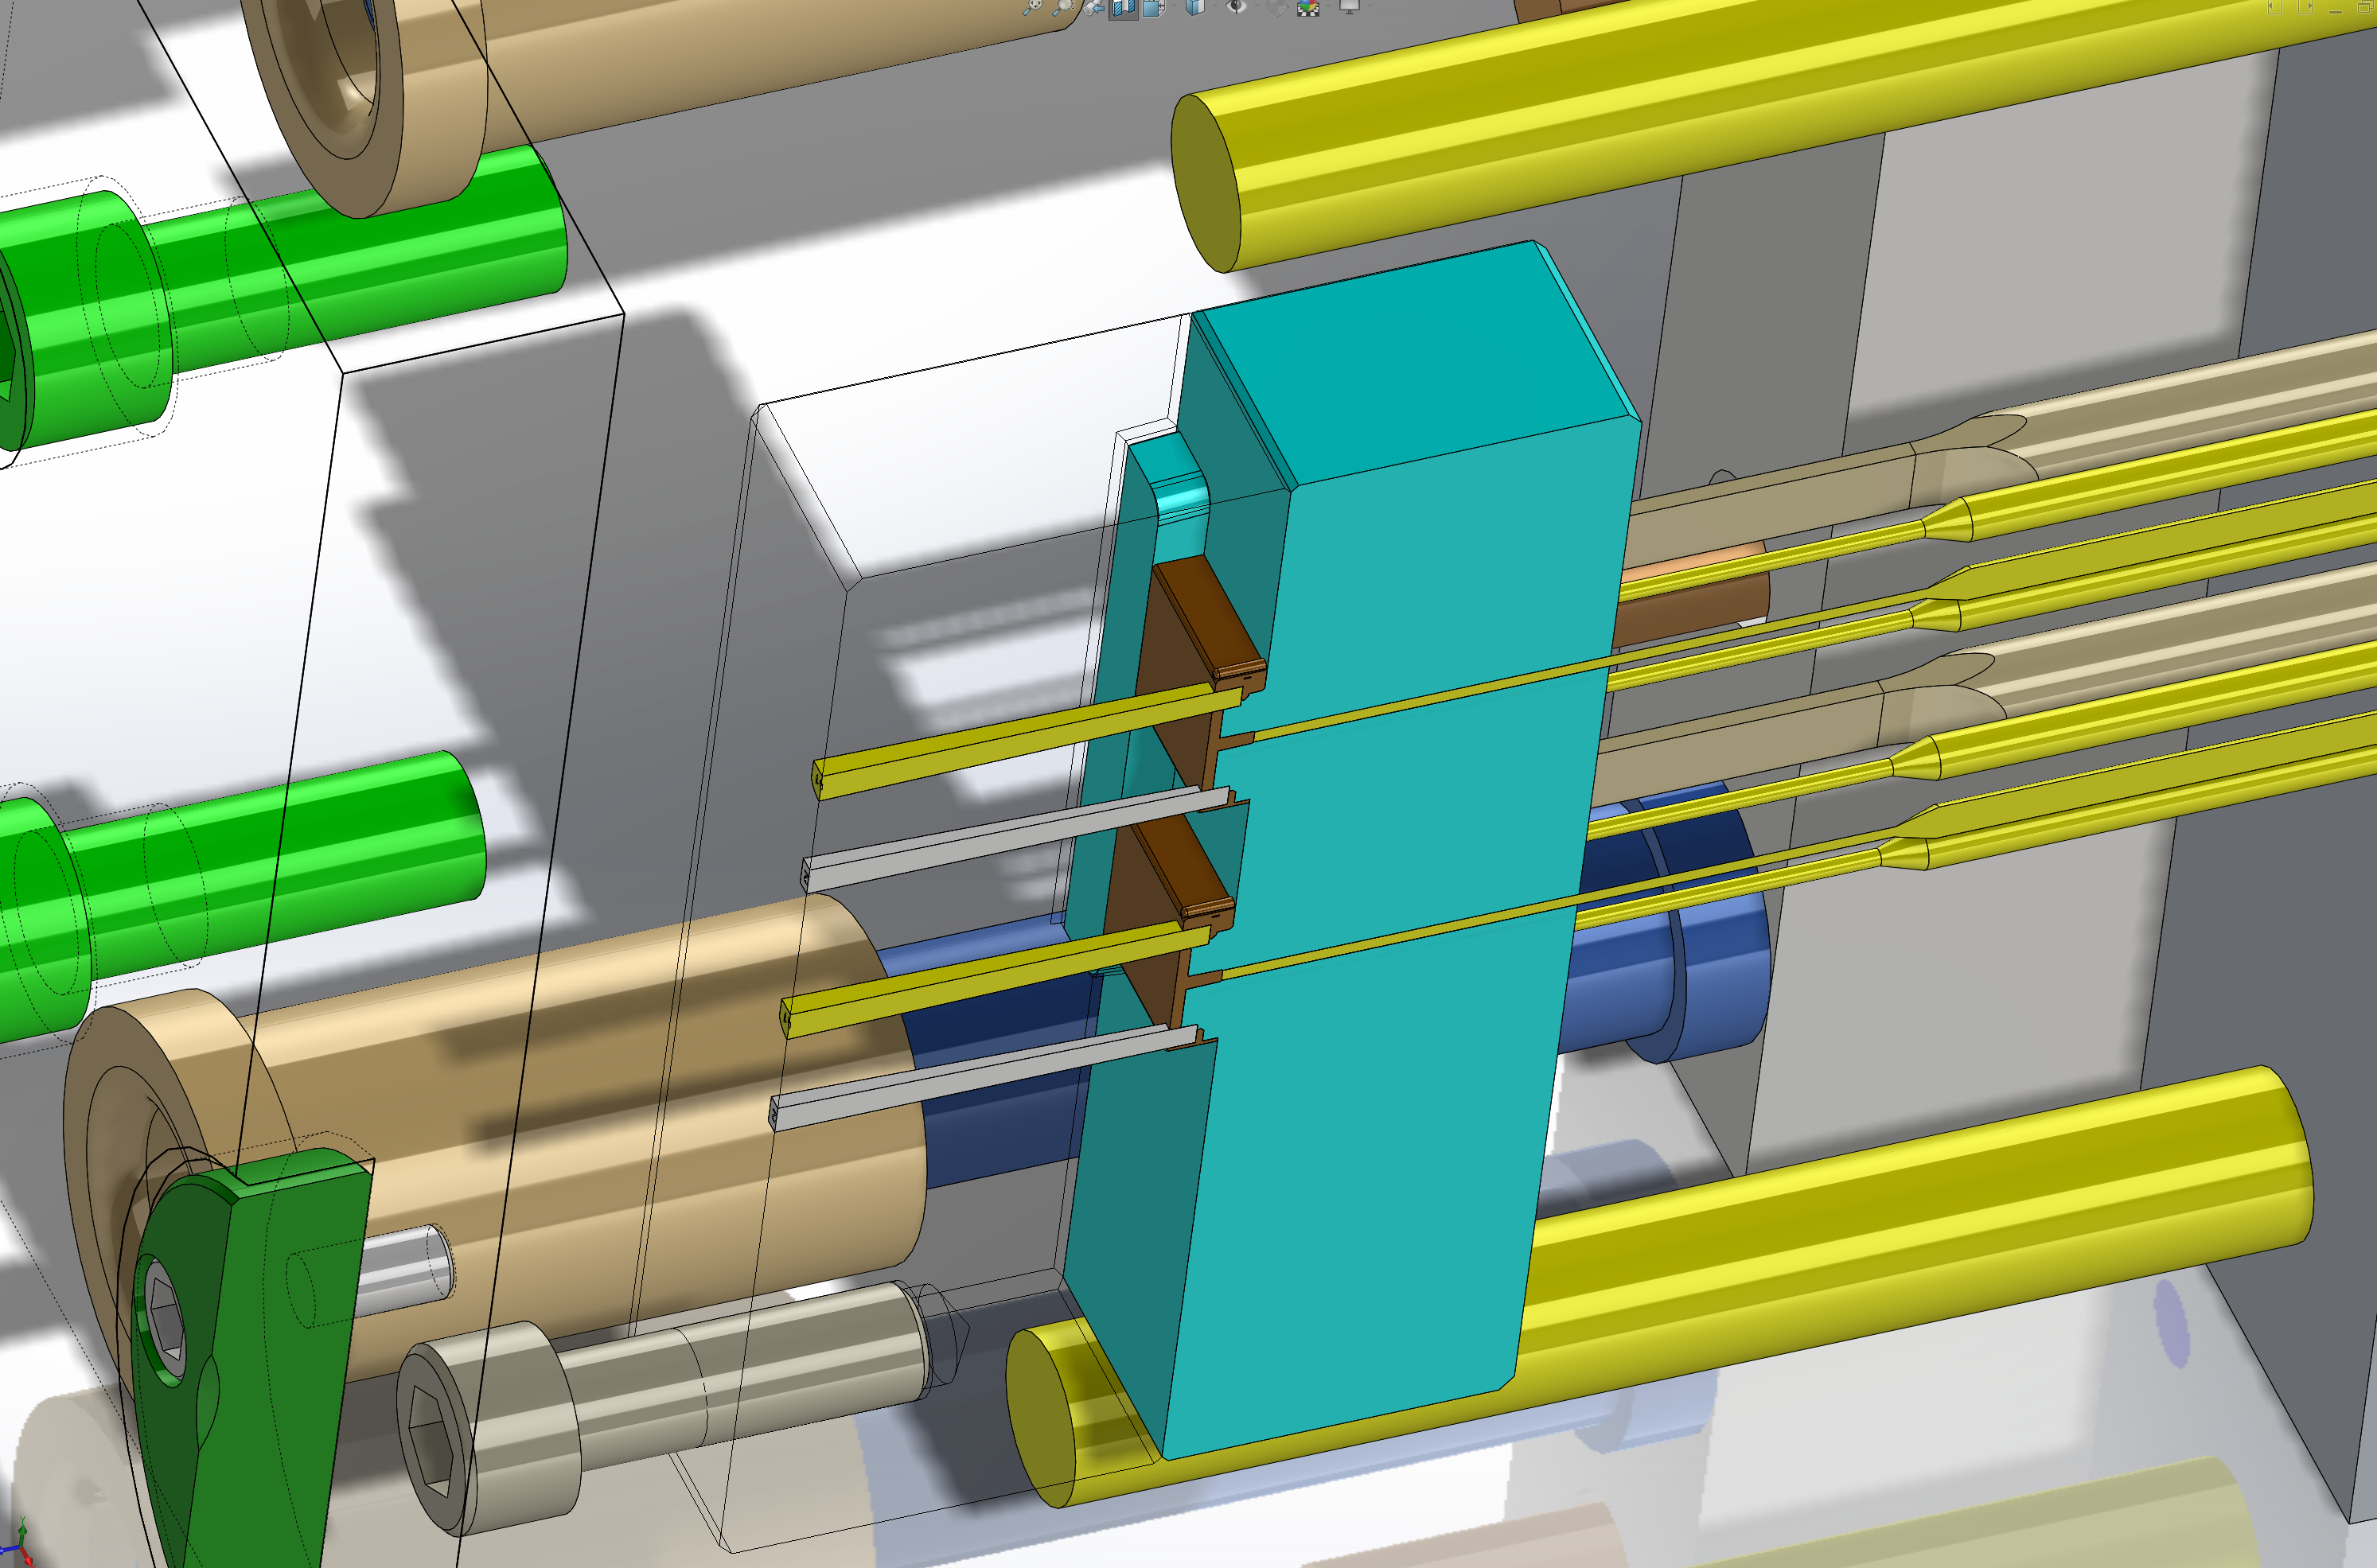
Tool Model
![]()
![]()
![]()
![]()
Designing the Case
3D Printing
Almost (but not quite) entirely unline injection molding
- STL vs STEP
- Overhangs
- Support structures
- Flow rate/lines
- Time taken
- Family molds
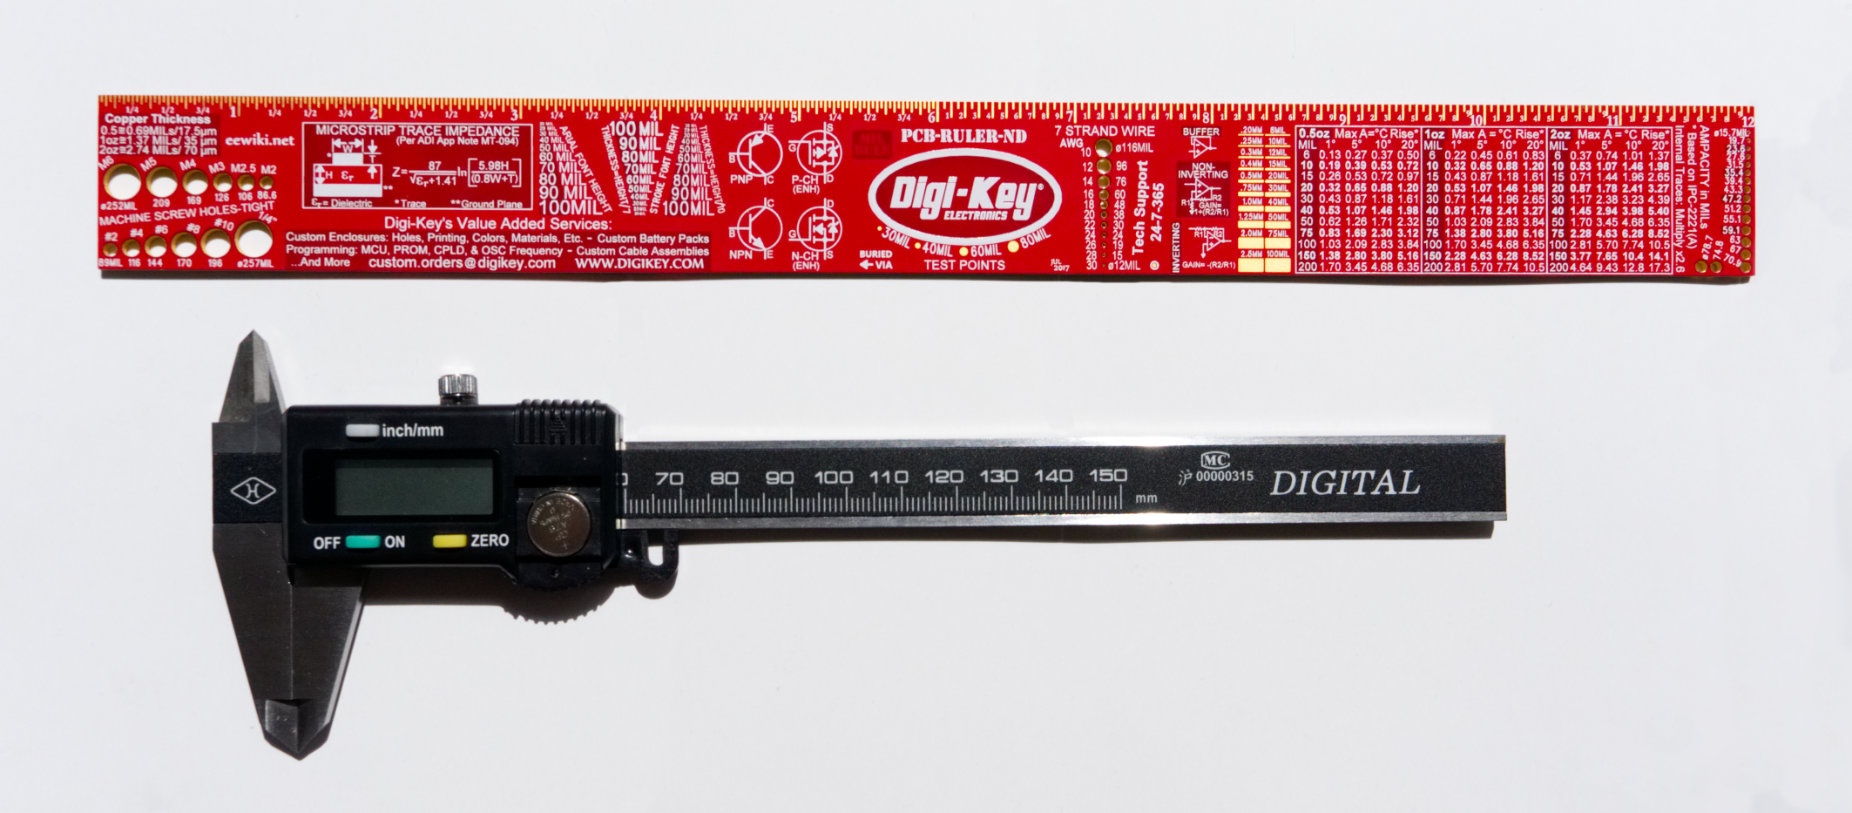
Hardware
![Ruler and Caliper]()
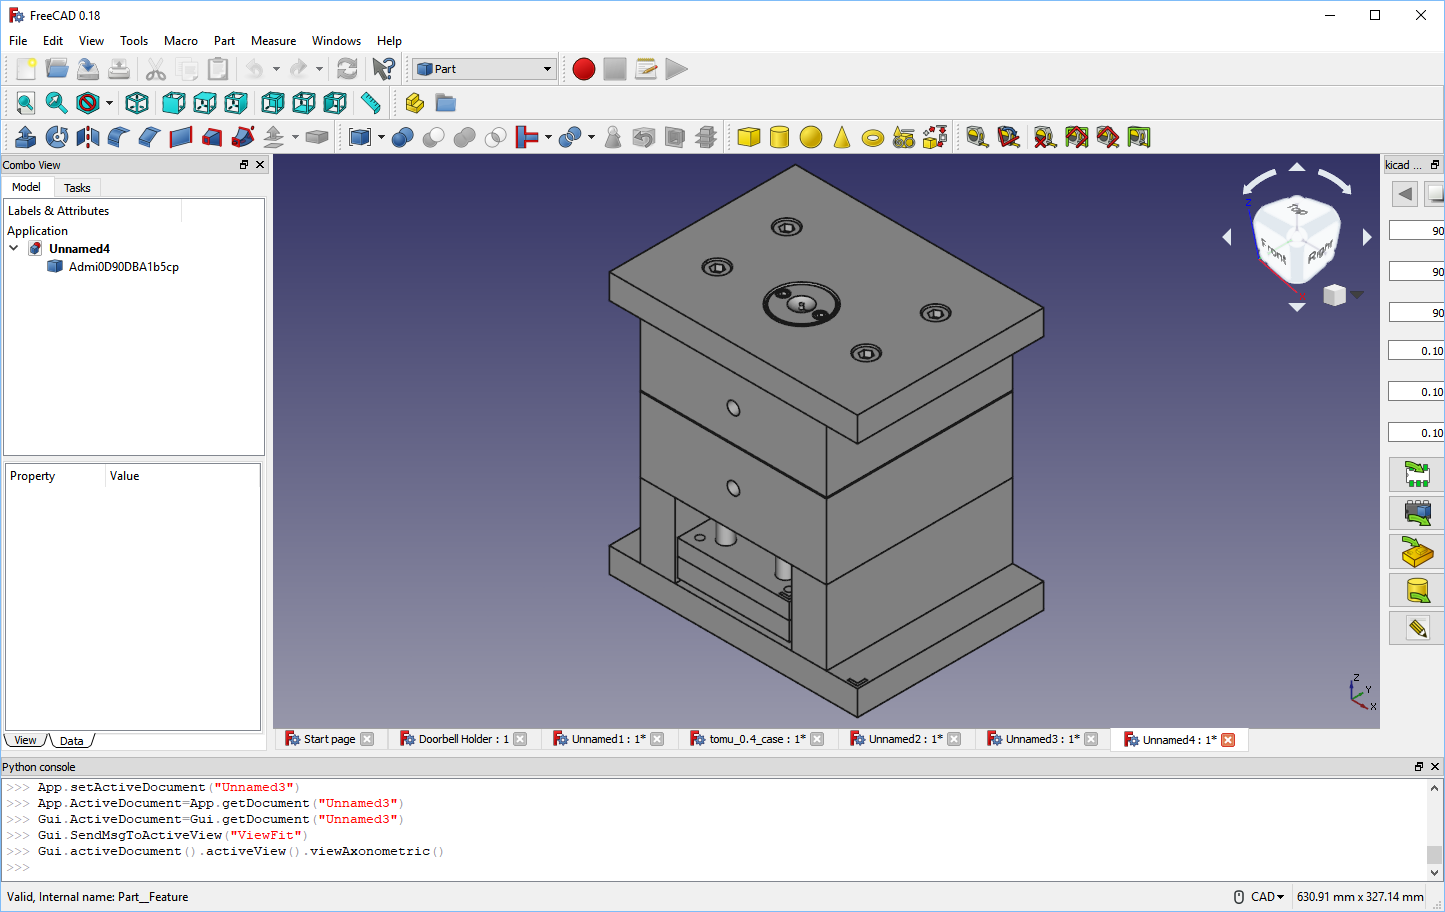
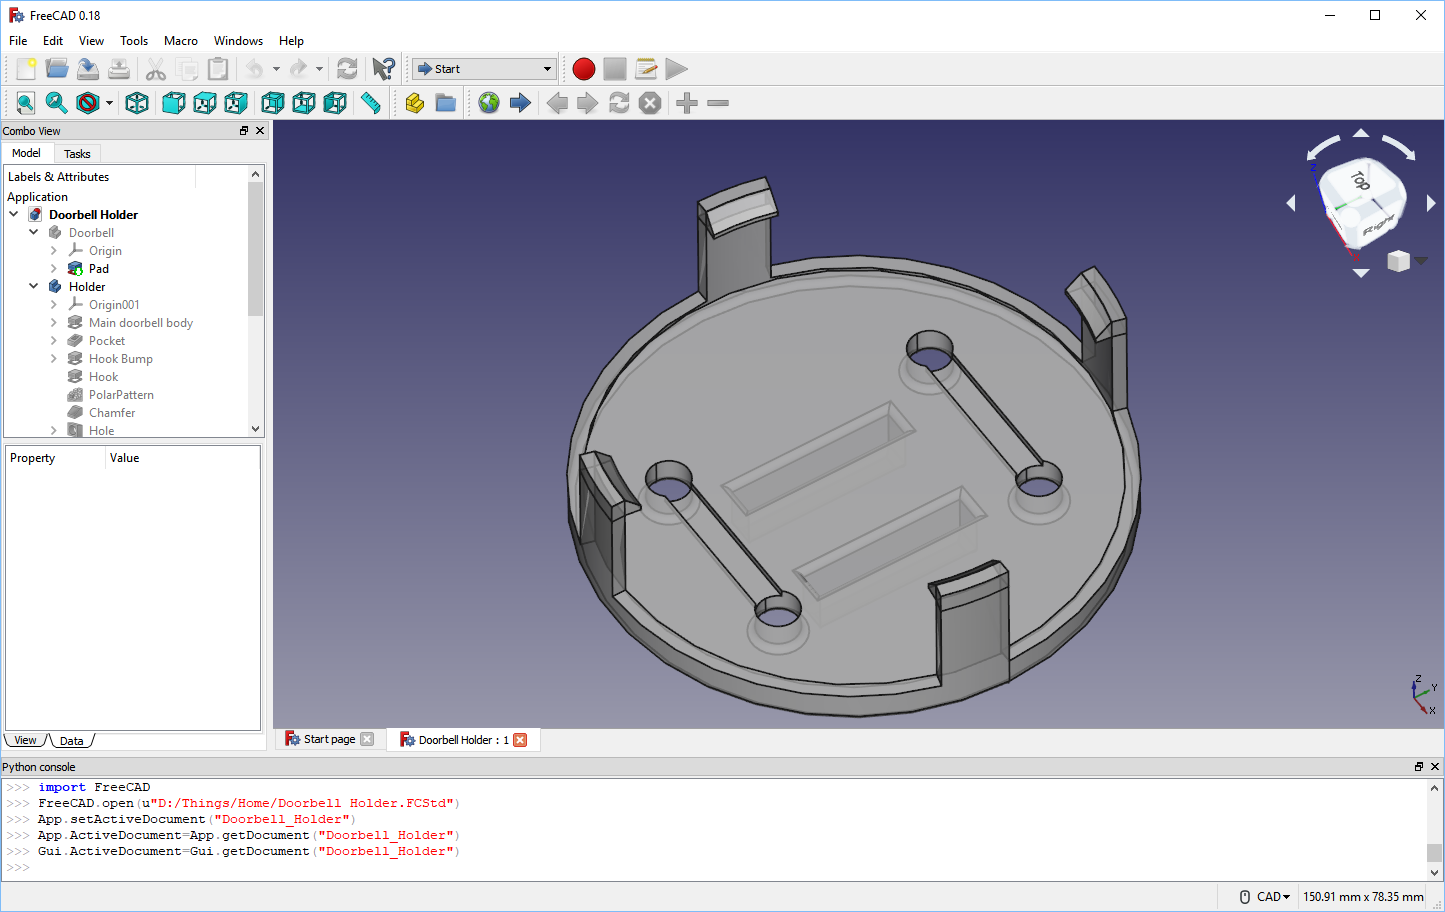
Software: FreeCAD
![FreeCAD Example]()
FreeCAD can create STEP files
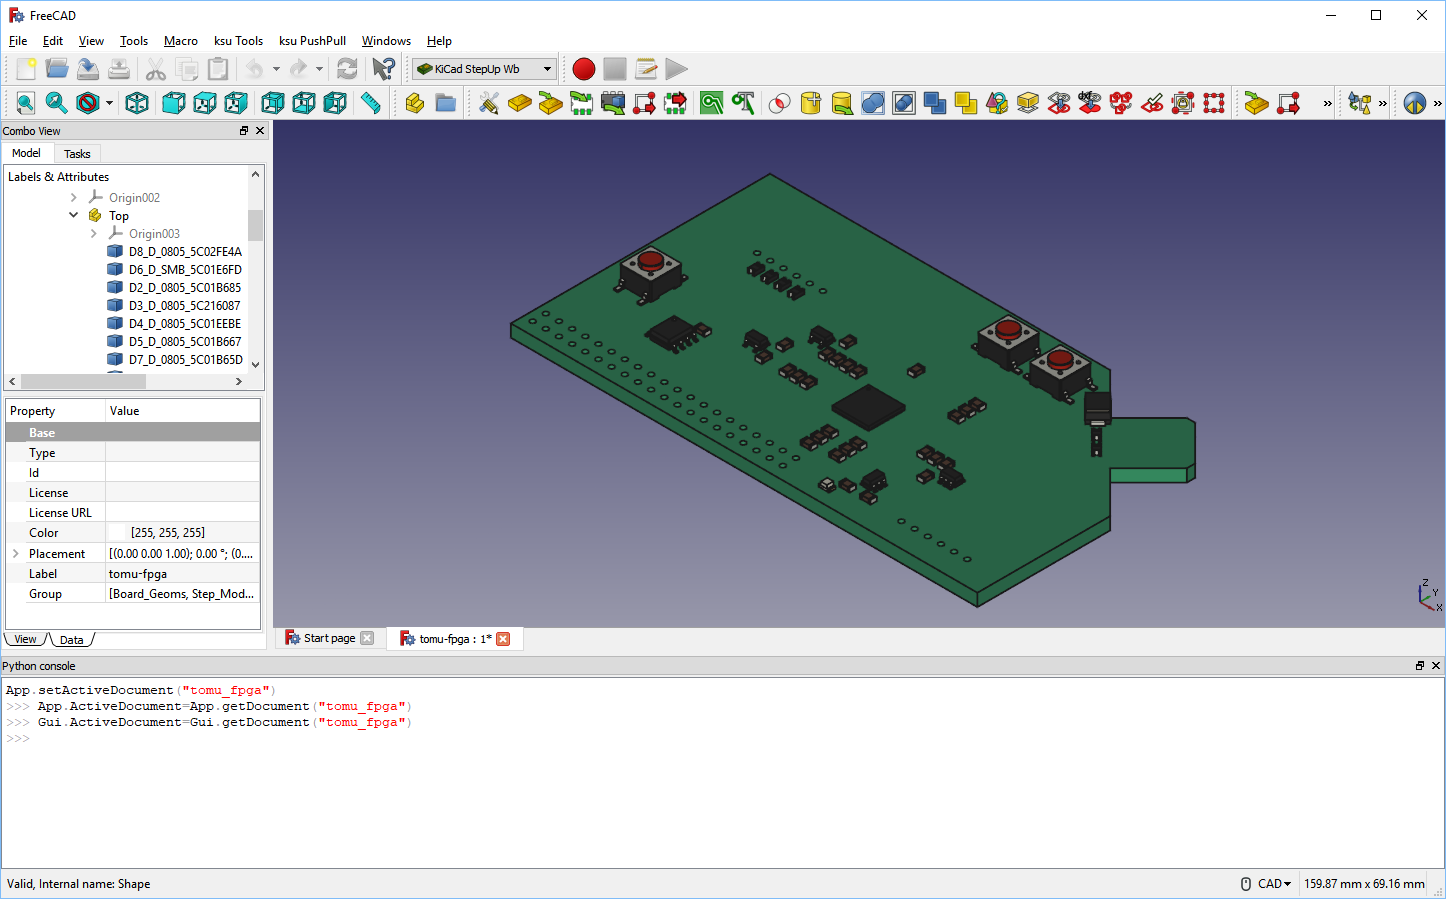
FreeCAD can read KiCad files
![KiCad PCB inside FreeCAD]()
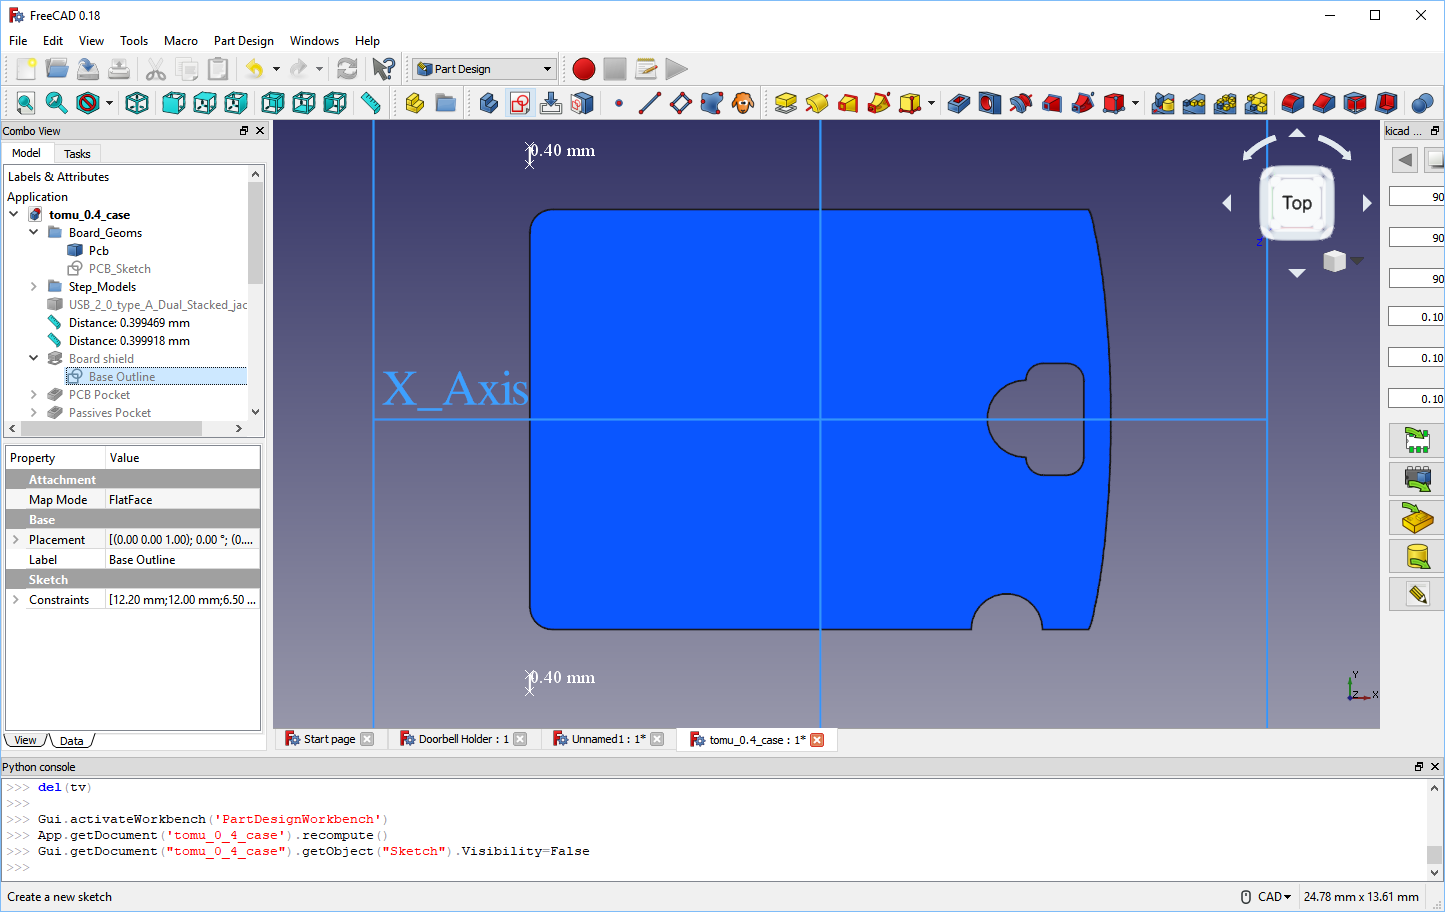
1) Open the PCB
![First, open the PCB in FreeCAD]()
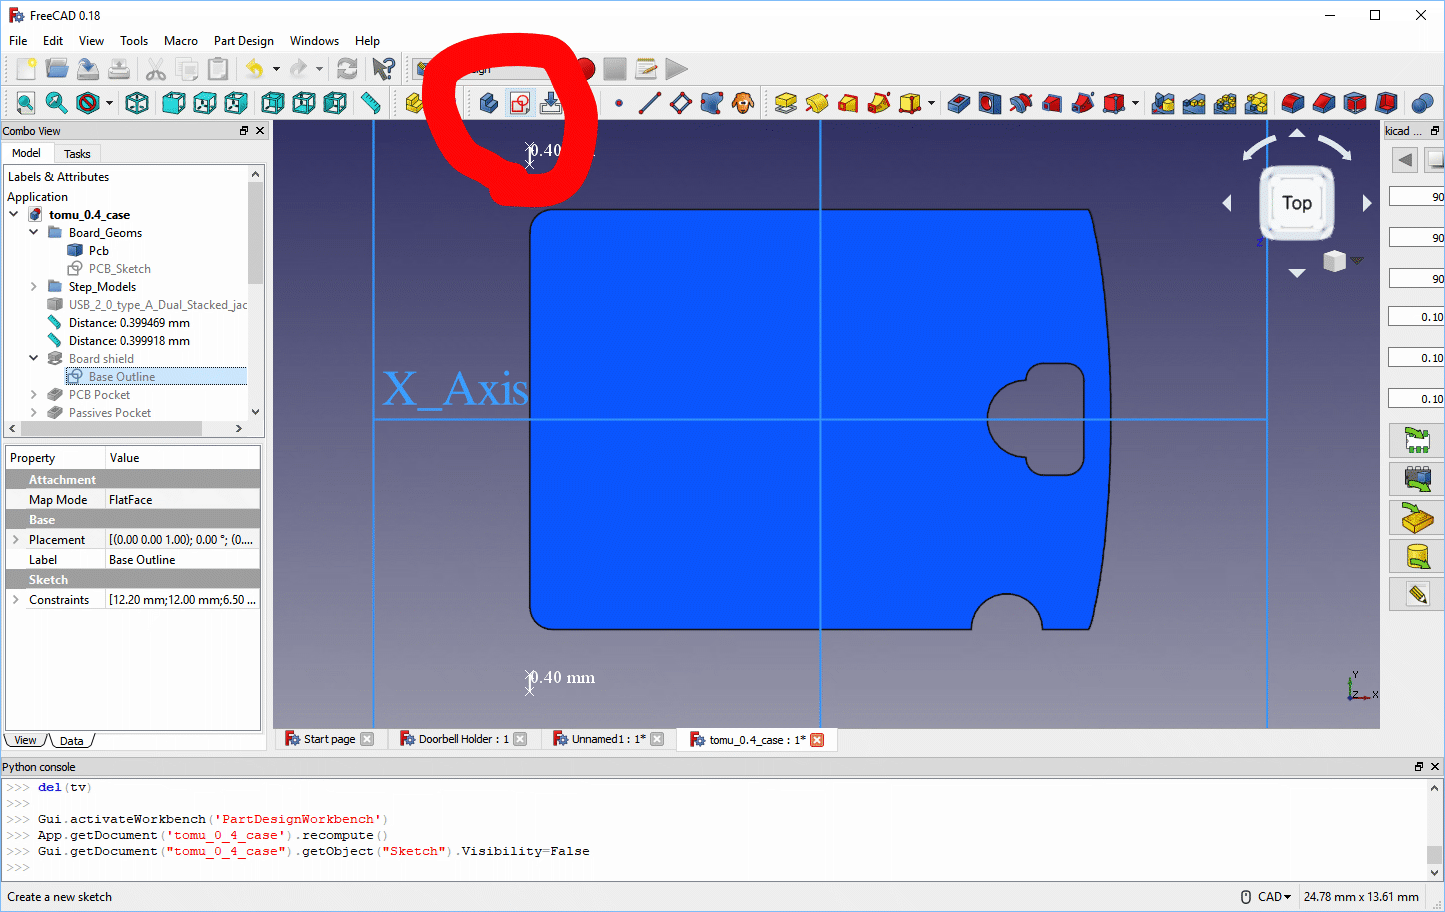
1) Open the PCB
![Click 'Create Sketch']()
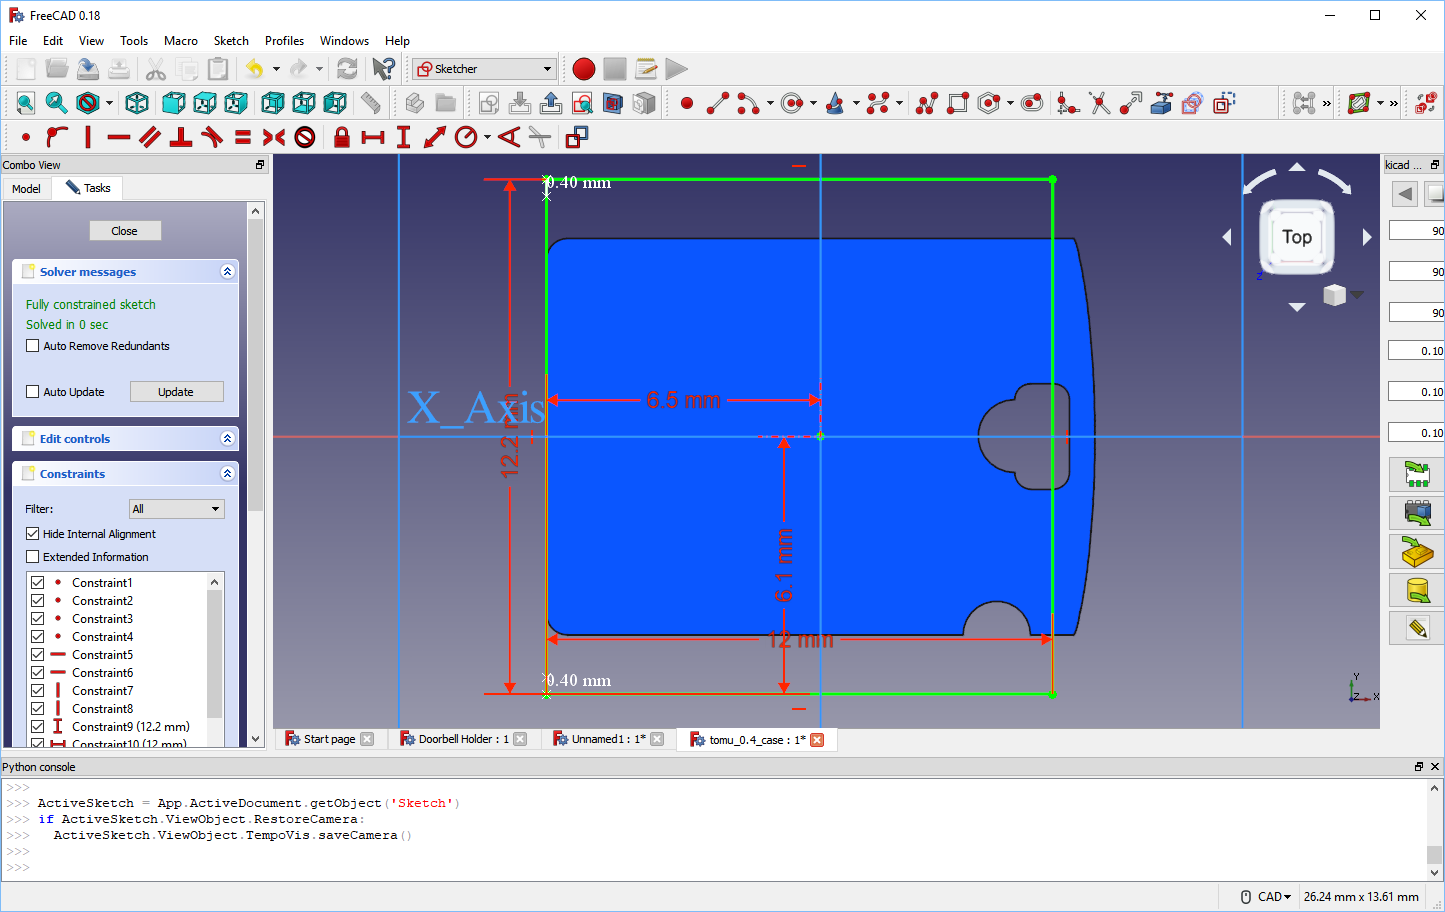
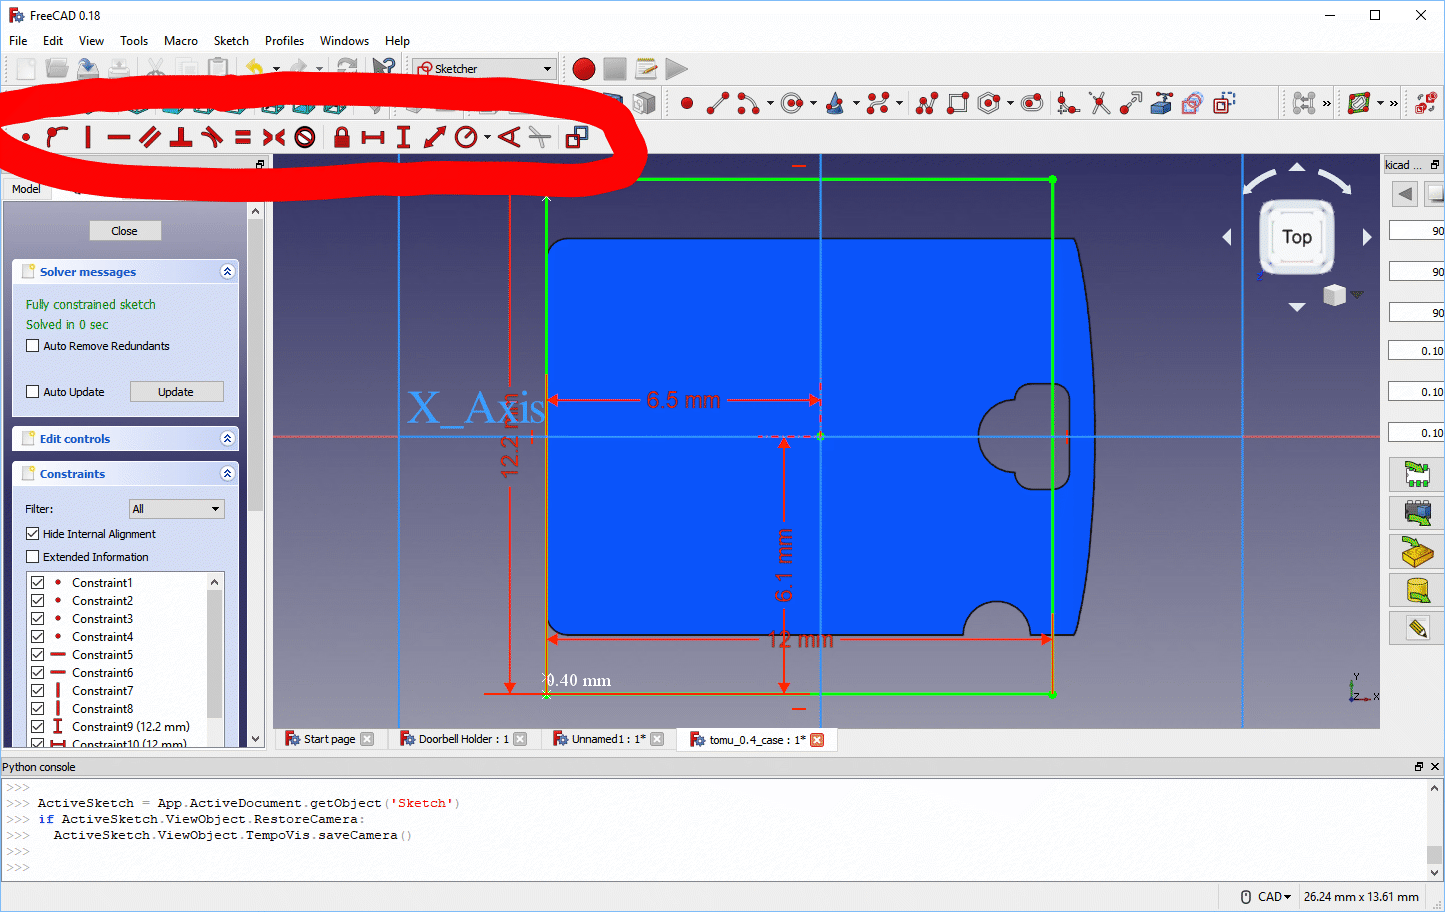
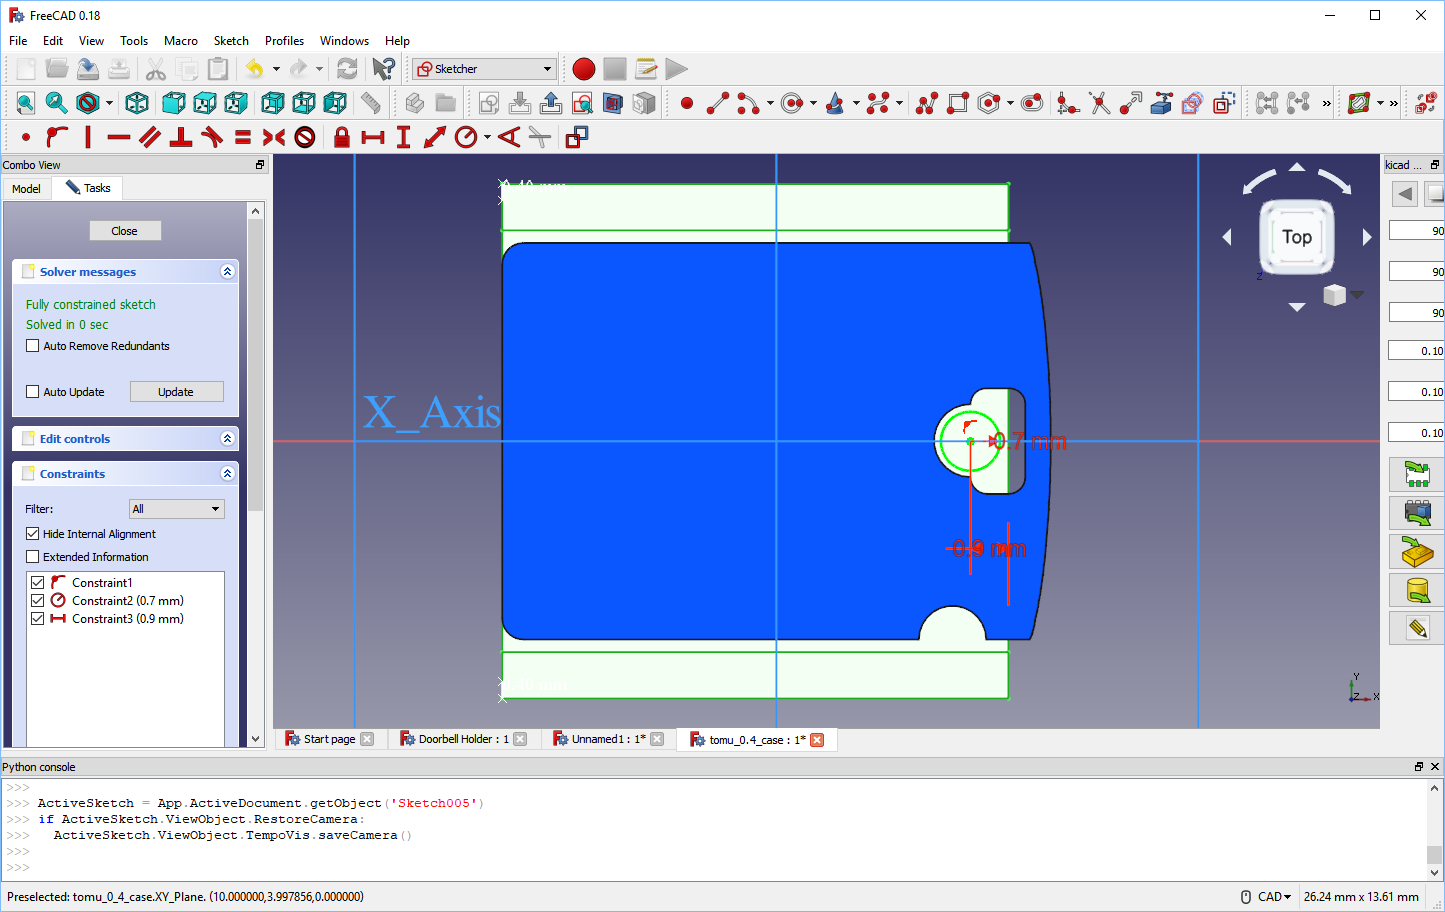
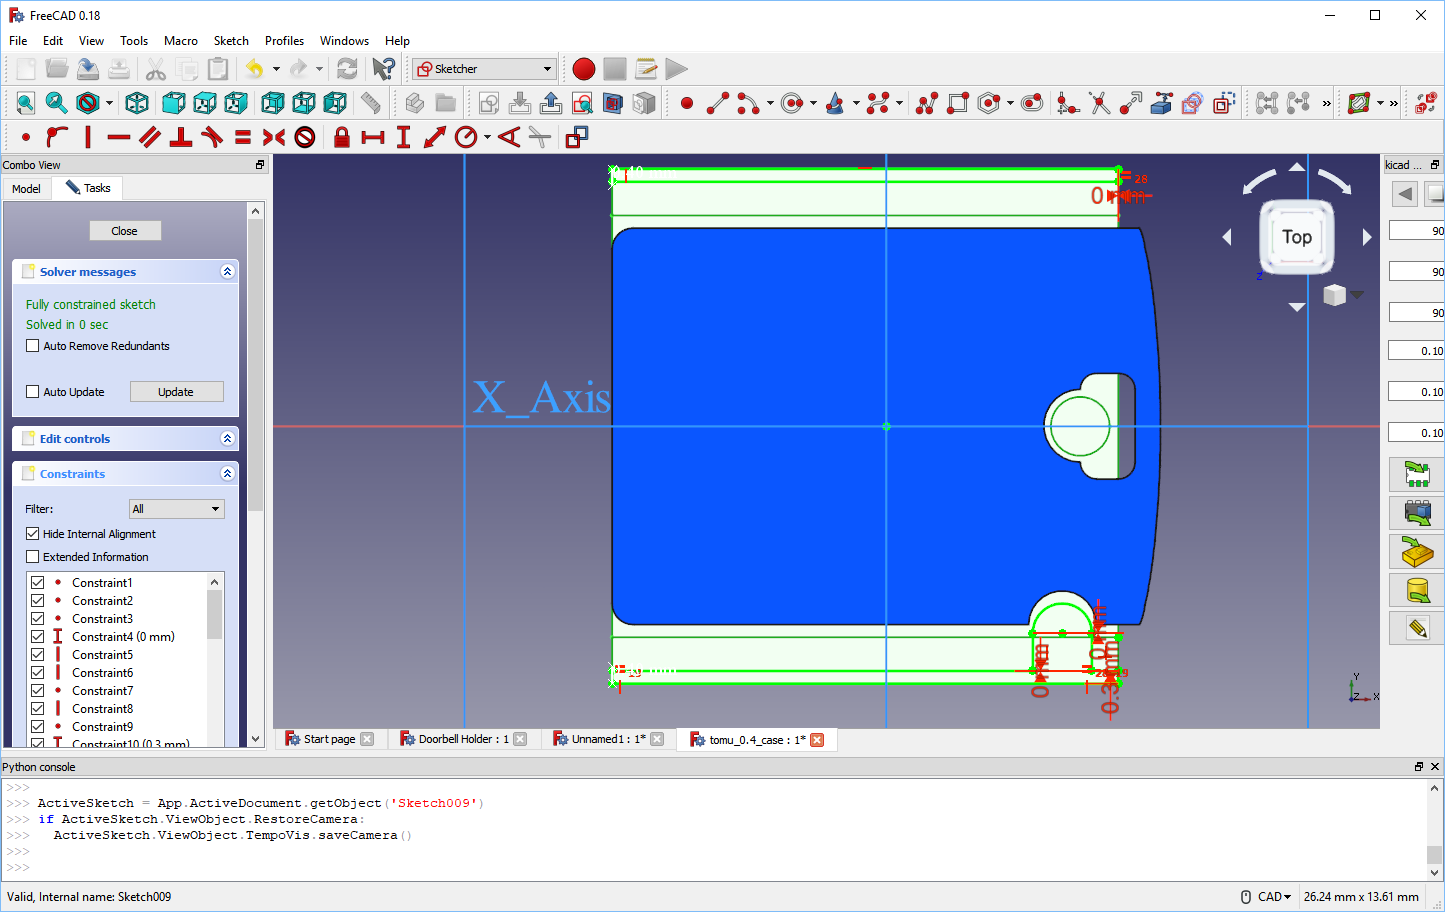
2) Create a sketch
![Creating constraints on the first sketch]()
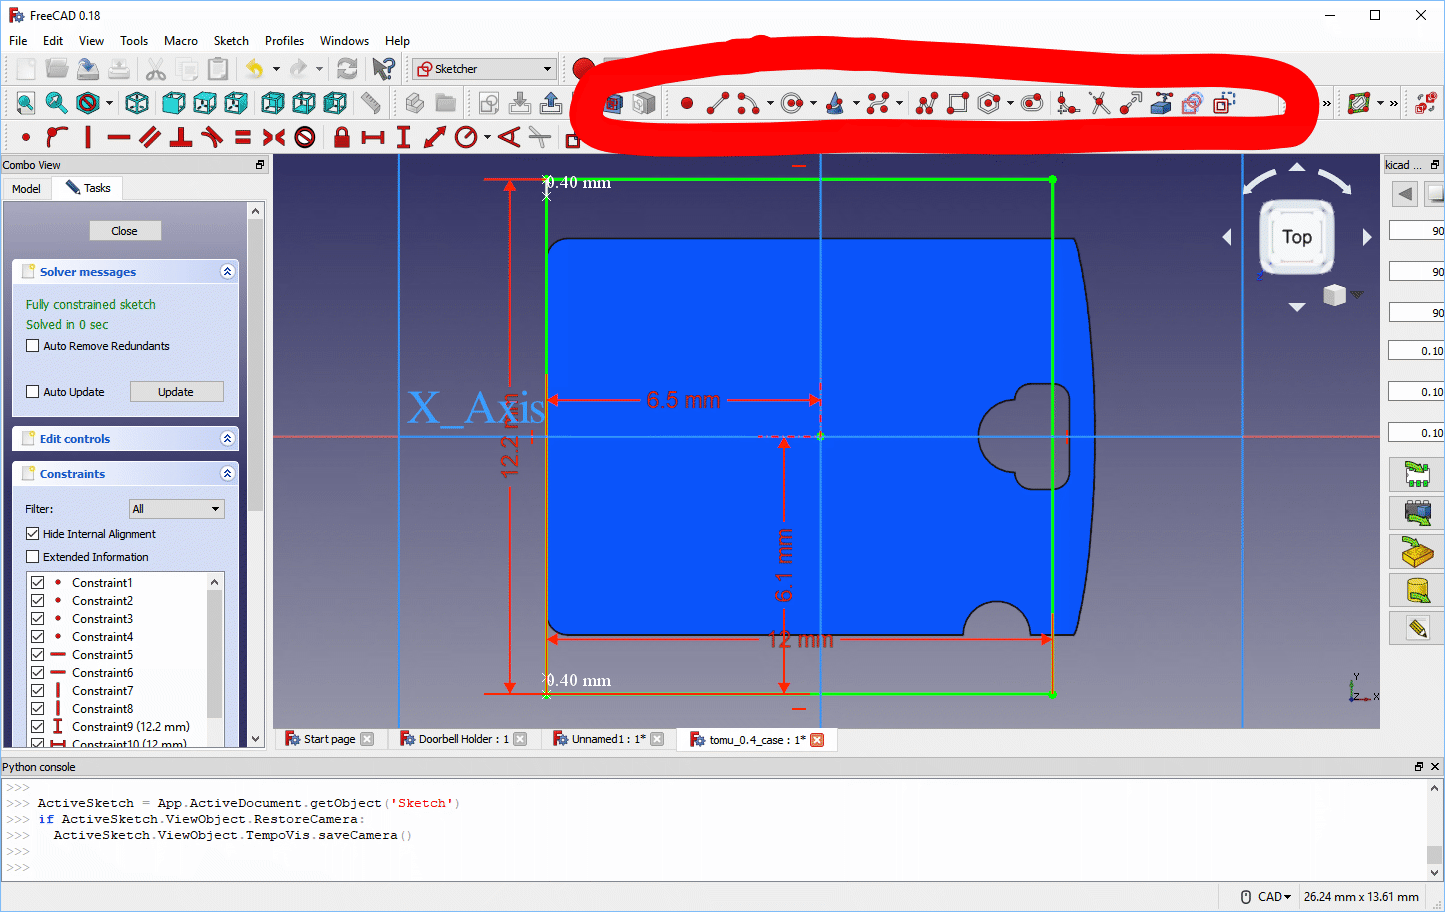
2) Create a sketch
![Creating constraints on the first sketch]()
2) Create a sketch
![Creating constraints on the first sketch]()
2) Create a sketch
![Creating constraints on the first sketch]()
2) Create a sketch
![Sketch done, starting pad]()
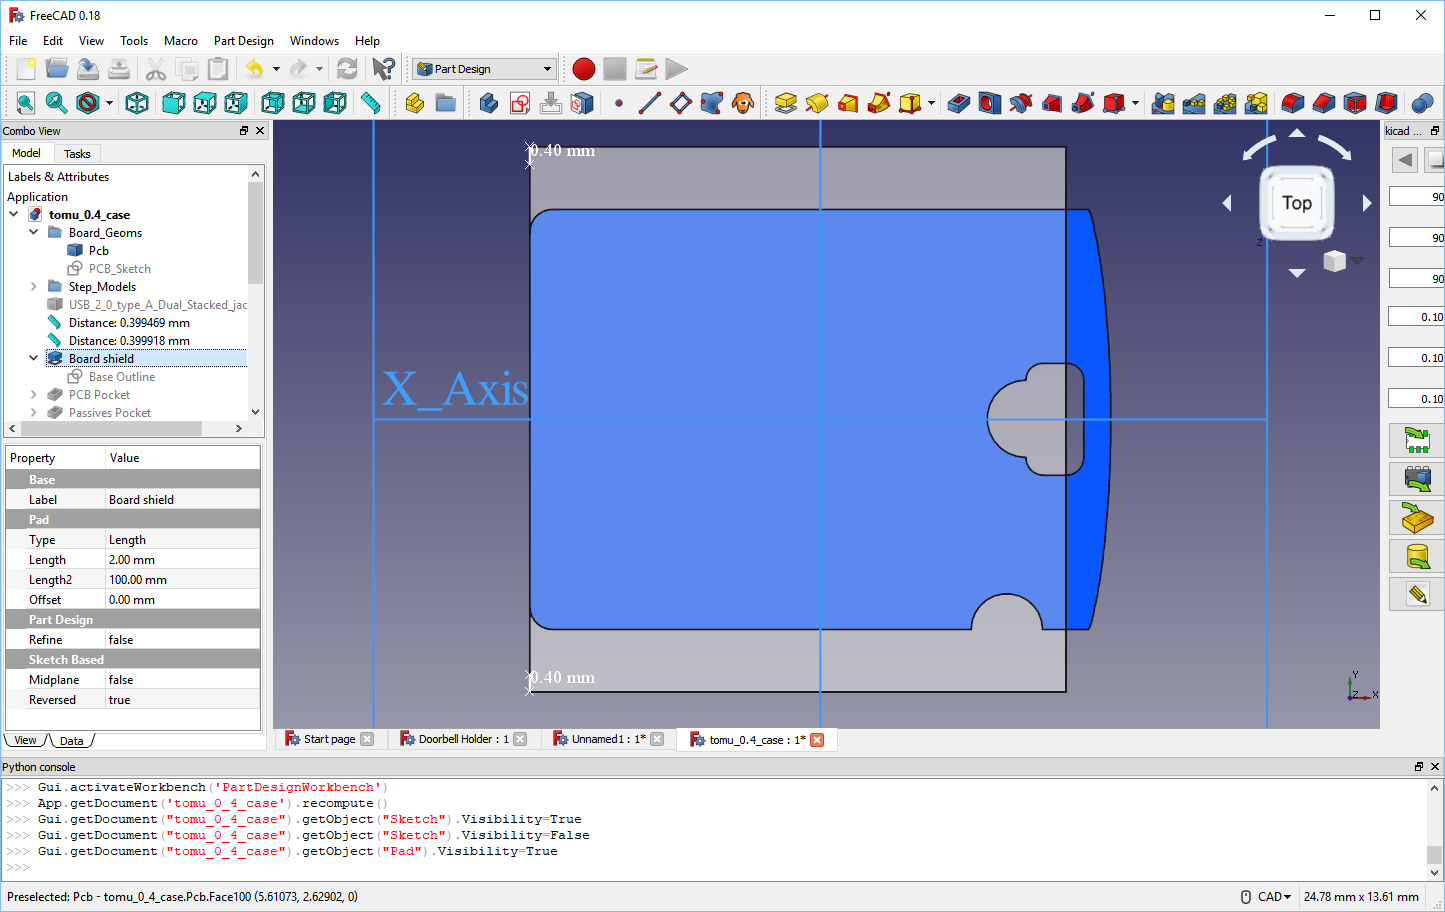
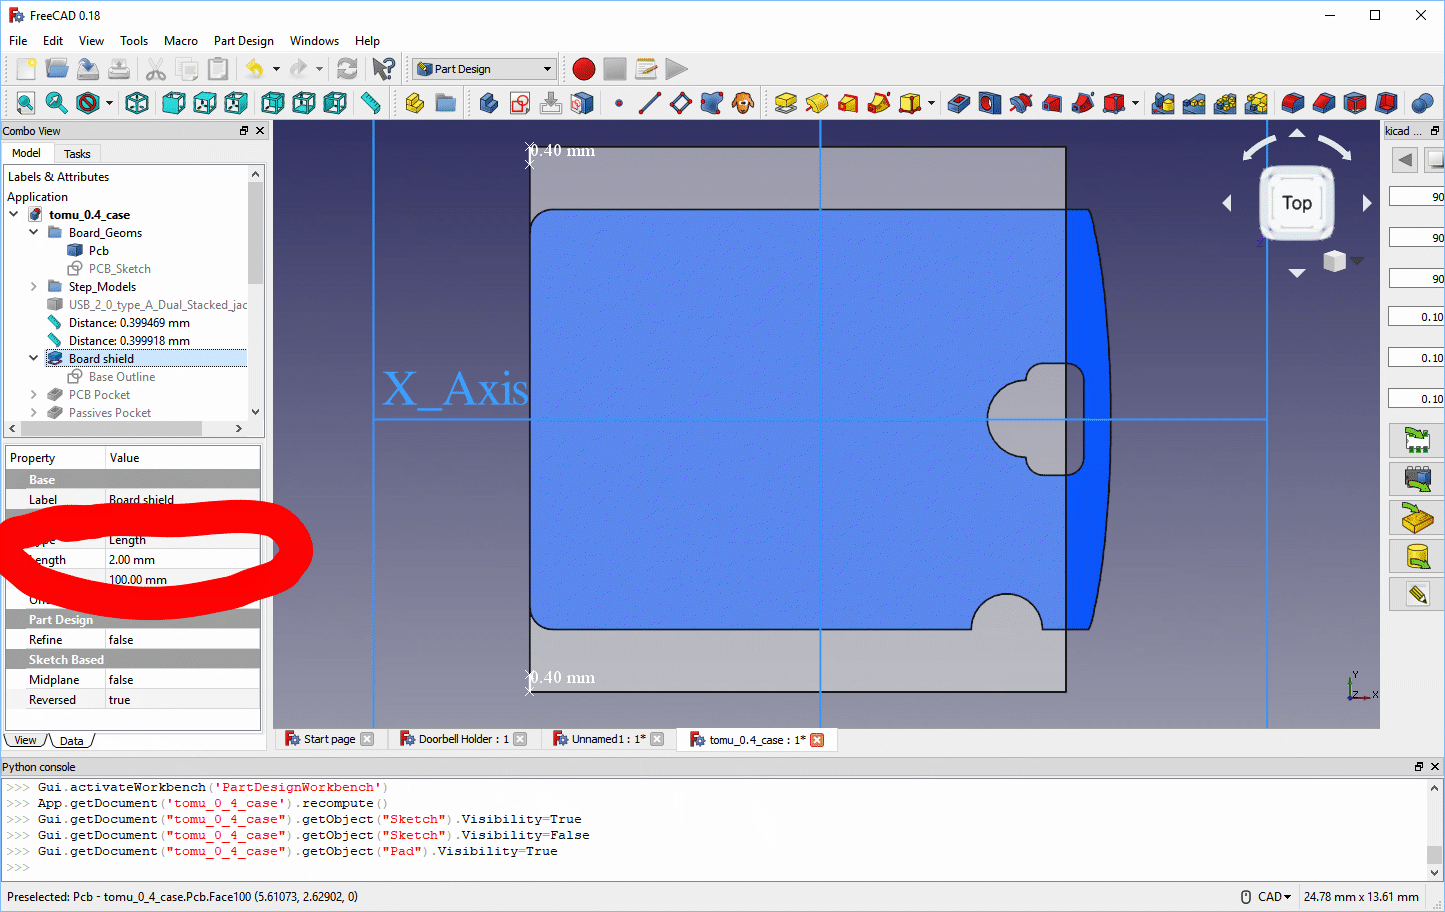
3) Pad the sketch
![Done with the pad]()
3) Pad the sketch
![Done with the pad]()
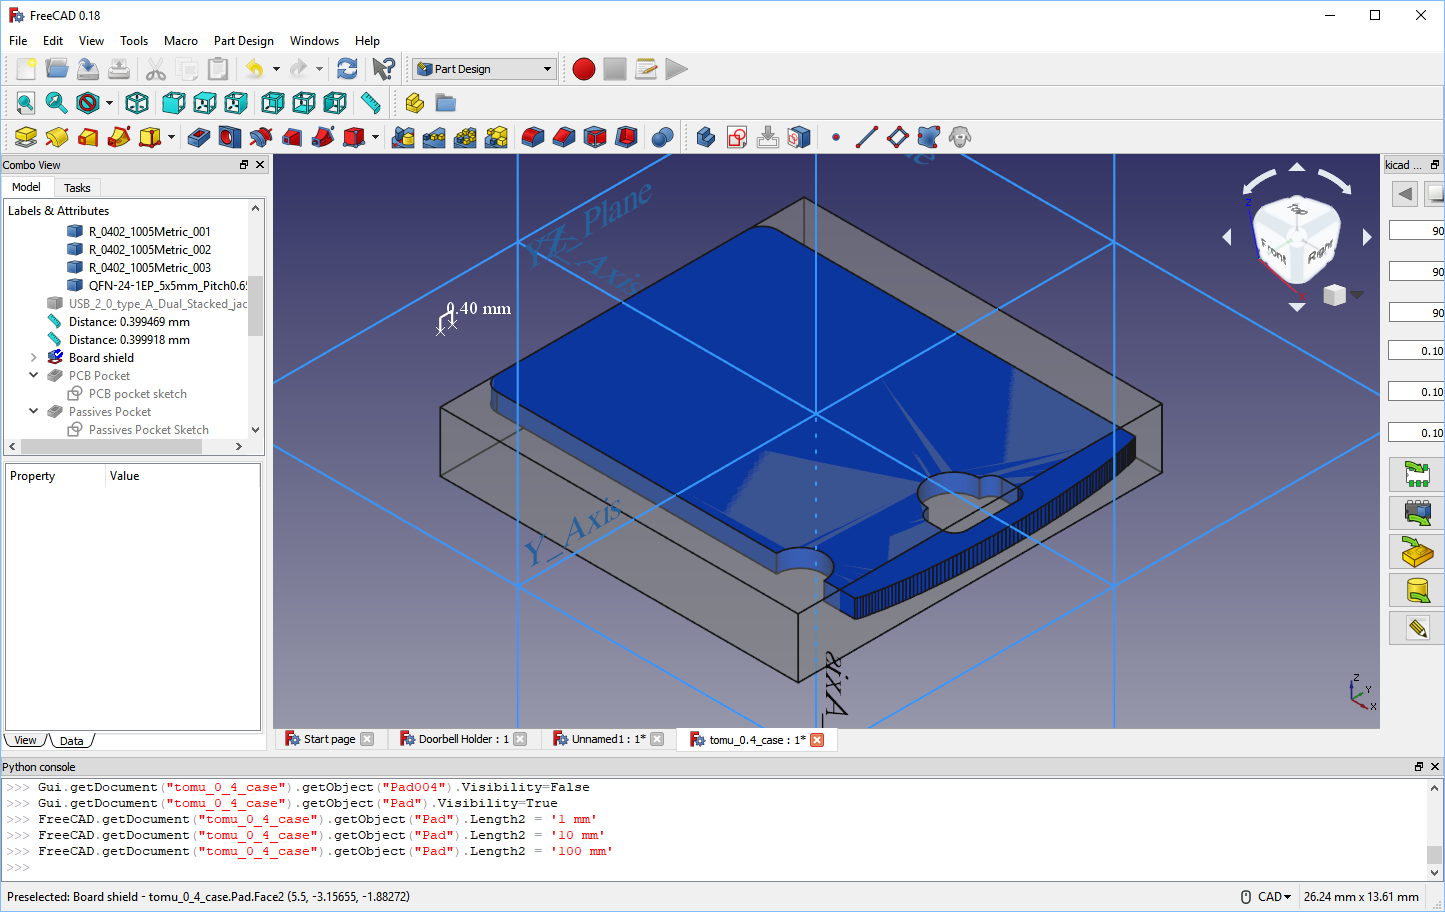
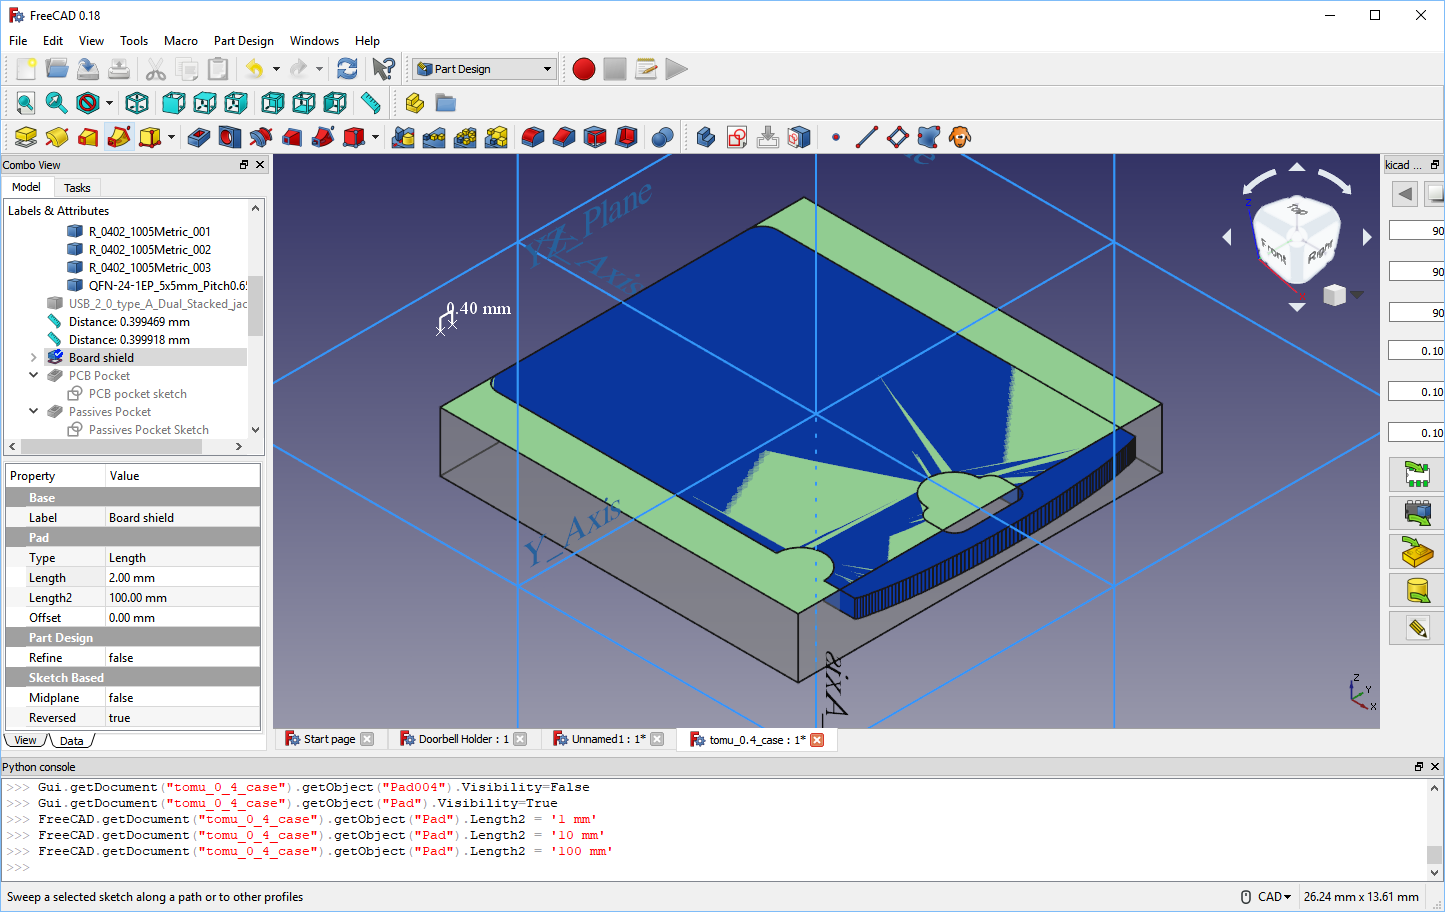
3) Pad the sketch
![Pad at an angle]()
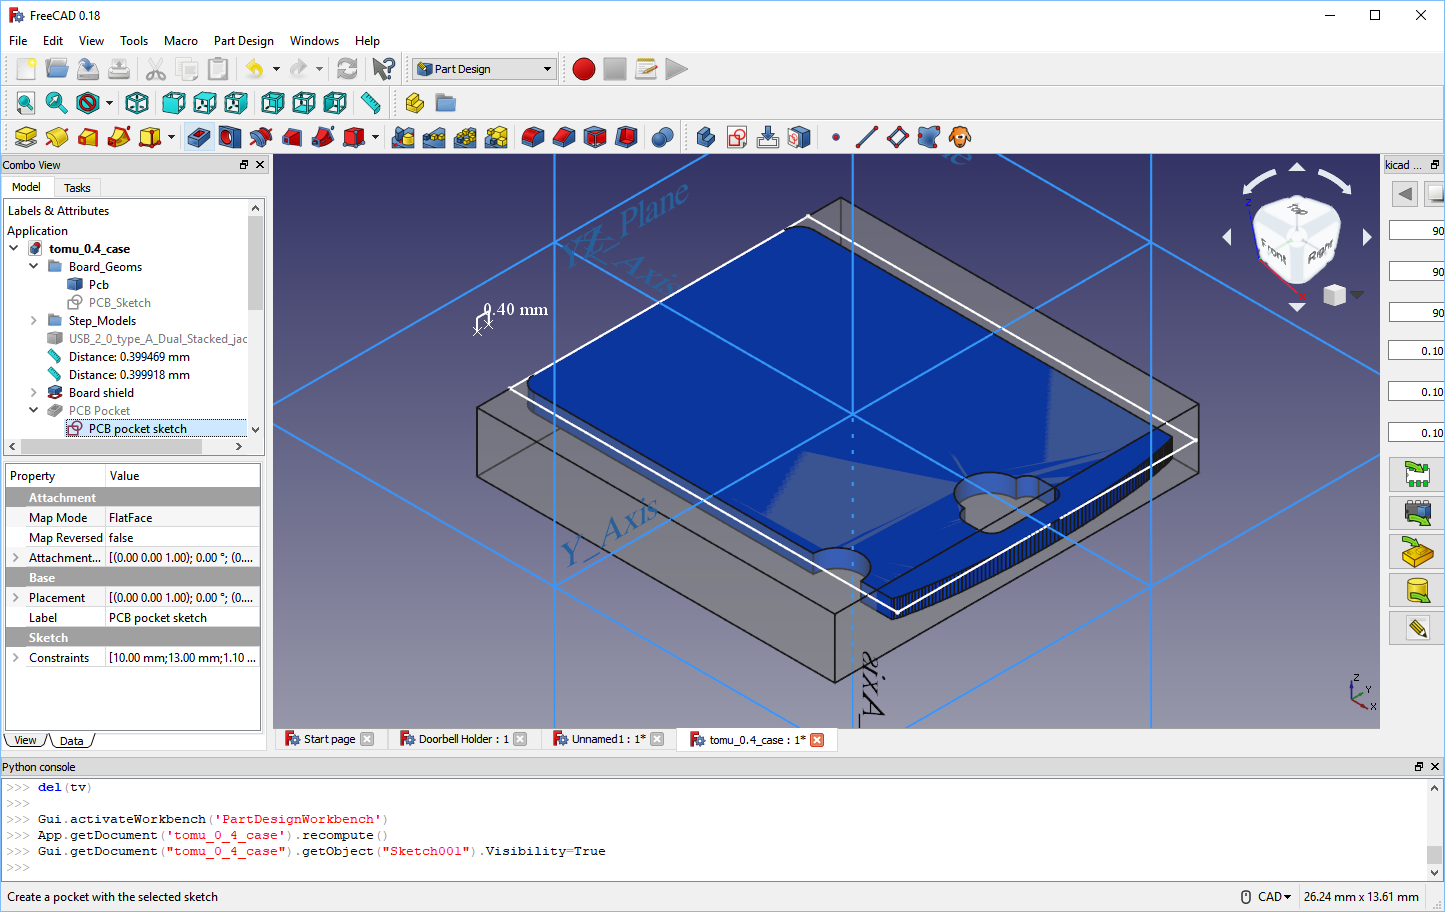
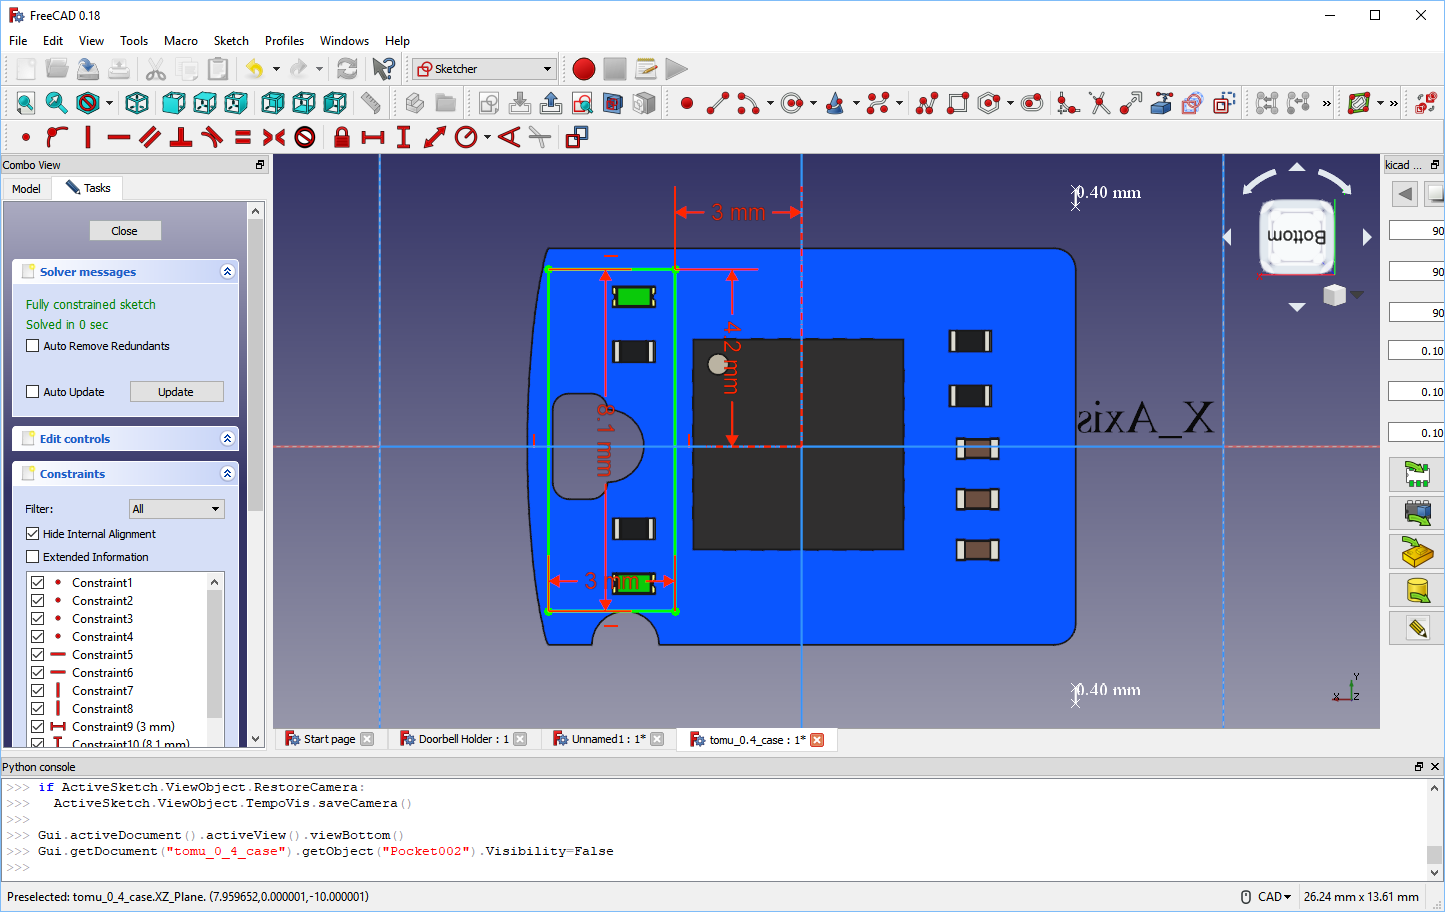
4) Repeat as necessary
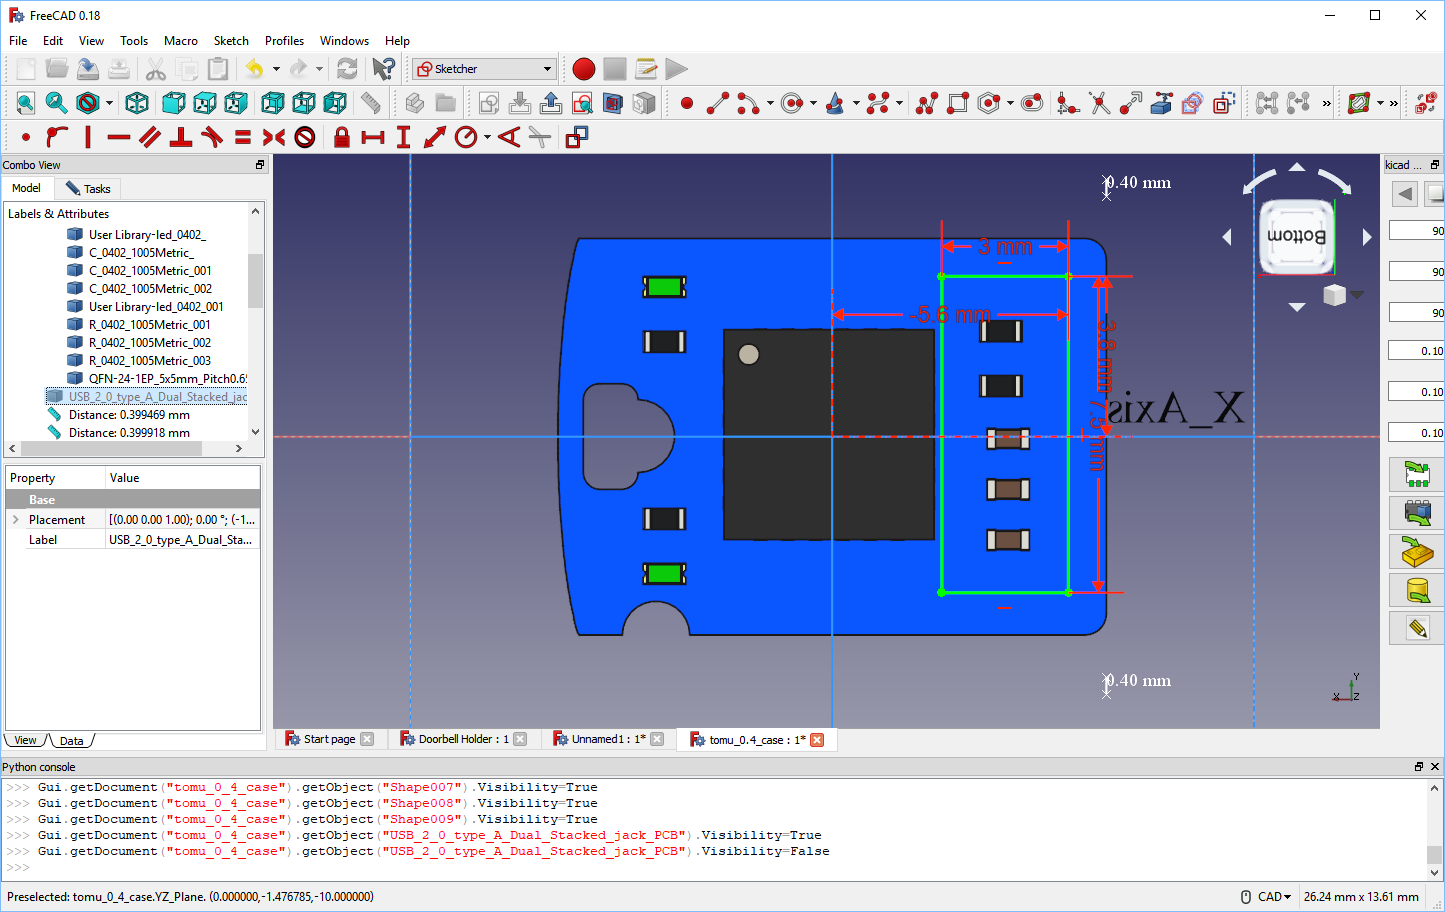
![Create sketch for pocket]()
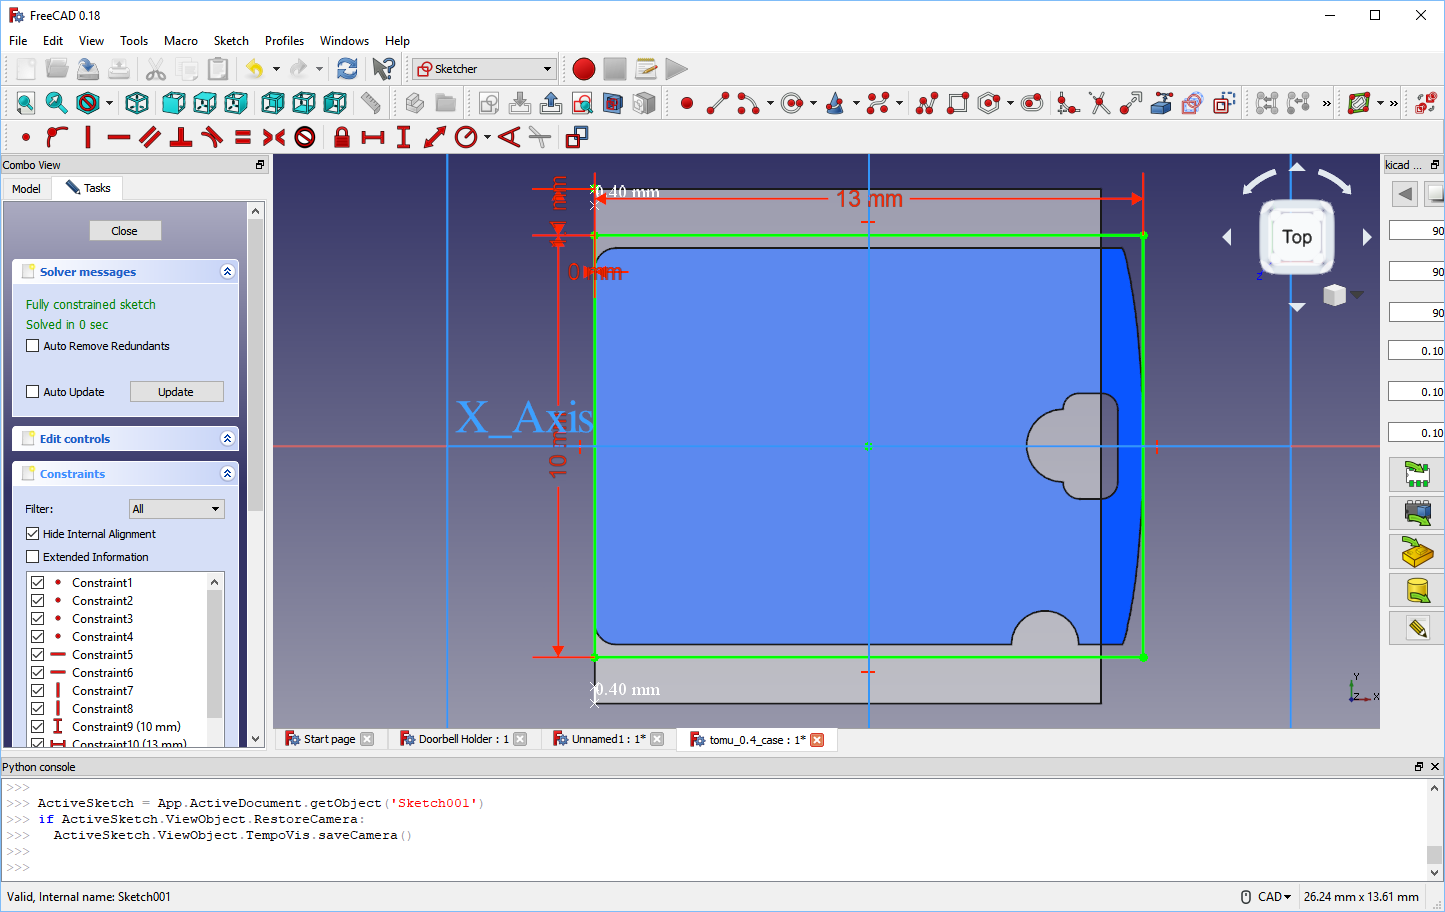
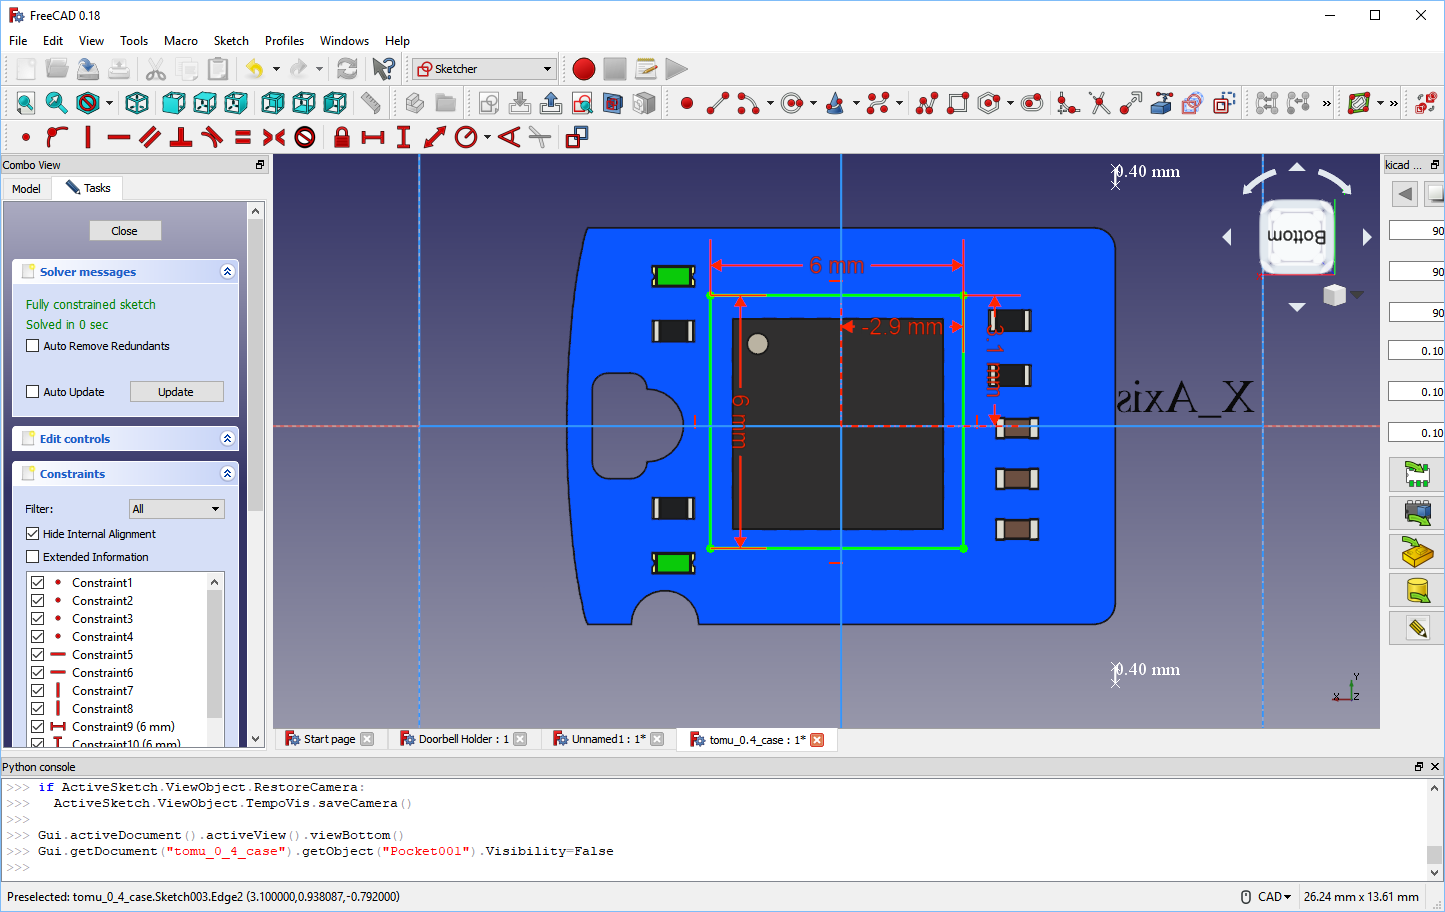
4) Repeat as necessary
![Complete sketch for pocket]()
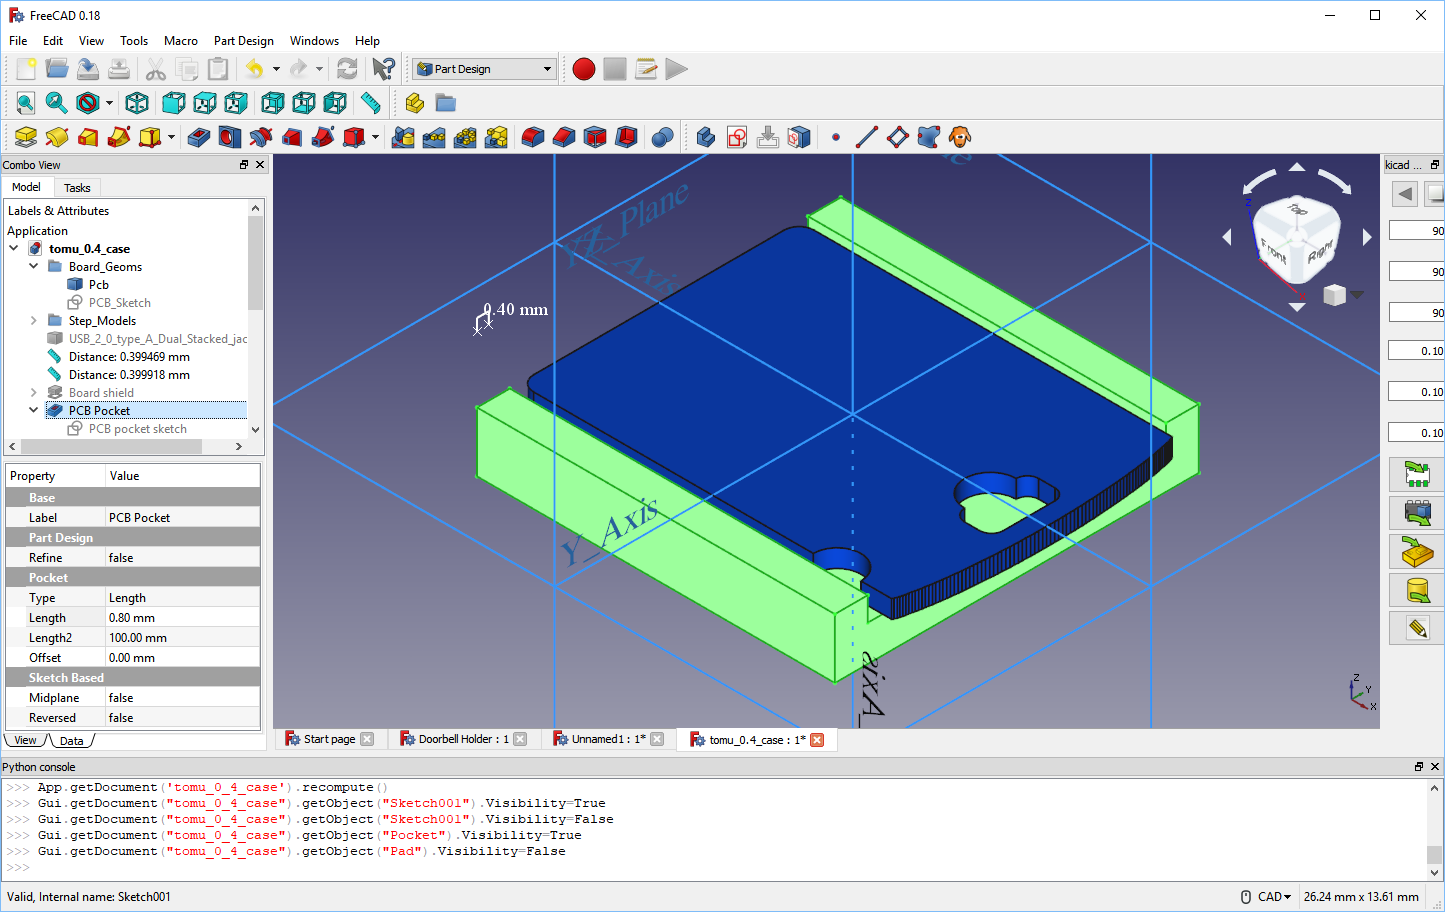
4) Repeat as necessary
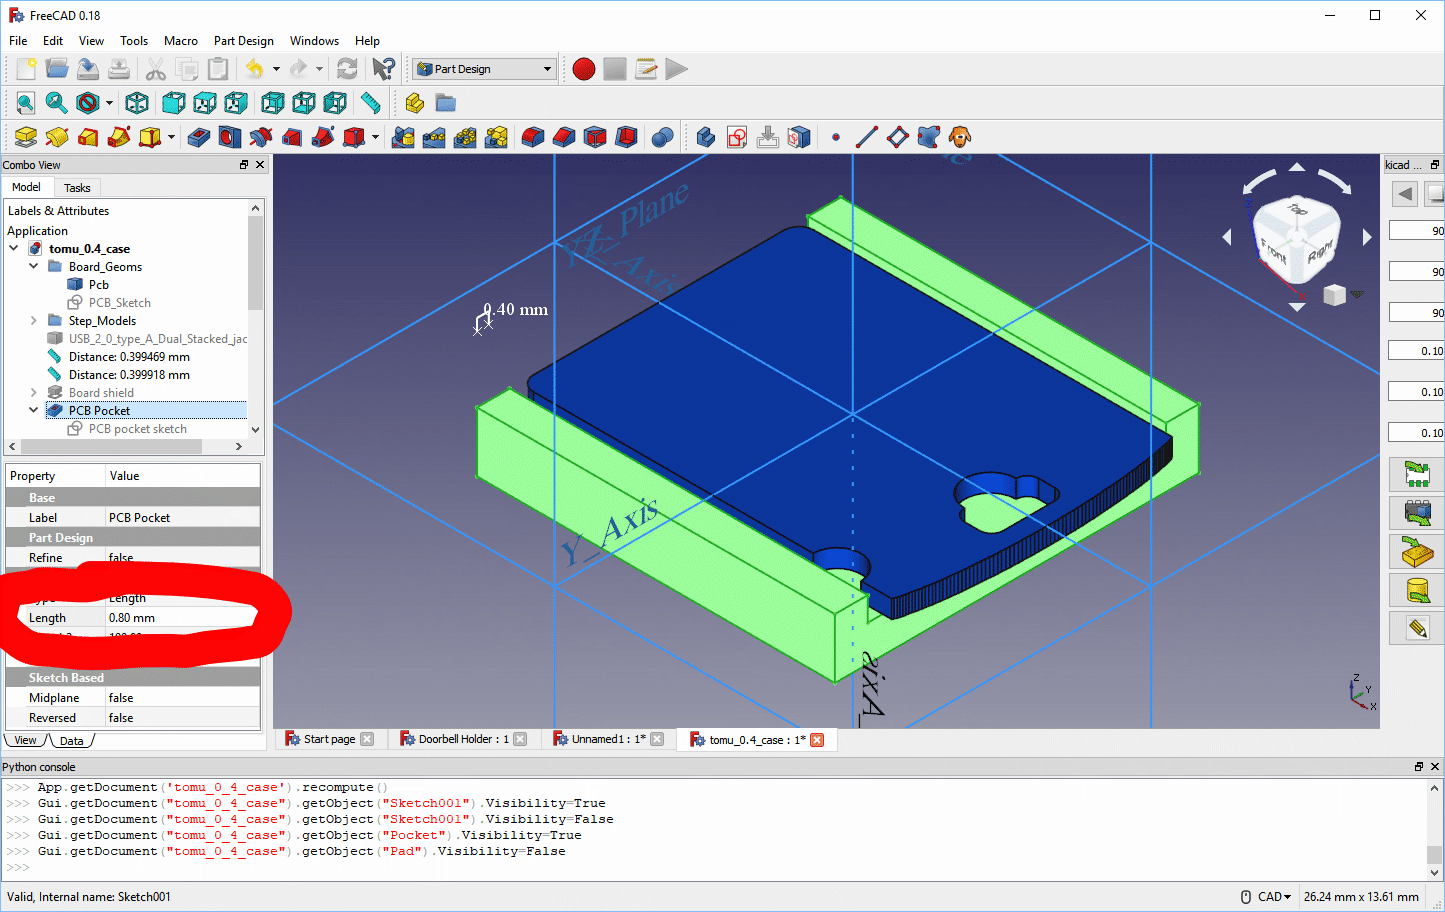
![Create a pocket]()
4) Repeat as necessary
![Create a pocket]()
4) Repeat as necessary
![Create a pocket]()
4) Repeat as necessary
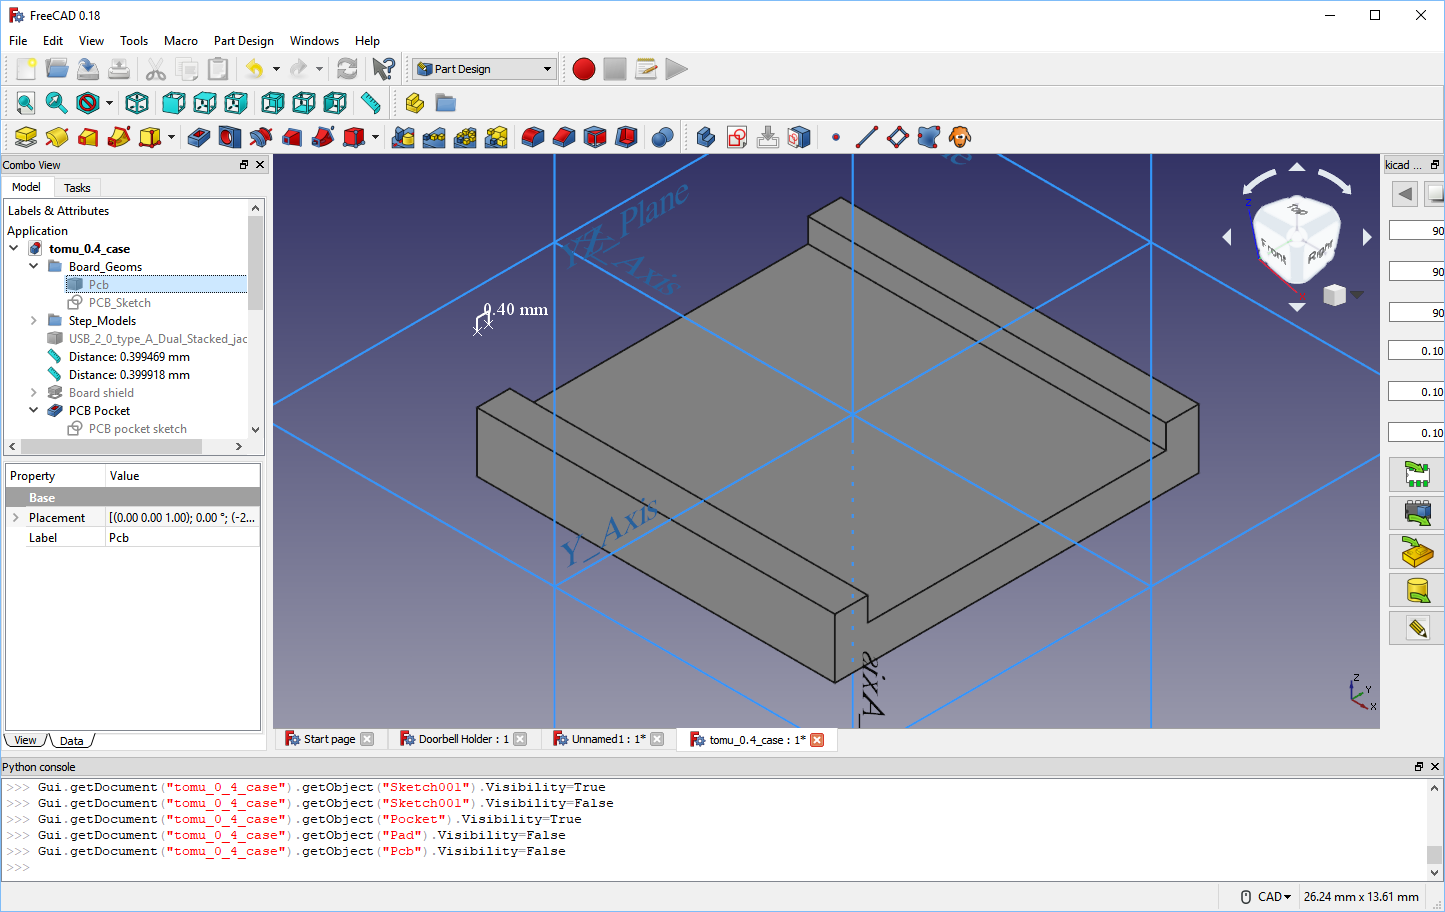
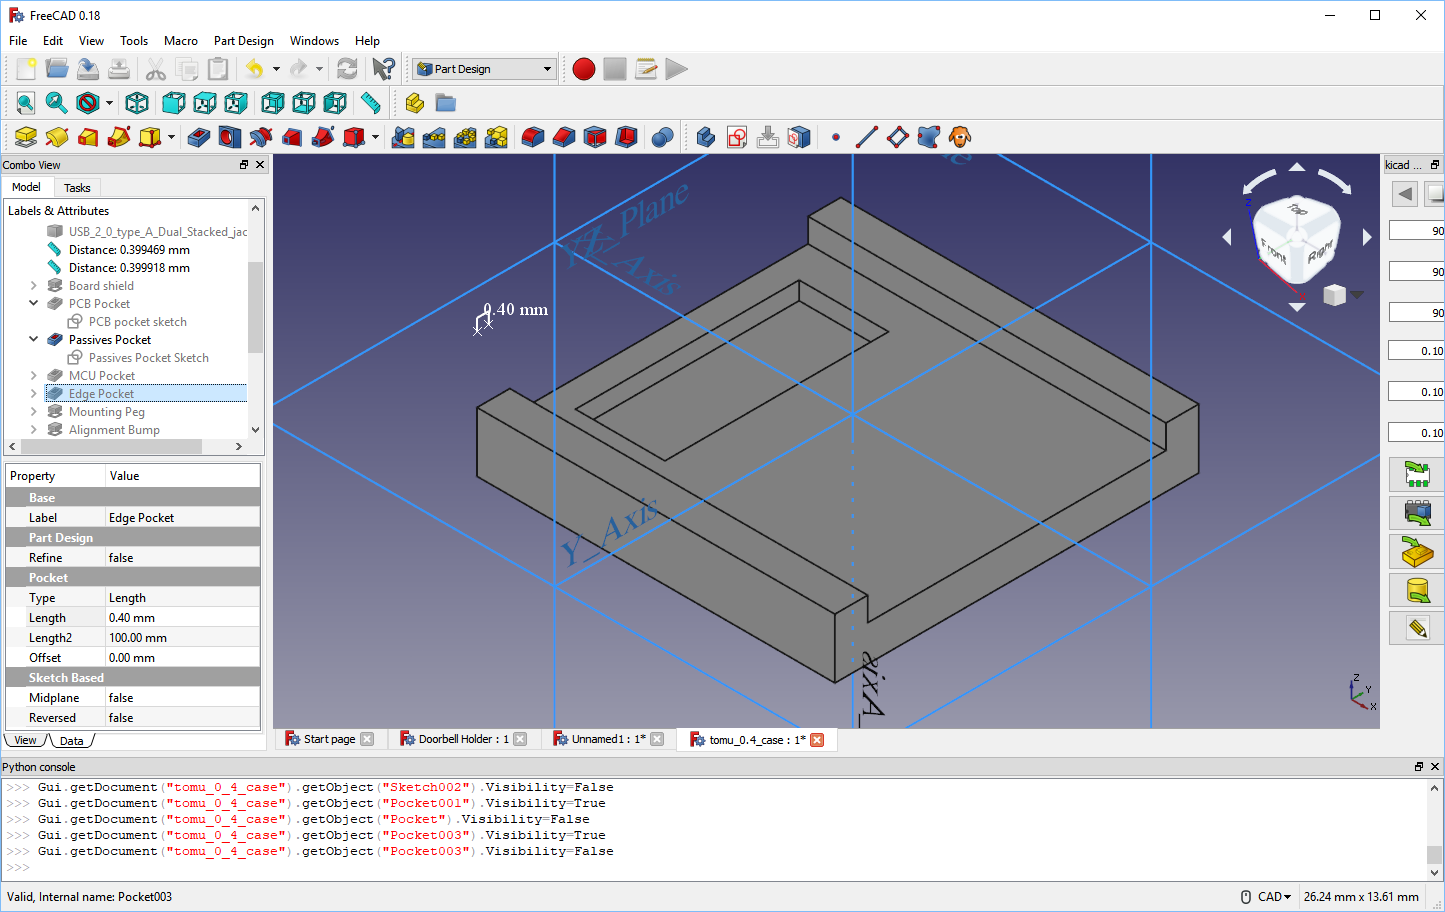
![Pocket with no PCB]()
4) Repeat as necessary
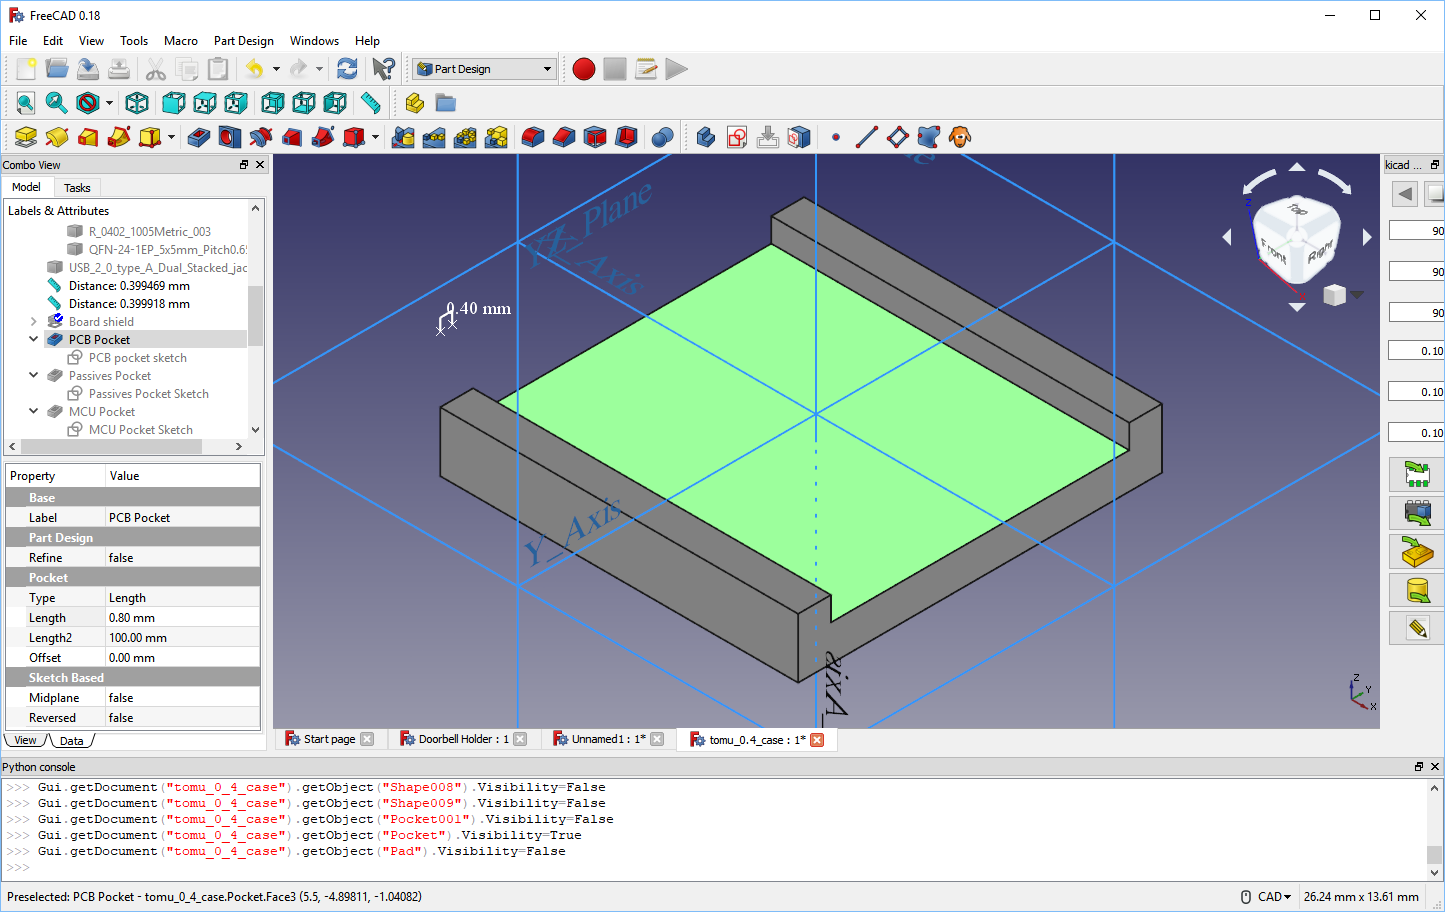
![Click on face for sketch]()
4) Repeat as necessary
![Pocket with no PCB]()
4) Repeat as necessary
![Pocket with no PCB]()
4) Repeat as necessary
![Pocket with no PCB]()
4) Repeat as necessary
![Pocket with no PCB]()
4) Repeat as necessary
![Pocket with no PCB]()
4) Repeat as necessary
![Pocket with no PCB]()
4) Repeat as necessary
![Pocket with no PCB]()
4) Repeat as necessary
![Pocket with no PCB]()
4) Repeat as necessary
![Pocket with no PCB]()
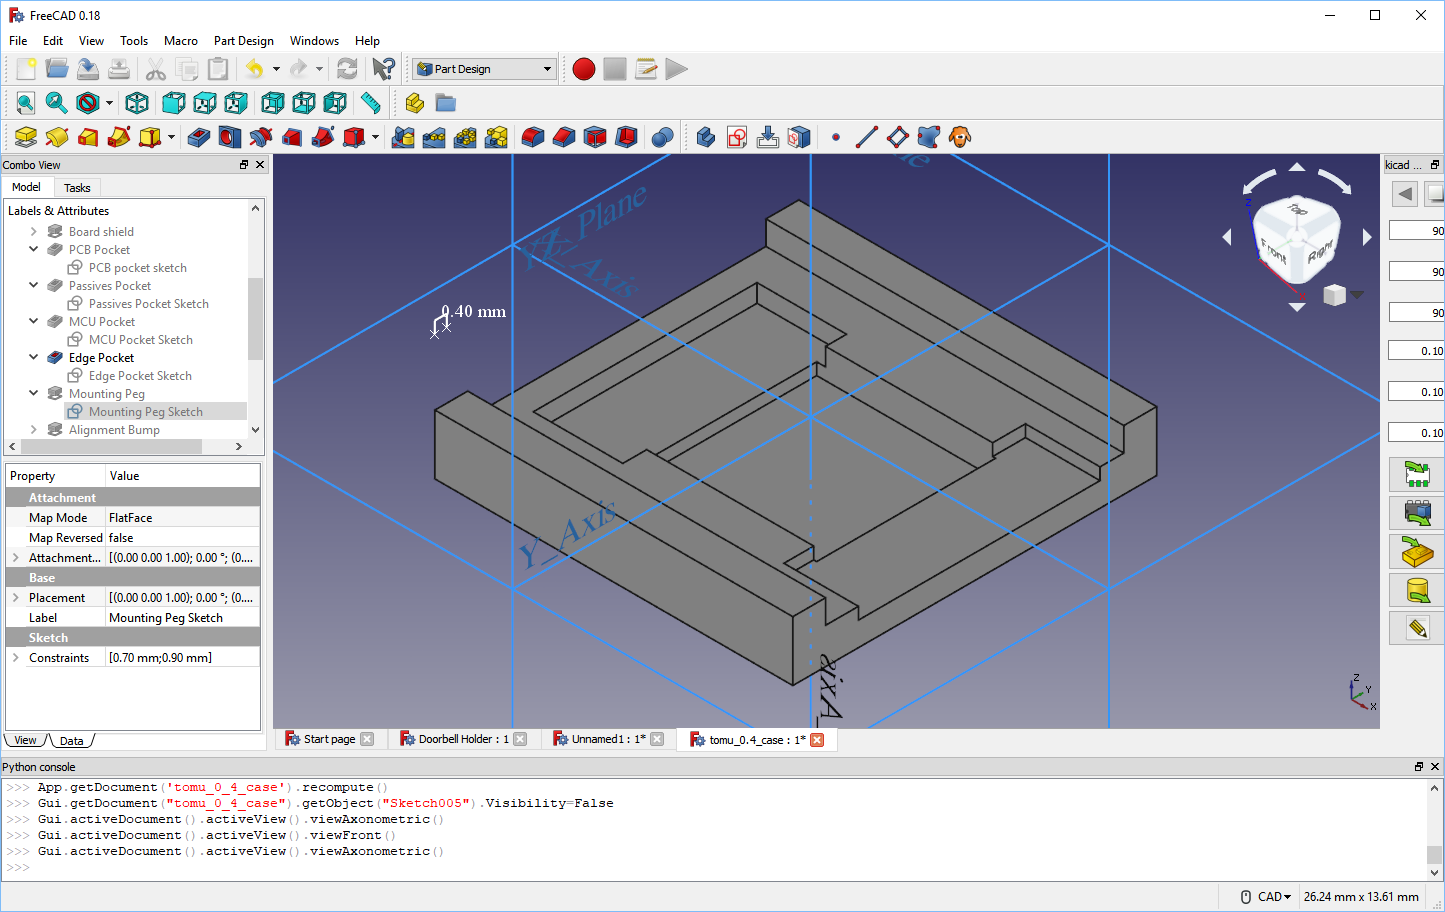
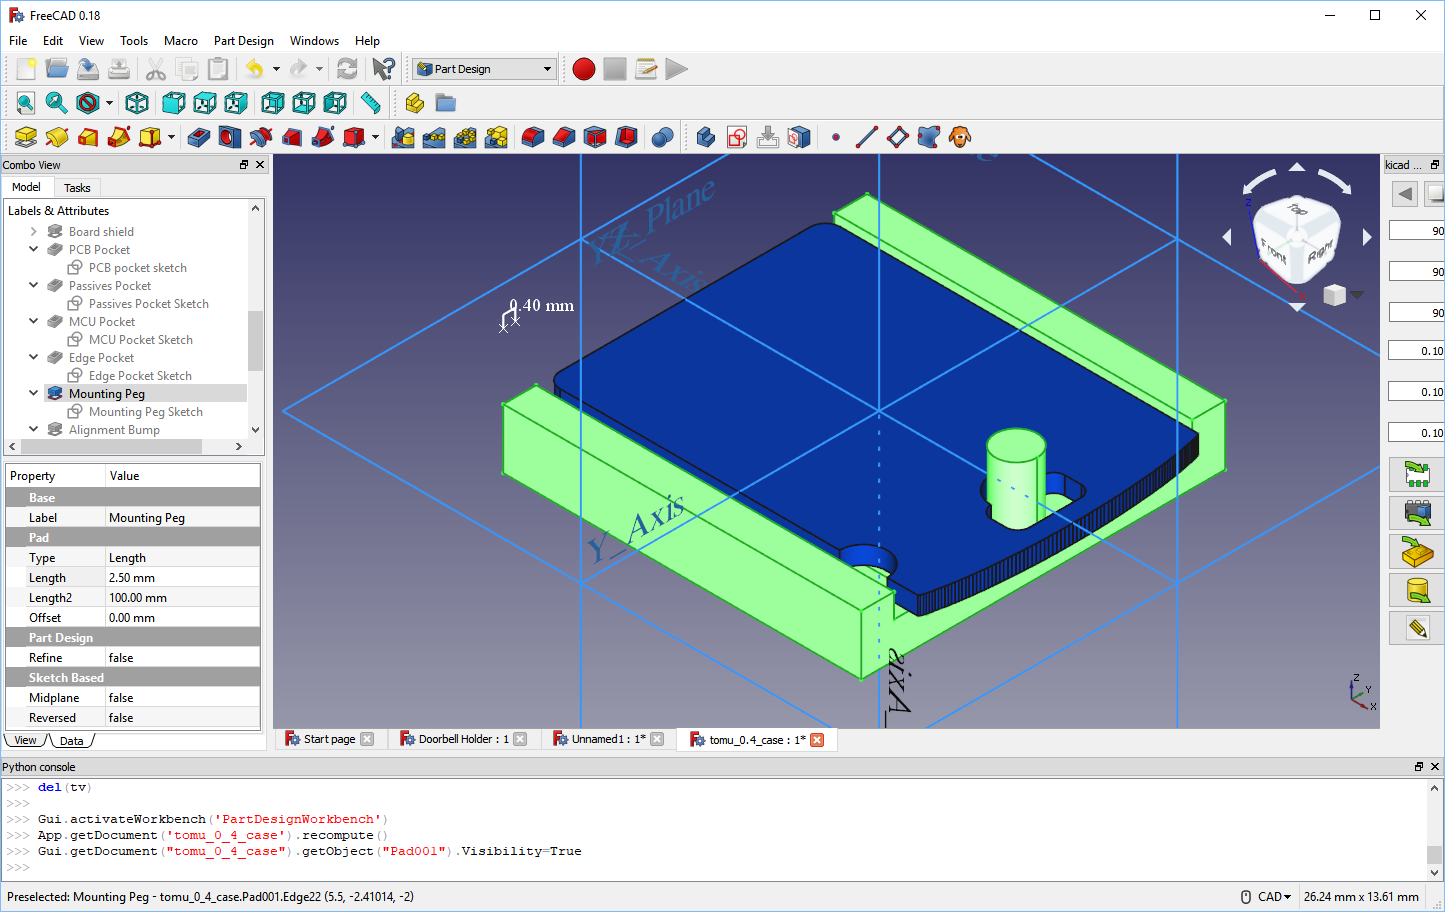
4) Repeat as necessary
![Creating a pad for the alignment bump]()
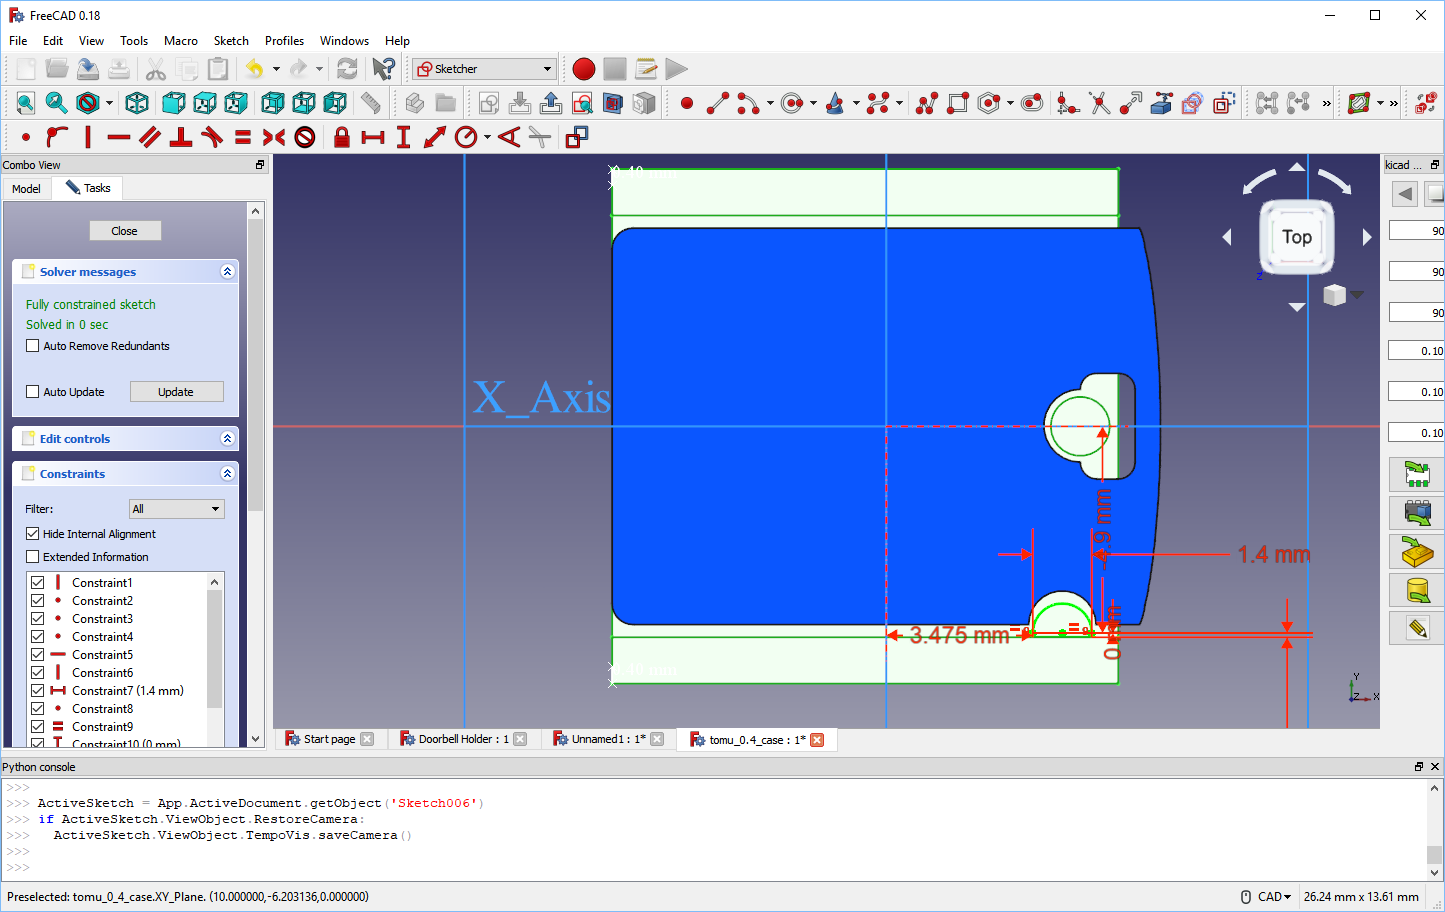
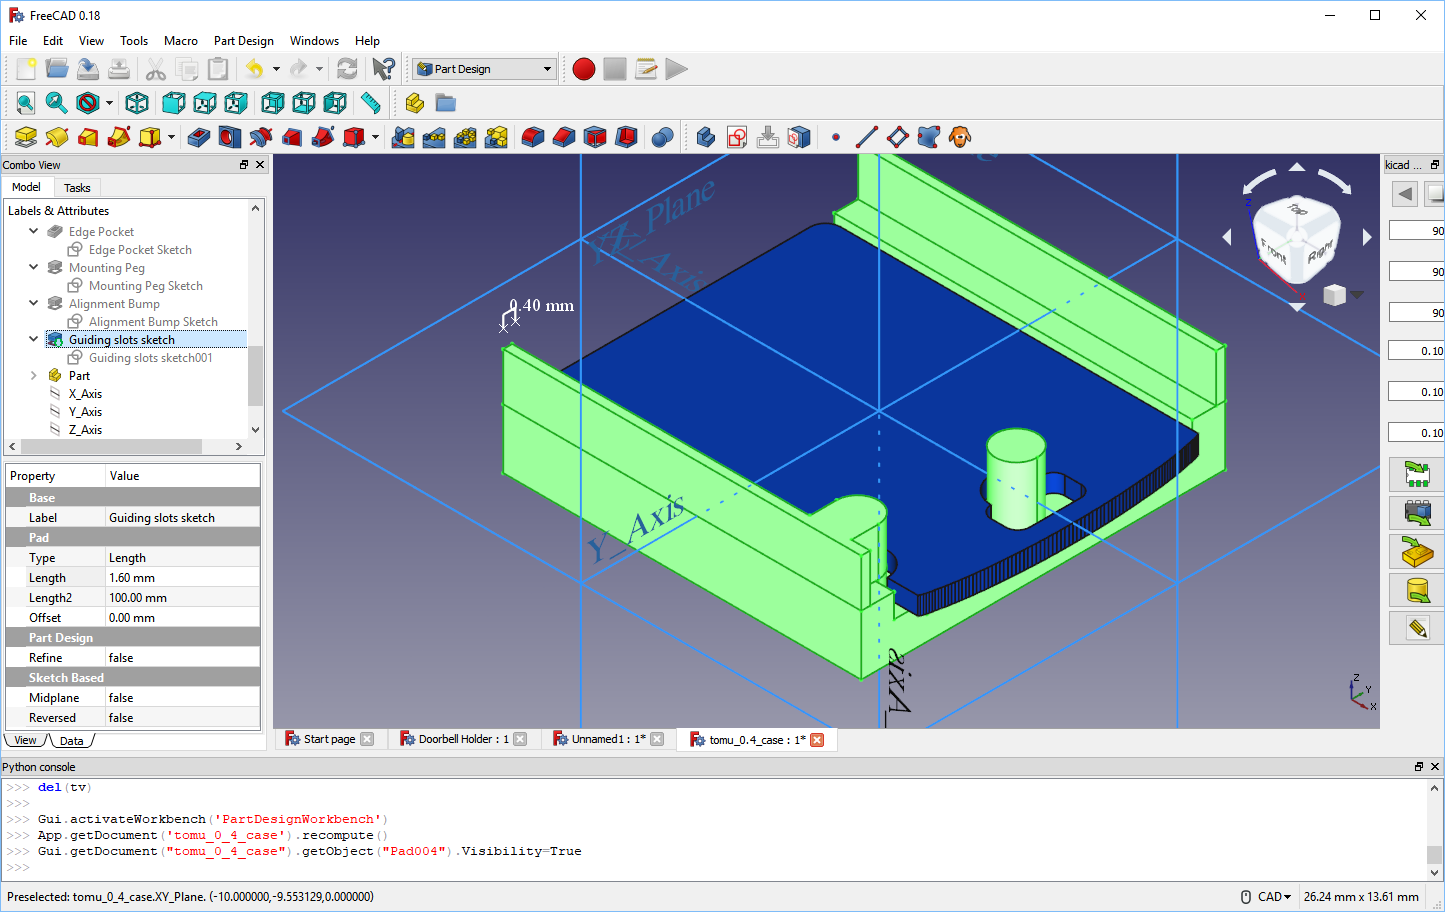
4) Repeat as necessary
![Creating the sketch for the guiding slots]()
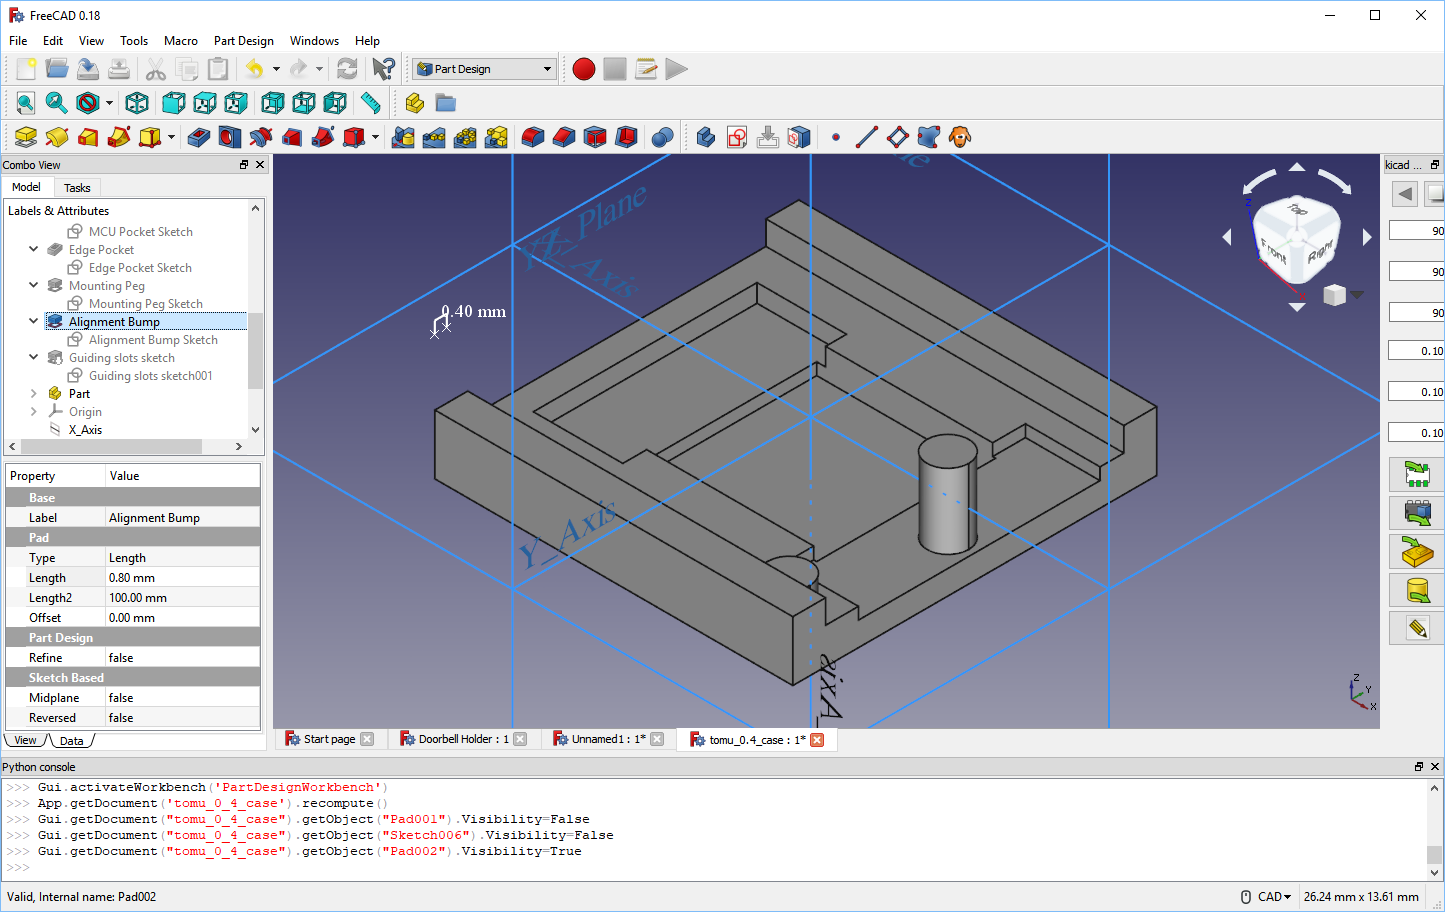
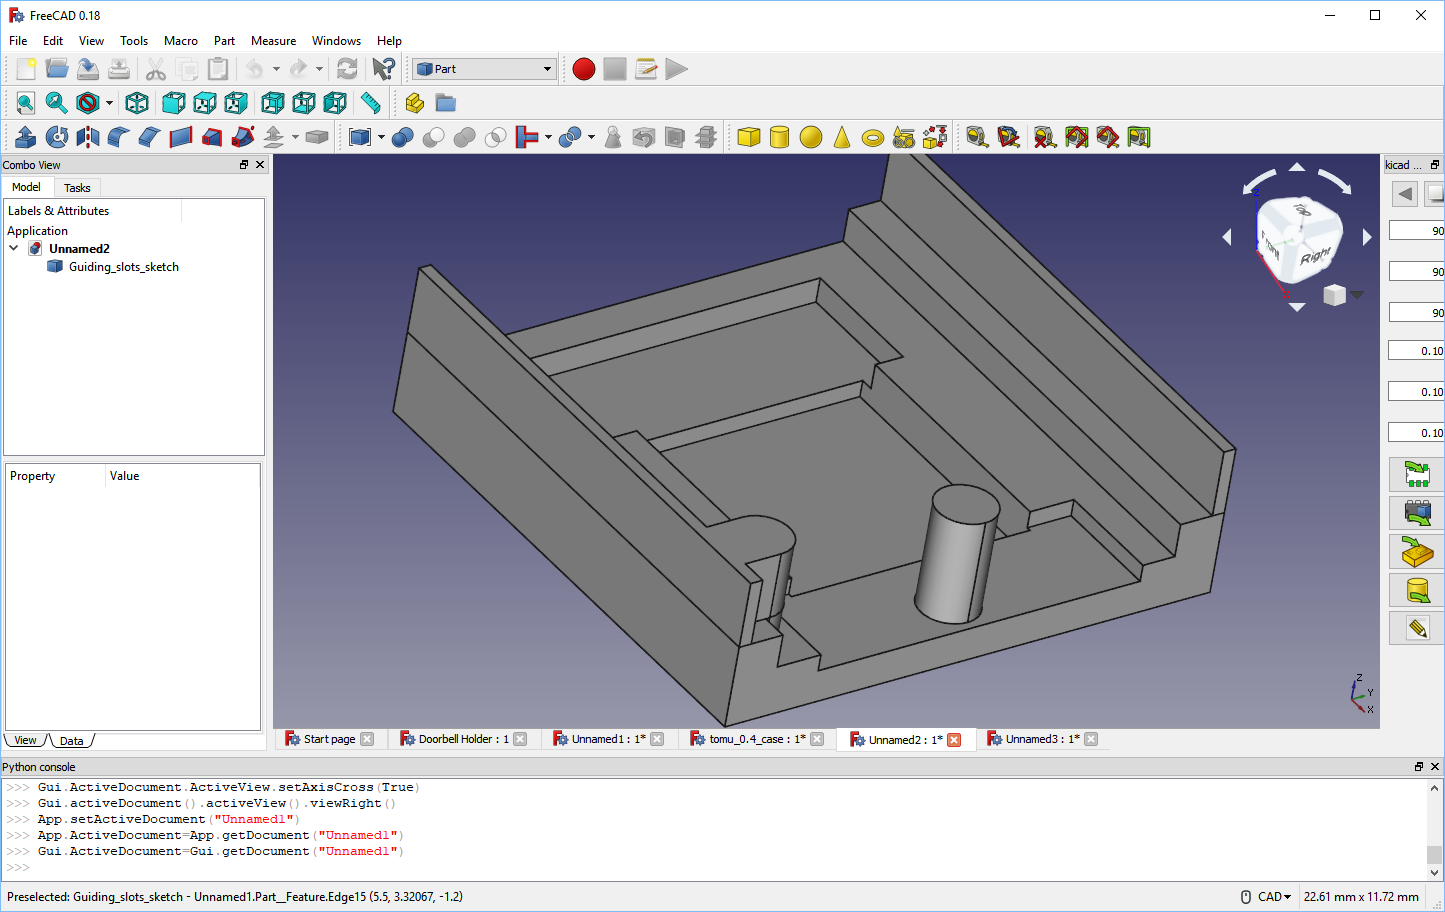
4) Repeat as necessary
![Finished case without PCB]()
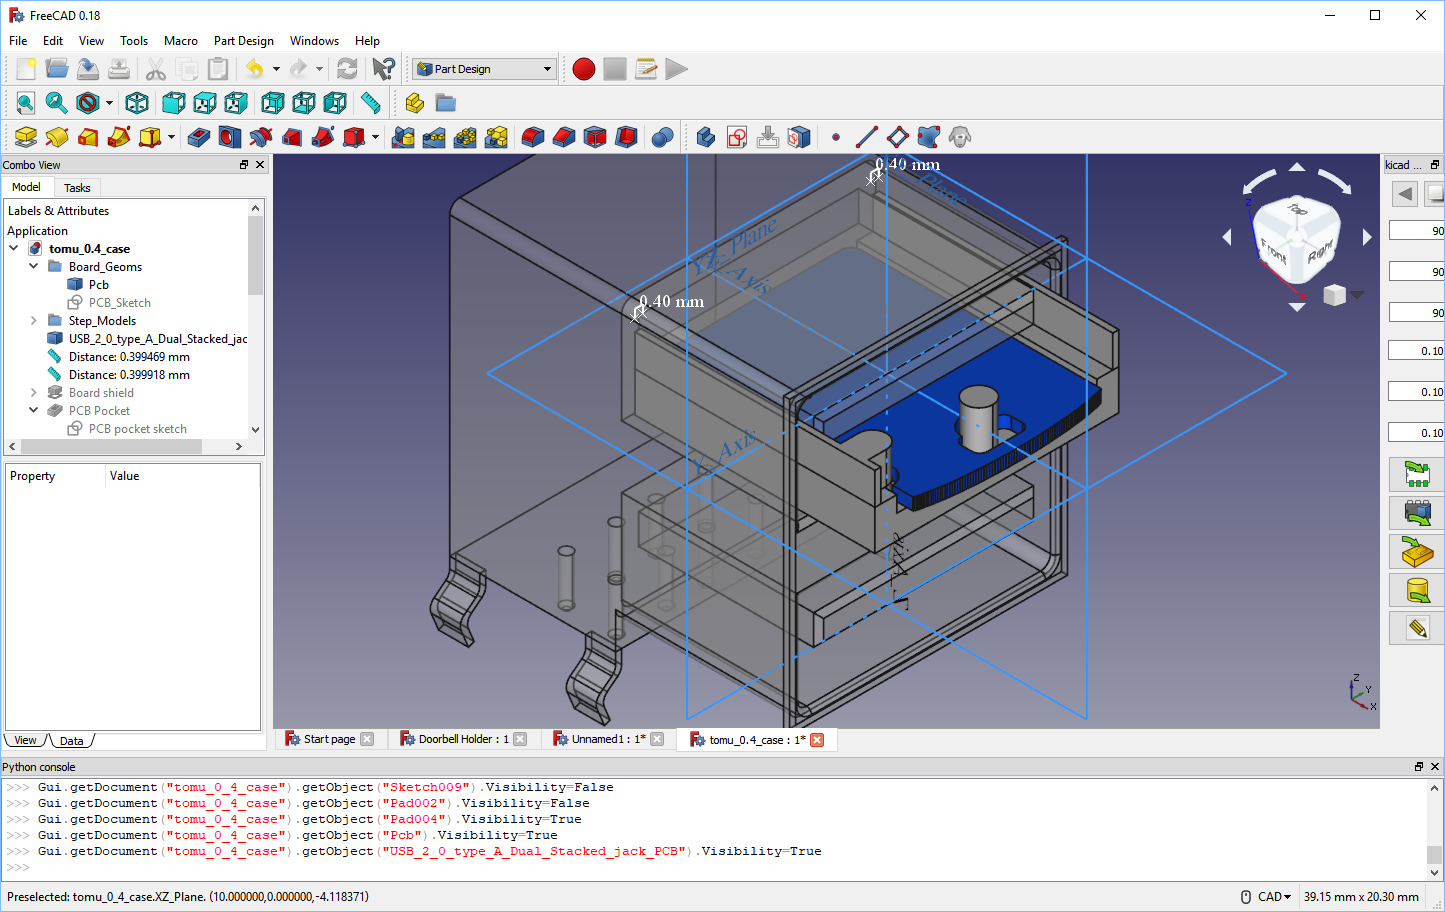
4) Repeat as necessary
![Finished case with PCB]()
5) Check with reference parts
![Test with models]()
Here's what we sent to the factory
![STEP model we sent to factory]()
And here's what they sent back
3D Printed Prototype
Cutting Steel
T0 Shot
![]()
Finishing
Manufactured!
Real World Fun
And the problems you'll face
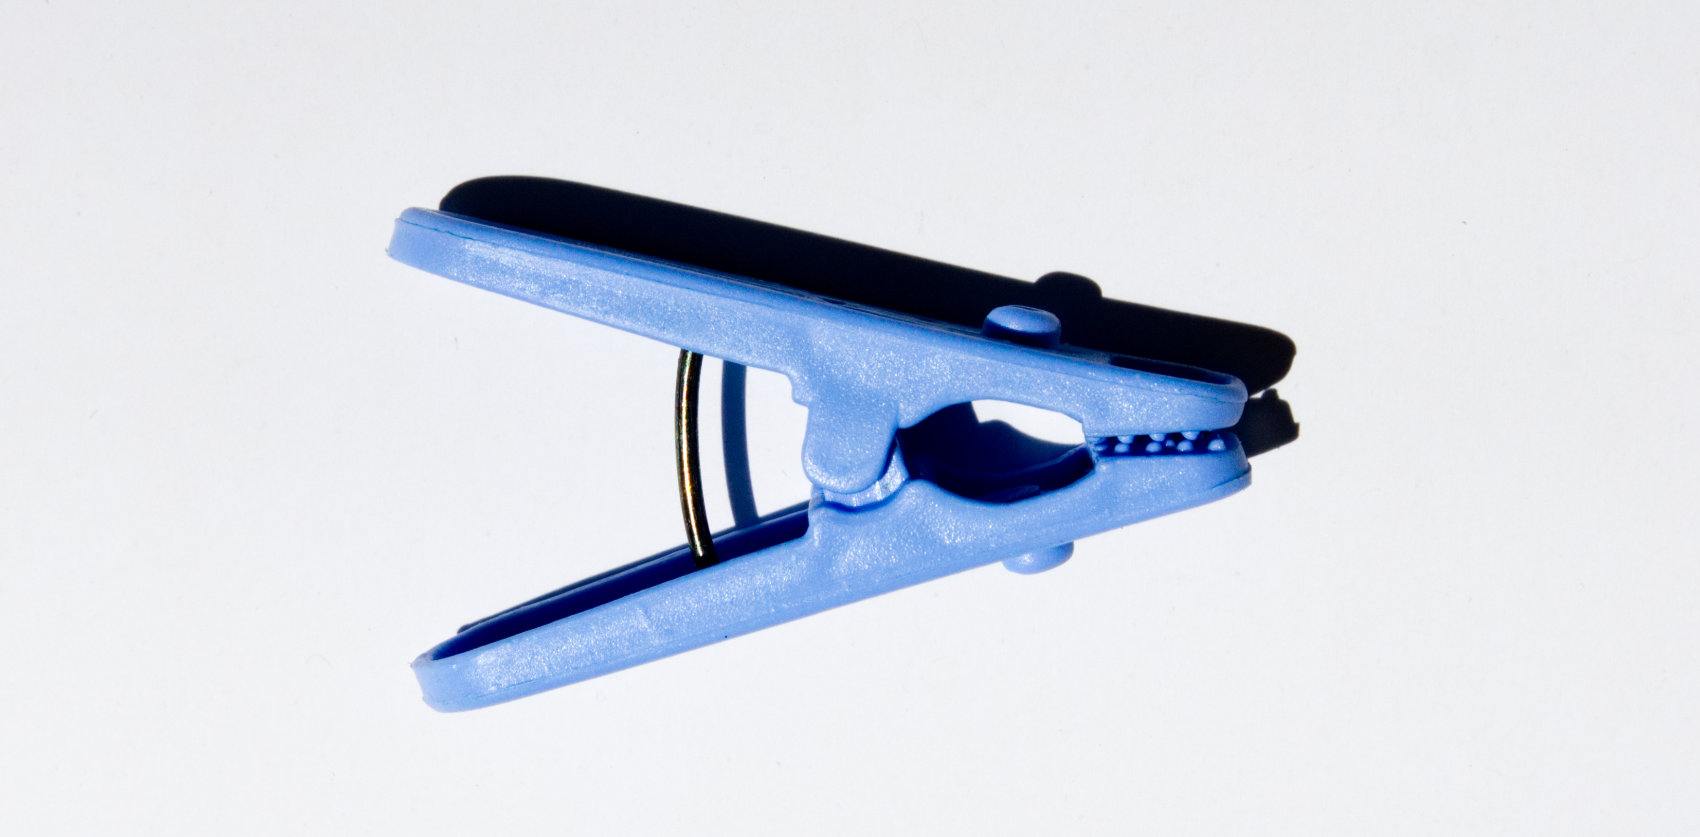
Clothes peg
![A clothes peg (side view)]()
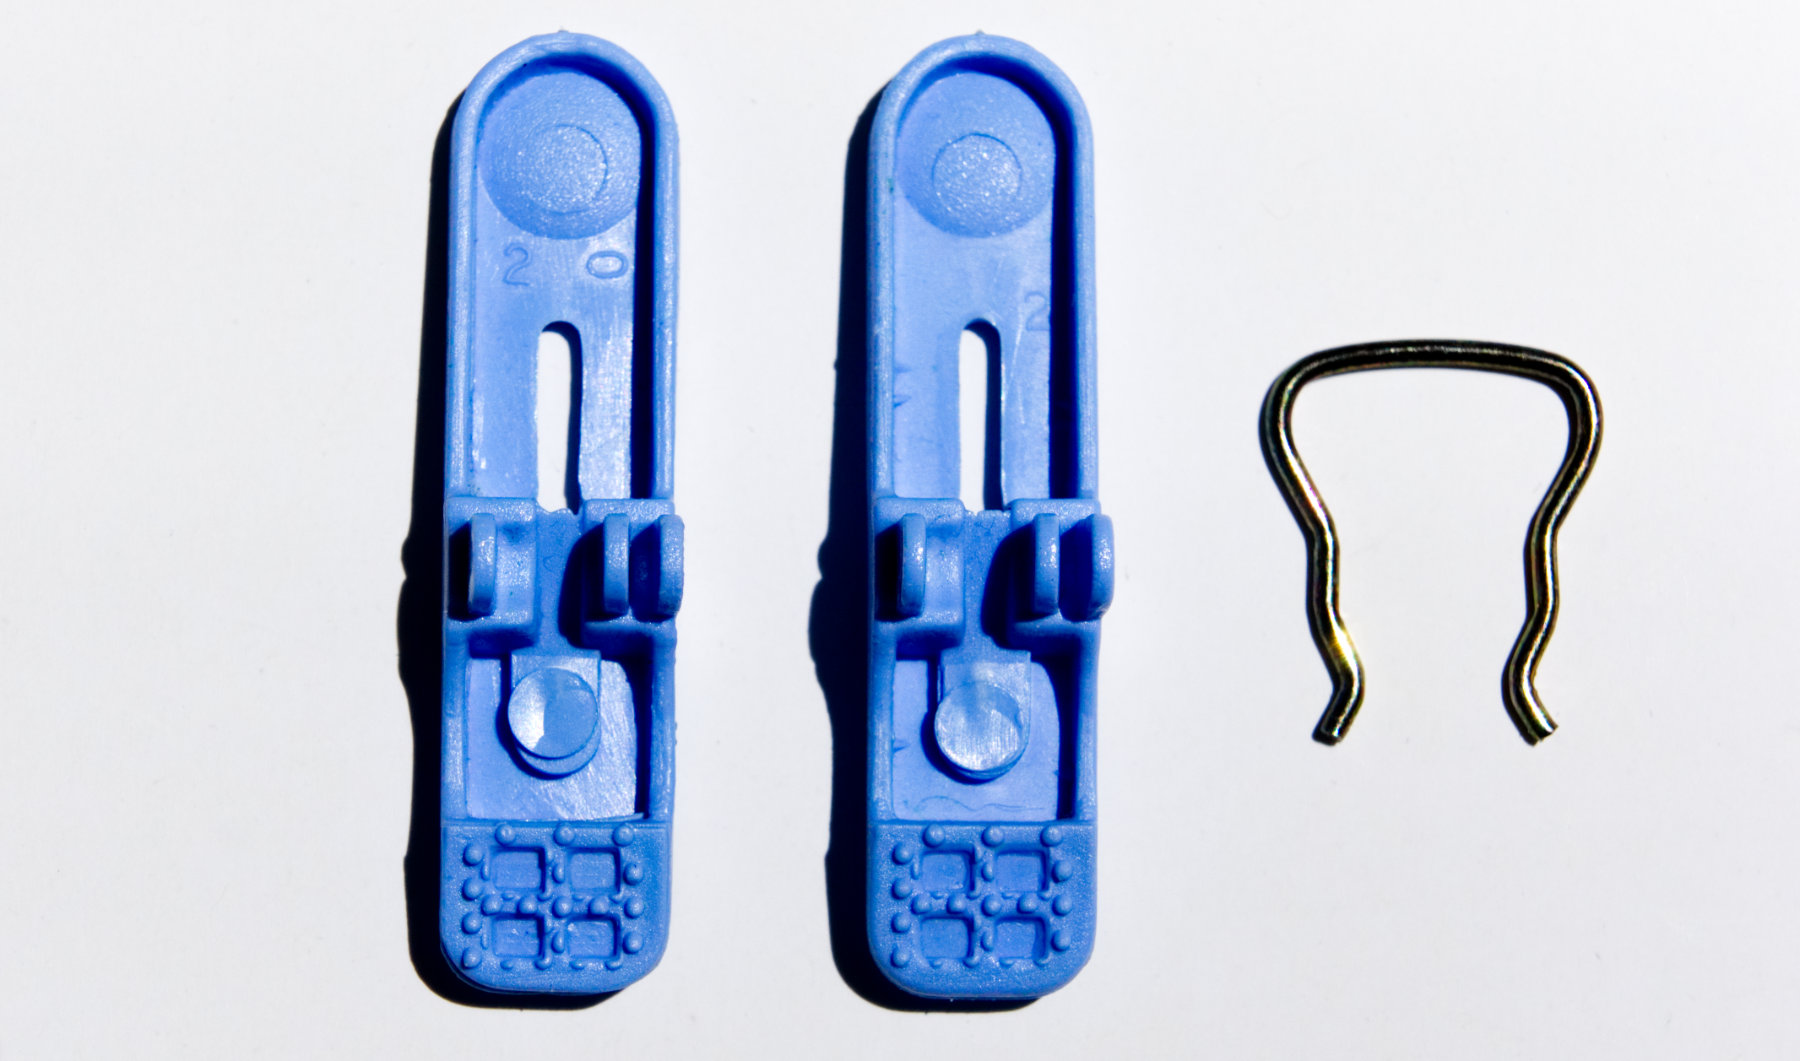
Clothes peg
![A clothes peg (inside view)]()
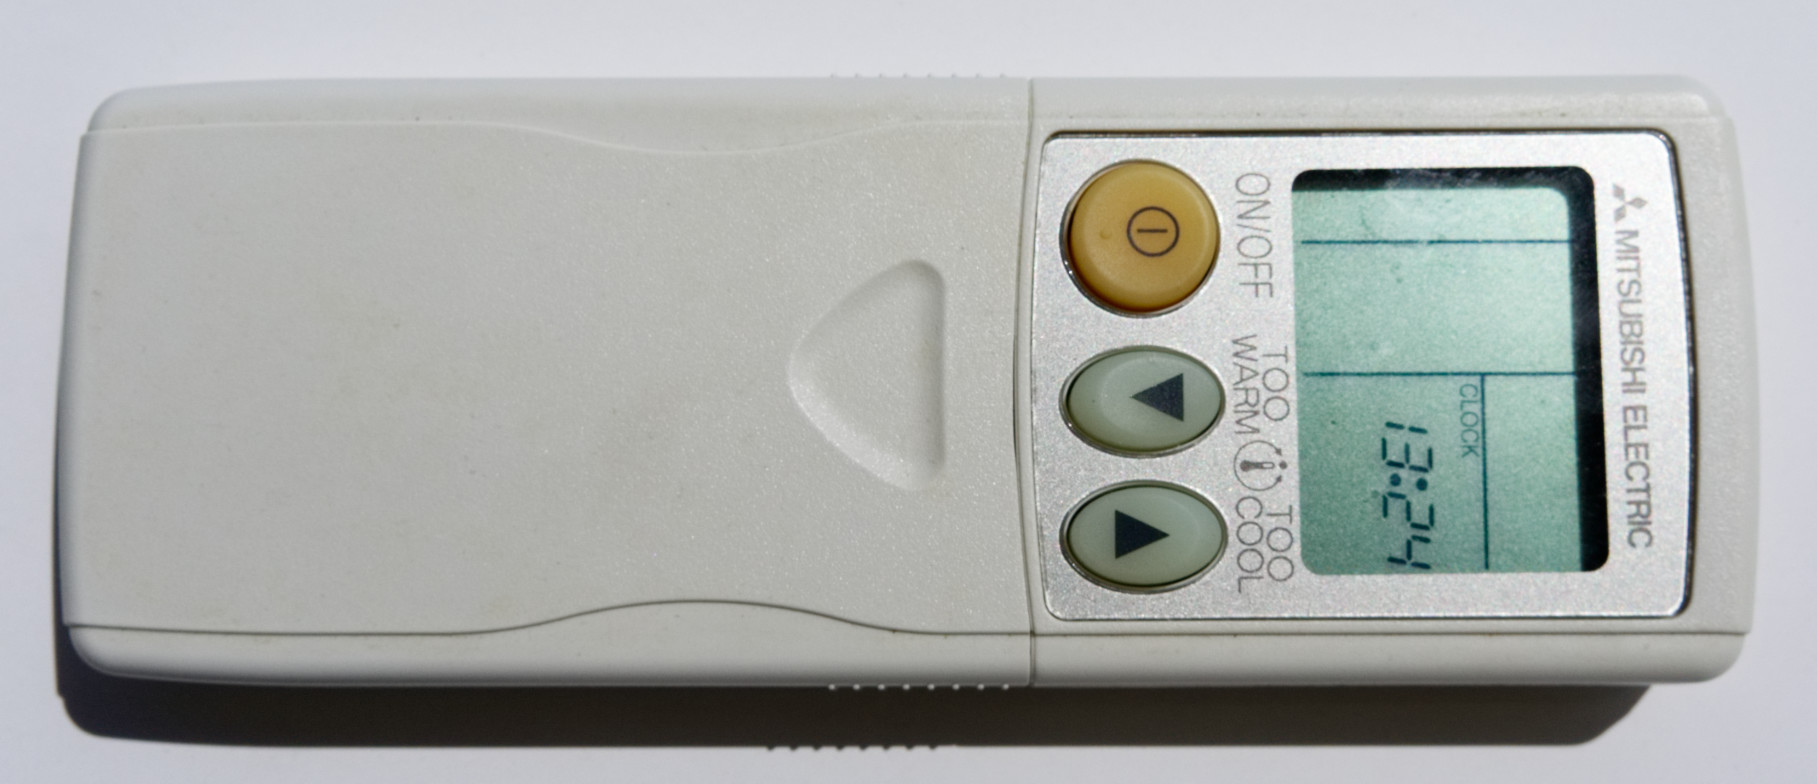
Aircon Remote (Front)
![Front of the aircon remote]()
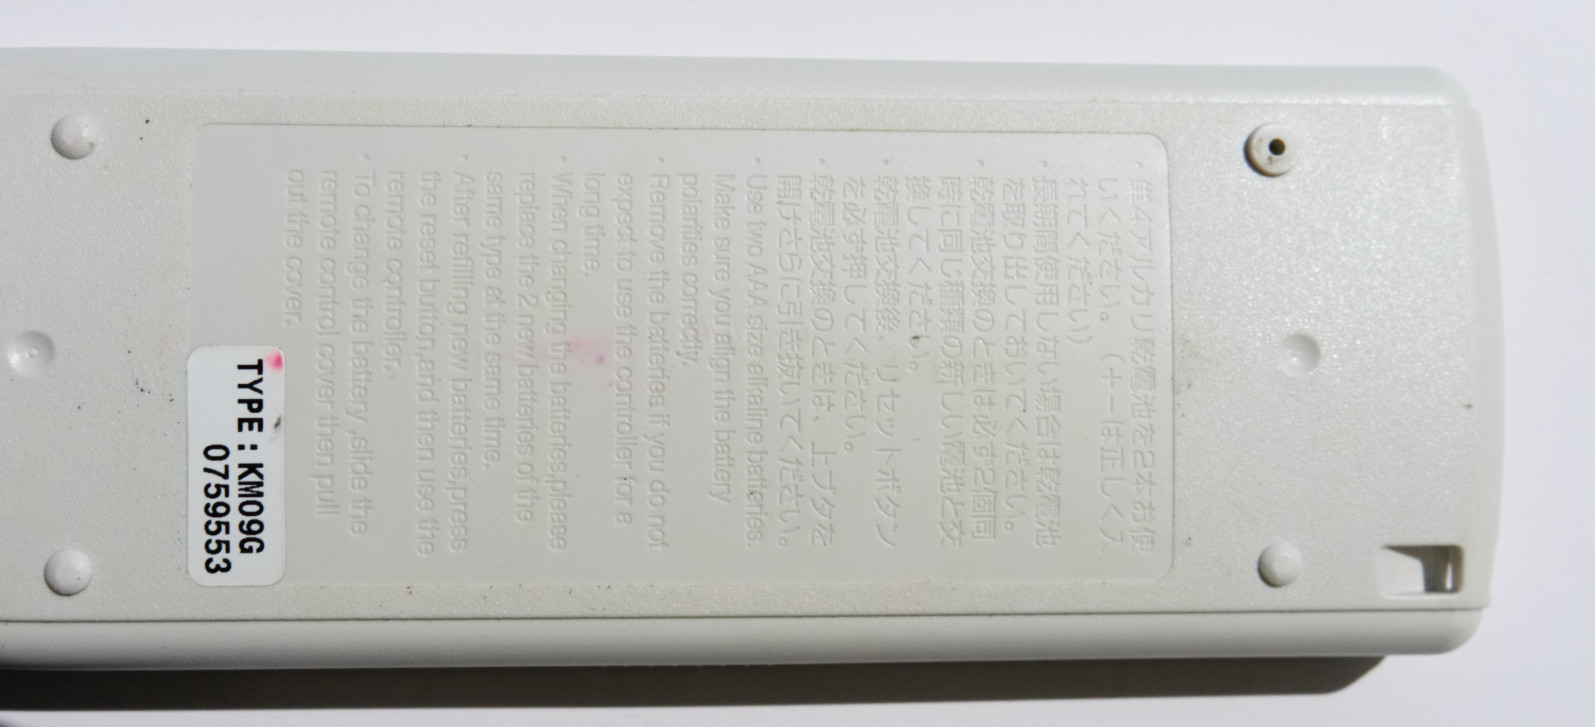
Aircon Remote (Back)
![Back of the aircon remote]()
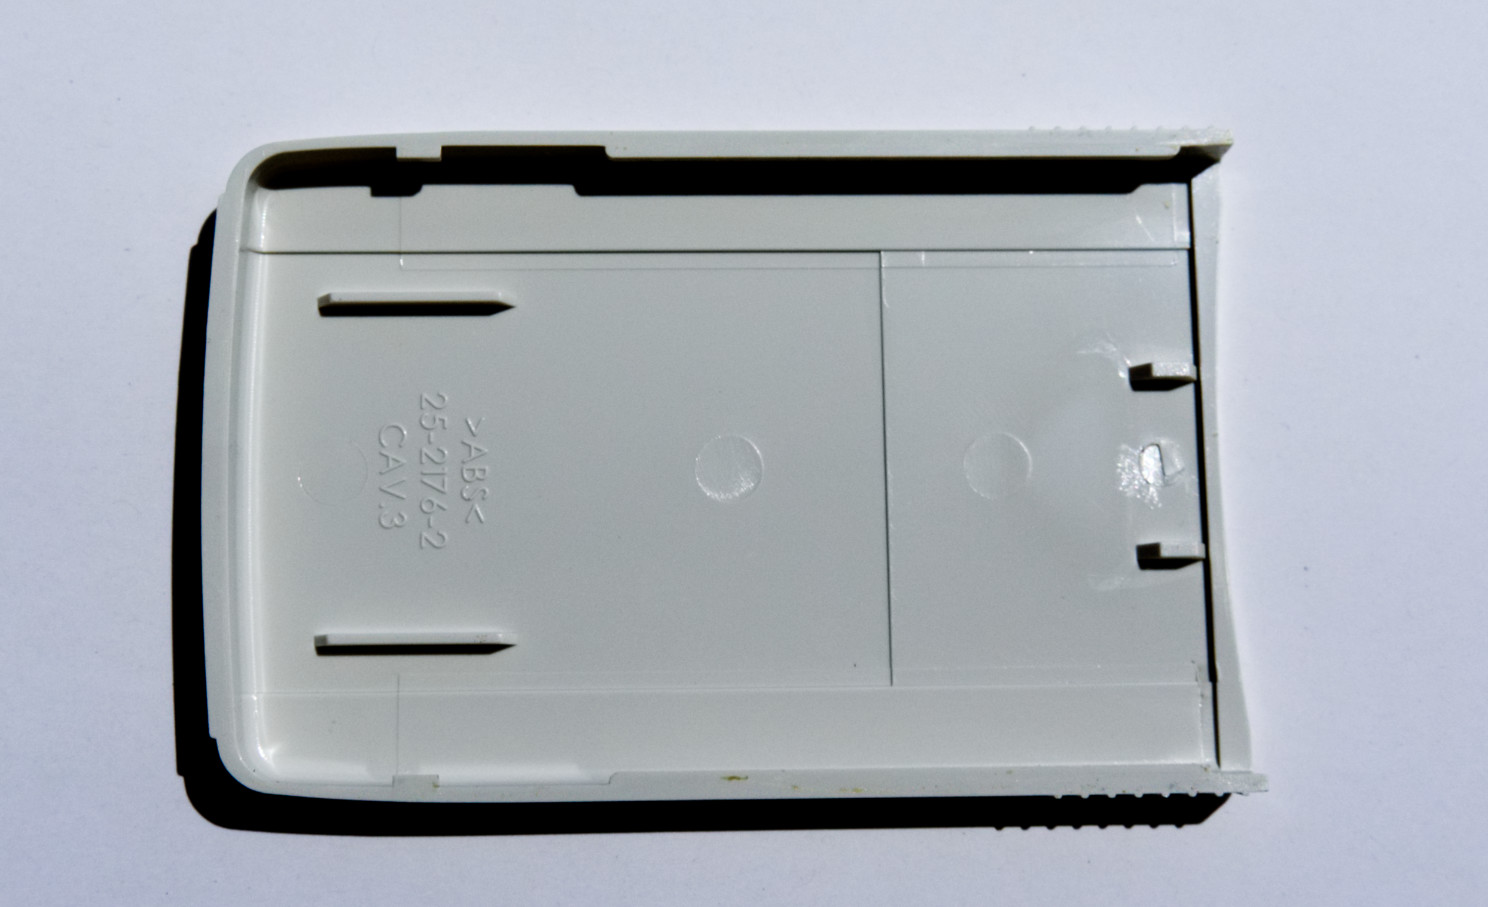
Aircon Remote (Front Cover)
![Cover from aircon remote front]()
Wine bottle opener
iPhone 3G